For
information on uploading multiple sessions for a master meeting product
via an Excel spreadsheet containing the sessions’ details, please see
Uploading
Sessions for a Meeting Parent Product.
For
information on uploading multiple sessions for a master meeting product
via an Excel spreadsheet containing the sessions’ details, please see
Uploading
Sessions for a Meeting Parent Product.When creating a SESSION product, for meeting sessions that occur before the actual meeting begins and need to be purchased separately (for example, a pre-conference session), you need to create them as a meeting parent product.
For
information on uploading multiple sessions for a master meeting product
via an Excel spreadsheet containing the sessions’ details, please see
Uploading
Sessions for a Meeting Parent Product.
To define the general session product:
1. From the
Personify360 main toolbar, select Meeting Definition
> Meeting and Session Setup.
The Product Maintenance search screen displays.
2. Click Create New Product.
3. Click
Meetings/Events, as highlighted below.
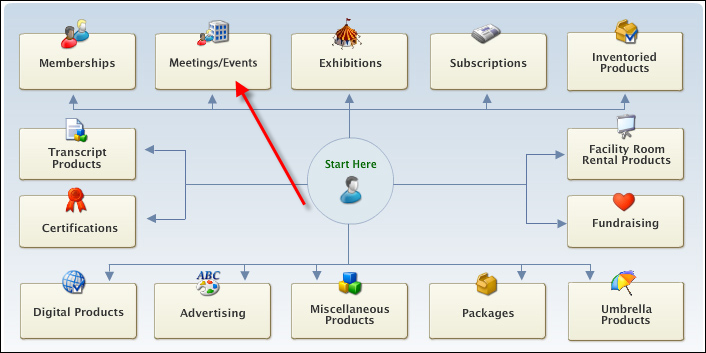
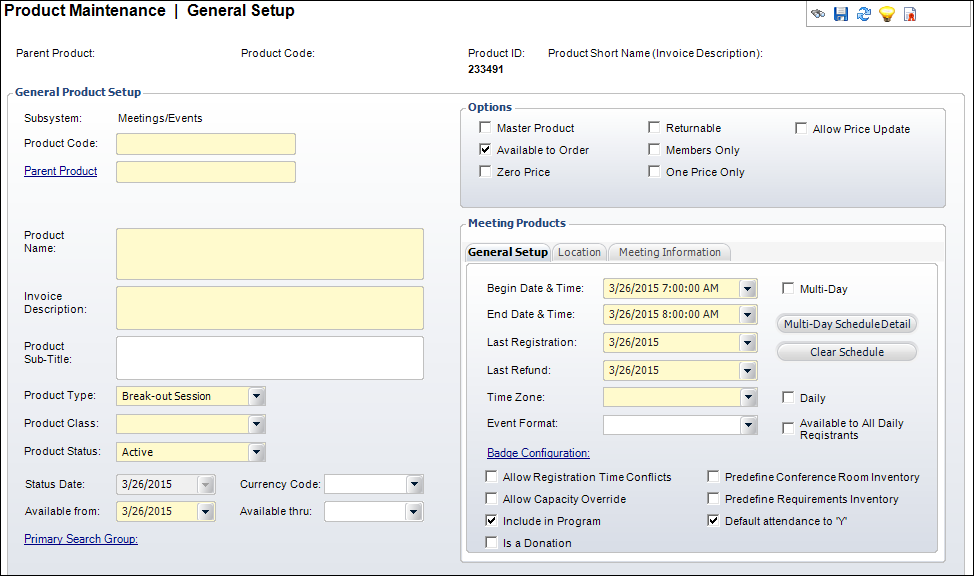
The General Setup screen displays.
4. Enter the Product Code.
5. Click
the Parent Product link to select
an existing parent meeting product.
Select the meeting that you want to link this session to.
6. Enter
the Product Name.
The Invoice Description defaults
to the same value.
7. Enter a Product Sub-Title.
8. Select
"Break-Out Session" from the Product Type
drop-down.
The fields on the General Setup screen change specific to session products,
as shown below.
9. Select the Product Class from the drop-down.
10. Select the Product Status from the drop-down.
11. If necessary, select a Currency Code from the drop-down.
12. Select the Available from date from the drop-down.
The Available
From date cannot be changed if orders have already been created for it.
13. If necessary, select the Available thru date from the drop-down.
14. If necessary, click the Primary Search Group link and search for a Primary Search Group to link to the product.
15. Check the applicable checkboxes:
· Available To Order
· Zero Price
· Returnable
· Members Only
· One Price Only
· Allow Price Update
16. In the Meeting Products section, from the General Setup tab, perform the following:
a. Enter the Begin Date & Time and End Date & Time.
If you update
the Begin Date & Time and/or End Date & Time of the meeting product,
the system will NOT ask if you want to also update the Start Date and
End Date of the room assignments. To manually update the Start Date and
End Date of the room assignments, access the Assign a Room screen. For
more information, please see Assigning
a Room.
b. Select the Last Registration date from the drop-down.
c. Select the Last Refund date from the drop-down.
d. Select the Time Zone from the drop-down.
As of 7.4.2,
the time zone field was added to the product maintenance screen. It is
so that a customer can add a meeting to his/her calendar, then the system
will evaluate the meeting time and time zone, and then add the meeting
to the customer’s calendar based on the customer’s time zone.
e. Select
an Event Format from the drop-down.
Once you define the Event Format for a meeting, users will be able to filter
the results in the Event Calendar by format.
f. Click
the Badge Configuration link to select a badge
to associate with the meeting.
If necessary, click the Default Badge
Setup link to open the Badge
Configuration screen.
g. Select the applicable checkboxes:
· Allow Registration Time Conflicts
· Allow Capacity Override
· Include in Program
· Is a Donation
· Predefine Conference Room Inventory
· Predefine Requirements Inventory
· Default attendance to 'Y'
· Repeating
· Daily
· Available to All Daily Registrants
17. In the Meeting Products section, from the Location tab, perform the following:
a. Click
the Facility link and search for a facility.
Available facilities are defined on the Meetings Facility Maintenance screen.
For more information, please see Setting
Up Facilities for Meetings.
b. Enter the Location, if necessary.
c. Select the Room and Configuration from the drop-downs.
If the meeting
has multiple facilities, you can select the additional facilities on the
Assign a Room screen. For more information, please see Assigning
a Room.
18. If necessary, from the Meeting Information tab, you view the meeting dates and location of the selected parent product.
19. Click Save.
Screen Element |
Description |
|---|---|
Header |
|
Parent Product |
Read-only. Defaults to the value that you entered for in the Parent Code text box. |
Product Code |
Read-only. Defaults to the value that you entered for in the Product Code text box. |
Product ID |
Read-only. As of 7.6.0, the unique product ID number assigned to the product displays. You can use the Product ID to leverage oData queries in the Online Store, Shopping Cart, and Checkout pages. See SVC Clients for more information. |
Product Short Name (Invoice Description) |
Read-only. Defaults to the value that you entered for in the Invoice Description text box. |
General Product Setup |
|
Subsystem |
Read-only. The area, or module, associated with the product. |
Product Code |
Text box. For sessions, the Product Code is the event name and the Parent Product is the master meeting product. |
Parent Product |
Link and text box. For sessions, the Product Code is the event name and the Parent Product is the master meeting product. This code must be unique and can be alphanumeric. |
Product Name |
Text box. The user-defined name of the product. |
Invoice Description |
Text box. Defaults to the Product Name. If your Product Name is extraordinary long, you can edit the Invoice Description to 50 characters. If the Invoice Description is longer than 50 characters, it will be cropped off the invoice.
If the product has been defined to display on the web, the description defined here will display on the full product listing, product preview, product detail, event calendar, meeting detail, and any promotional marketing controls on the web.
|
Product Sub-Title |
Text box. This is an optional field that allows you to enter in an additional description (sub-title) that can be used for reporting purposes. |
Drop-down. The primary type of product. For example, meeting or break-out session. The type selected affects the choices for Product Class. Values in the drop-down are populated based on the fixed codes defined for the MTG "PRODUCT_TYPE" system type. Options include: · Badges · Course · Exam Proctored · Exam Product · Sponsorship/Other Fees (please note that as of 7.5.2, if this product type is selected, the Master Product checkbox will be checked automatically) · Meeting · Break-out Session |
|
Product Class |
Drop-down. Used to classify any meeting product (master or subproduct) to distinguish between break-out sessions and social events from general sessions. It can also be used to give a discount to a certain class of products. The options available are determined by the Product Type selected. |
Product Status |
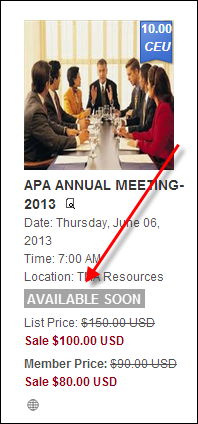
Drop-down. The status of the meeting product. Values include Active, Cancelled, and Discontinued. As of 7.5.0, if the product has been defined to display on the web, this status is set to "Active" (A), and the Available from date is set to a date in the future, the "AVAILABLE SOON" product alert will display on the Product Listing, Event Calendar, Meeting Detail, and Product Detail pages on the web for this product, as shown below.
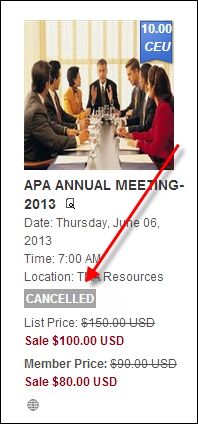
If the product has been defined to display on the web and this status is set to "Cancelled" (C), the "CANCELLED" product alert will display on the Product Listing, Event Calendar, Meeting Detail, and Product Detail pages on the web for this product, as shown below.
|
Currency Code |
Drop-down. Select a type of currency to associate with the product. Values can include United States Dollor (USD), Pound Sterling (GBP), Euro (EUR), or Japanese Yen (JPY). As of 7.5.2, when transferring a meeting registration, if the "Xfer to New Order" checkbox is checked on the Order Transfer screen, the Currency drop-down is enabled on the Order Transfer screen. If necessary, you can change the currency. Please note that you can only change the currency if the product has NOT been defined in locked currency via the "Currency Code" drop-down on this screen. |
Status Date |
Read-only. System-generated status change date. |
Available from |
Drop-down. Defaults to the system date, but it can be overridden. The date from which the meeting product will be available from. As of 7.5.0, if the product has been defined to display on the web, the Product Status is set to "Active" (A), and the Available from date is set to a date in the future, the "AVAILABLE SOON" product alert will display on the Product Listing, Event Calendar, Meeting Detail, and Product Detail pages on the web for this product, as shown below.
|
Available thru |
Drop-down. This field is usually left blank unless there is a specific date on which registrations will close. If a date is entered, the meeting product will not be available for orders after this date. |
Primary Search Group |
Link. This is an optional feature that allows organizations to assign a search group code to products and customers, so that back office staff assigned to that primary search group can optionally pre-filter searches for customers or products by their assigned primary search group. Primary search group codes are defined on subgroup customer records and mapped to zip codes. An organization can have customers be automatically assigned to a primary search group based on the zip code of their primary address by setting the APP AUTOMATIC_SEARCH_GROUP_ASSIGNMENT application parameter to "Y". For more information on primary search groups, please see Creating a Primary Search Group Mapping. |
Options |
|
Master Product |
Checkbox. This checkbox should be unchecked for session products. |
Available to Order |
Checkbox. When checked, sets this as an active meeting product for purchase by customers. An example of why it would not be selected is if you are blocking rooms for a board meeting. |
Zero Price |
Checkbox. When checked, indicates this product is available for $0, so you can validate the product without entering pricing and GL account information. You still must enter a default rate code.
As of 7.5.2, if this checkbox is checked, the Waive Shipping checkbox is checked and disabled on the Rates Pricing screen.
|
Default Attendance to “Y” |
Checkbox. When checked, indicate the attendance status for those who order this meeting product will be automatically set to “Y”. If this is checked for the Parent Product, then the session will automatically be checked. This checkbox was added in the 7.2.2 release so you no longer have to manually set the attendance for registrants once the meeting is completed. |
Returnable |
Checkbox. When checked, indicates this product can be returned. |
Members Only |
Checkbox. When checked, the system allows only members can buy this meeting product.
As of 7.5.0, if this product is active, has been setup to display on the web, and this checkbox is checked, the "MEMBERS ONLY" product alert will display on the Product Listing, Event Calendar, Meeting Detail, and Product Detail pages on the web for this product, as shown below.
|
One Price Only |
Checkbox. When checked, indicates pricing cannot be targeted solely to one rate structure and all rate structures receive the same price. Processing time is quicker when the product is available to all purchasers and this checkbox is checked. When unchecked, indicates the rate structures apply to the price of the product. |
Allow Price Update |
Checkbox. If this checkbox is selected, the Unit Price field is editable on the Order Entry screen and the Line Item Details screen.
If the price of the product is $0 and this checkbox is selected, the Line Status will default to Proforma regardless of the Org Unit Line Status default. The system assumes that the price will be manually changed. |
Is a Donation |
Checkbox. When checked, indicates that when you purchase this meeting product, it will count as a donation. The amount paid for the meeting registration is included in the giving analysis and recognition. When unchecked, indicates this meeting product is not related to fundraising or donations. If this meeting product is linked to a campaign with a recognition structure on the Product Central > Related to Fundraising screen, then the donor will achieve recognition when he/she purchases the meeting product and receives fundraising credit.
|
Meeting Products - General Setup |
|
Begin Date & Time |
Drop-down. Defaults to the system date, but can be overridden. The official published date and time of the meeting product.
|
End Date & Time |
Drop-down. The official published ending date and time of the meeting product. This date is different from the Begin Date if the Multi-Day checkbox is selected. For single-day meetings, select the same date as the Begin Date.
|
Last Registration |
Drop-down. The last day on which a registration can be entered into the system. For sessions, it defaults to the start date of meeting.
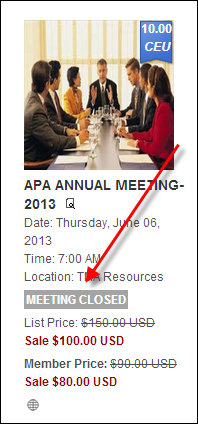
As of 7.5.0, if this product is active, has been setup to display on the web, and this date is set to a date in the future, the "MEETING CLOSED" product alert will display on the Product Listing, Event Calendar, Meeting Detail, and Product Detail pages on the web for this product, as shown below.
|
Drop-down. The last day that a refund can be generated for this session. For sessions, it defaults to the start date of meeting. For more information, please see Cancelling a Meeting Order with a Refund. |
|
Time Zone |
Drop-down. As of 7.4.2, indicates the time zone in which the meeting will occur. |
Event Format |
Drop-down. Select a format from the drop-down (e.g., Conference, Meeting, or Webinar). When you define a format for a meeting, web users will be able to filter the results on the Events Calendar by format. |
Badge Configuration |
Link. Displays all available badge templates defined on the Badge Configuration screen. |
Default Badge Setup |
Link. Opens the Badge Configuration screen. For more information, please see Defining Default Badge Configuration. Please note that this link only displays for meeting products with a Product Type of "Course", "Meeting", or "Exam Proctored". |
Allow Registration Time Conflicts |
Checkbox. Indicates whether the Order Entry screen should allow entry of meeting sessions which possess time conflicts. The checkbox defaults to unchecked. Prior to 7.5.0, when this checkbox is checked, the Order Entry screen allows you to override the conflict. When unchecked, Personify does not allow a registrant to have active registrations for events that conflict in time with existing Order Detail lines for the same ship-to customer. Although the sessions can be added to the order (to allow for changing the ship-to customer), when you save the order an error message will display stating that you cannot register because of time conflicts, and the session will be deleted. You can define a main meeting product and its sessions to have differing values for this field. For example, this logic can be used to not allow time conflicts for a main educational meeting but to allow time conflicts for social events of the main meeting. As of Personify 7.5.0, if two sessions are defined to occur at the same time, but only one session has this checkbox checked, the system will allow a customer to register for both sessions without displaying an error. For example, if a lunch session that is defined to allow time conflicts occurs at the same time as a class session that is defined to NOT allow time conflicts, customers will NOT be prevented from registering for both sessions. |
Allow Capacity Override |
Checkbox. When checked, indicates the capacity set on the Define Capacity screen can be overridden when ordering a meeting product in the back office or web. If you select to override capacity when entering a meeting order, the meeting capacity increases by “1” on the Capacity Definition screen. This applies to all meetings, sessions, courses or proctored exams. It defaults to unchecked and would rarely be checked, except for meetings like webinars or events not being held at an indoor facility. |
Include in Program |
Checkbox. When checked, indicates the meeting should be included in the program. |
Checkbox. When checked, enables the Meeting Room Inventory screen. See Defining Meeting Room Inventory for more information. Select this checkbox if you want to define an inventory of the conference rooms because you only want certain rooms to be available for the meeting. Only check this checkbox if you want to schedule rooms within specific time slots. This invokes the scheduling conflict management.
As of 7.5.2, if this checkbox is unchecked: · There should be no room assigned at the meeting level. · When you select a Room and Configuration from Location tab, that room will be assigned to that session. · If you do not assign a Room and Configuration from the Location tab, but assign from Assigned Rooms screen, then the first assigned room will display on the Location tab for the session. · If you select a Room and Configuration for a session and the session is multiple days, the system should create room assignment records for all days of the session. · If you update the Room and Configuration from Location tab, the system will update all the records for all days for the facility associated with the original room.
As of 7.5.2, if this checkbox is checked: · The Room and Configuration fields on the Location tab will be enabled. The options that display in the Room drop-down are populated based on the Facility selected. If no rooms have been defined for the selected facility, nothing will display in the drop-down. · The Room and Configuration fields on the Location tab will only show the first room assigned to the session, when multiple rooms are assign to same session. It will not show any room in the inventory if it has not been assigned. · For multi-day sessions, the system only supports using the same room to each day. If you later change the room (e.g., more people signed up than expected), the system will update the room for all of the days of the session for the selected facility. |
|
Predefine Requirements Inventory |
Checkbox. When checked, indicates you must set up vendors, supplies, and an equipment inventory prior to scheduling that inventory for meeting sessions. If checked, once you use the inventory, you cannot assign any more because the inventory is predefined. Enables the Requirement Inventory and Session Requirements screens. See Defining Meeting Product Requirement Inventory and Defining Meeting Product Session Requirements for more information. When unchecked, you can order more requirements if necessary because you did not predefine the inventory.
|
Default Attendance to “Y” |
Checkbox. When checked, indicate the attendance status for those who order this meeting product will be automatically set to “Y”. If this is checked for the Parent Product, then the session will automatically be checked. This checkbox was added in the 7.2.2 release so you no longer have to manually set the attendance for registrants once the meeting is completed. |
Multi-Day |
Checkbox. When checked, indicates this meeting is one session of an event that spans multiple days or sessions. Registrants must register for all of these in the series. When scheduling conflicts are not allowed, the registrant must have all sessions available in the schedule or not register for any of them. A multi-day event is defined as a package, where the individual events cannot be registered for by themselves. The individual events would therefore be “not available” to orders.
For the multi-day functionality to work properly, you must define the schedule for the meeting by clicking the “Multi-Day Schedule Detail” button. Please see Defining Room Assignments for a Multi-Day Meeting for more information. |
Multi-Day Schedule Detail |
Button. Displays the Room Assignment (MTG005) screen when you can define the schedule for the meeting. See Defining Room Assignments for a Multi-Day Meeting for more information. |
Clear Schedule |
Button. Clears the facility and room assignment schedule information. This button will be disabled for session products in which the Predefine Conference Room Inventory checkbox is checked. |
Daily |
Checkbox. This checkbox only displays for session products. As of 7.5.0, check this checkbox to allow web users to register for one day in a conference. You must also set up a daily rate code for this option to work. For more information, see Defining the Daily Meeting Registration Workflow. |
Checkbox. This checkbox only displays for session products. As of 7.5.0, when checked, registrants will be permitted to register for this session, even if they select a daily rate for a different day. For more information, see Defining the Daily Meeting Registration Workflow. |
|
Meeting Products - Location |
|
Facility |
Link. Displays a list of facilities that were setup in the Meeting Facilities screen. Hotels/venues not specifically designated as a “facility” will not display. Available facilities are defined on the Meetings Facility Maintenance screen. For more information, please see Setting Up Facilities for Meetings. |
Location |
Text box. A free-form field where you can define more information for the facility. This field is not used for a room name and is not required. |
Room |
Drop-down. Select a defined meeting room, e.g., Banquet Hall, Conference Room, Ballroom, Classroom. The options available depend on the room types selected on the Facility Setup screen.
|
Configuration |
Drop-down. The meeting room setup. Common examples include classroom, rounds, lecture, theater, etc. |
Meeting Products - Meeting Information |
|
Begin Date & Time |
Read-only. Displays the begin date and time of the meeting parent product. |
End Date & Time |
Read-only. Displays the end date and time of the meeting parent product. |
Facility |
Read-only. Displays the facility selected for the meeting parent product. Click this link to open the facility in the Meetings Facility Maintenance screen. |
See also:
· Defining Session Capacity and Session Control
· Defining a Session Product to Display on the Web
 When a product is marked as member-only,
only customers who qualify for a rate structure that has been
defined for the product being purchased (on the
When a product is marked as member-only,
only customers who qualify for a rate structure that has been
defined for the product being purchased (on the 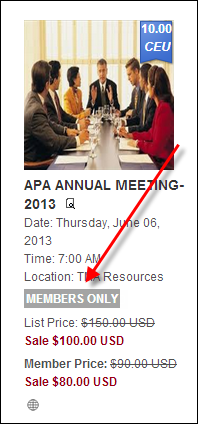
 As of 7.5.1, if this checkbox
is checked, the
As of 7.5.1, if this checkbox
is checked, the