 This
task is only available if the Predefine
Conference Room Inventory checkbox on the General
Setup screen is selected.
This
task is only available if the Predefine
Conference Room Inventory checkbox on the General
Setup screen is selected.This
task is only available if the Predefine
Conference Room Inventory checkbox on the General
Setup screen is selected.
Prior to allocating facilities or rooms for the active session, an inventory of available facilities and rooms must be defined. Once defined, session locations are validated against availability from the master schedule. Only define the rooms that are needed.
Break-out
sessions can only be assigned to defined rooms.
To define meeting room inventory:
1. From the
Personify360 main toolbar, select Products > Product
Central.
The Product Maintenance search screen displays.
2. Click Search to find a product or click Create New Product.
3. From the
Subsystem Specific task category, click Meeting Room
Inventory.
The Meeting Room Inventory screen displays, as shown below.
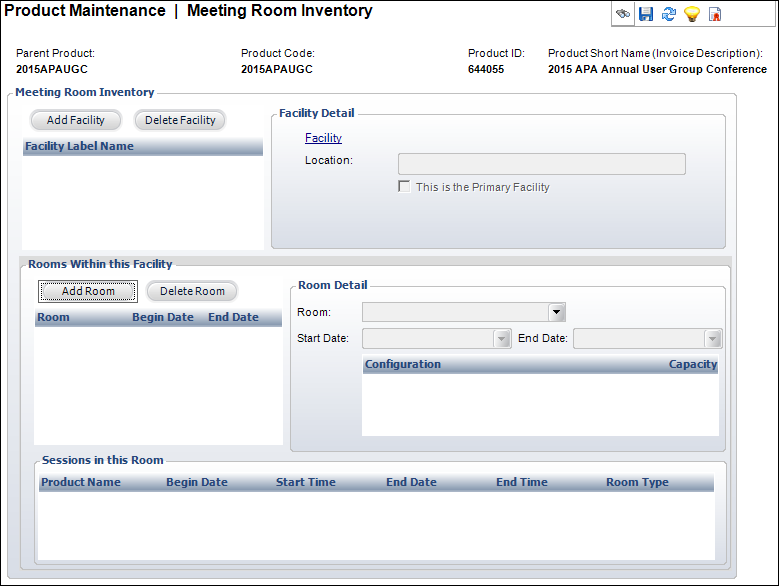
4. Click
Add Facility.
The Facility Chooser displays.
5. Search for and select a facility.
6. Enter the Location, if necessary.
7. If This is the Primary Facility check the checkbox.
8. Click Add Room to add a room within the facility.
9. Select the Room from the drop-down.
10. Select the Start Date and End Date the room will be in use.
11. Click Save.
Screen Element |
Description |
|---|---|
Meeting Room Inventory |
|
Add Facility |
Button. When clicked, a row is added to the Facility Label Name table and the corresponding fields are enabled to add a facility detail. The Facility Chooser displays where you can search for a facility. |
Delete Facility |
Button. When clicked, the highlighted row from the table and the information entered in the Facility Detail fields are deleted. |
Facility |
Link. When clicked, the Facility Chooser displays where you can change the facility you added when you clicked Add Facility. |
Location |
Text box. A free-form field where you can define more information for the facility. This field is not used for a room name and is not required. |
This is the Primary Facility |
Checkbox. When checked, indicates the facility is a primary facility for the meeting since you can have multiple facilities for one meeting. If you selected a facility on the General Setup screen, then that facility is considered the primary facility and this field is read-only. |
Rooms Within this Facility |
|
Add Room |
Button. When clicked, a row is added to the Rooms Within this Facility table and the corresponding fields are enabled to add a room detail. |
Delete Room |
Button. When clicked, the highlighted row from the table and the information entered in the Room Detail fields are deleted. |
Room |
Drop-down. Select a defined meeting room, e.g., Banquet Hall, Conference Room, Ballroom, Classroom. The options available depend on the room types selected on the Facility Setup screen.
|
Start Date |
Drop-down. The begin date and time the room will be used. |
End Date |
Drop-down. The date and time the room is no longer needed. |
See Also:
· Defining Session Requirements
· Assigning a Room to a Meeting/Session