The Room Assignment screen displays with the previously defined rooms and configurations for the facility, as shown below.
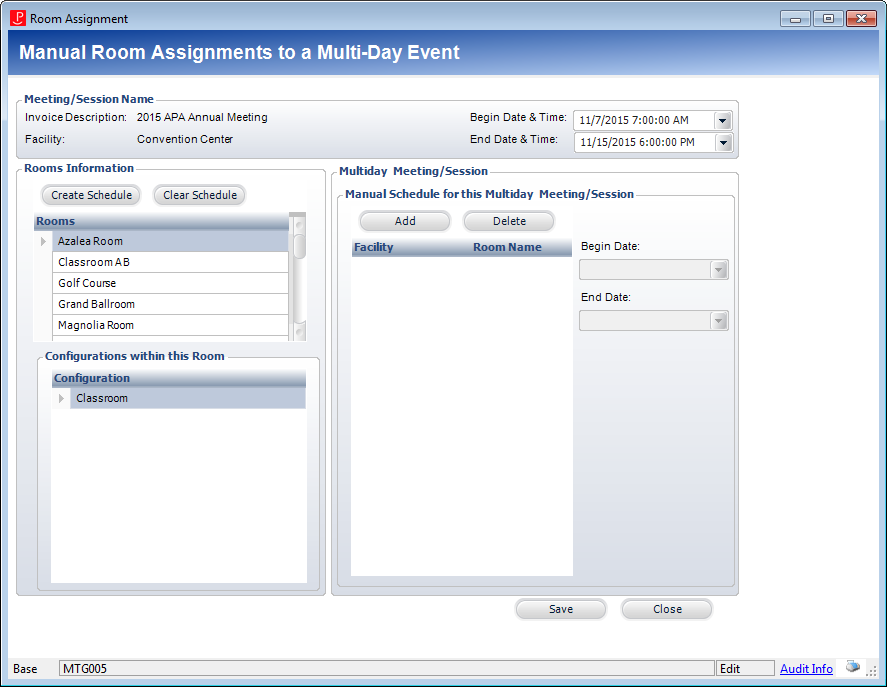
The available rooms can be inventoried or non-inventoried. But a restriction exists on what facilities and rooms can be selected and scheduled. Using this screen, you can create a schedule for a multi-day event where sessions occur:
· In the same room at the same time over multiple days.
· On the same day in one room but at separate times.
· On the same day in different rooms at different times.
· On multiple days but in different facilities or different rooms at the same facility.
When you save this screen, the system verifies there are no conflicting room reservations for any of the days. The room assignment cannot be saved to the meeting product until no conflicts exist.
To define the room assignments manually for a multi-day event:
1. On the General Meeting Setup screen, click Multi-Day Schedule Detail.
2. Select
the appropriate facility.
The Room Assignment screen displays with the previously defined rooms and
configurations for the facility, as shown below.
3. Select the room you want to assign to a multi-day event.
4. If multiple configurations for the room exist, select the appropriate configuration you want to assign to a multi-day event.
5. To schedule
the same room in the same facility for all days of the meeting, click
Create Schedule.
The system creates a line for the room for each day.
6. To schedule a room manually, click Add.
7. Select the Begin Date and End Date and times the room will be used for the multi-day meeting.
8. Perform Steps 3-7 for each room you want to assign.
9. Click Save.
Screen Element |
Description |
|---|---|
Begin Date & Time |
Drop-down. The begin date and time of the multi-day meeting. This is populated from the General Setup screen. You can change the date here, but it is mainly used as a reference for booking rooms. |
End Date & Time |
Drop-down. The end date and time of the multi-day meeting. This is populated from the General Setup screen. You can change the date here, but it is mainly used as a reference for booking rooms. |
Rooms Information |
|
Create Schedule |
Button. When clicked, a schedule is automatically created for the highlighted room/configuration for all days of the meeting. |
Clear Schedule |
Button. When clicked, the entire schedule for the room/configuration is cleared. |
Multi-day Meeting/Session |
|
Add |
Button. When clicked, one instance of the room/configuration is added to the schedule. Click this button to manually add rooms for the multi-day meeting. |
Delete |
Button. When clicked, the highlighted facility and room are deleted from the schedule. |
Begin Date |
Drop-down. The begin date the facility and room will be scheduled for the multi-day meeting. |
End Date |
Drop-down. The end date the facility and room will be scheduled for the multi-day meeting. |
See Also:
· Defining General Product Information
· Assigning Multiple Facilities to a Meeting
· Uploading Session for a Meeting Parent Product