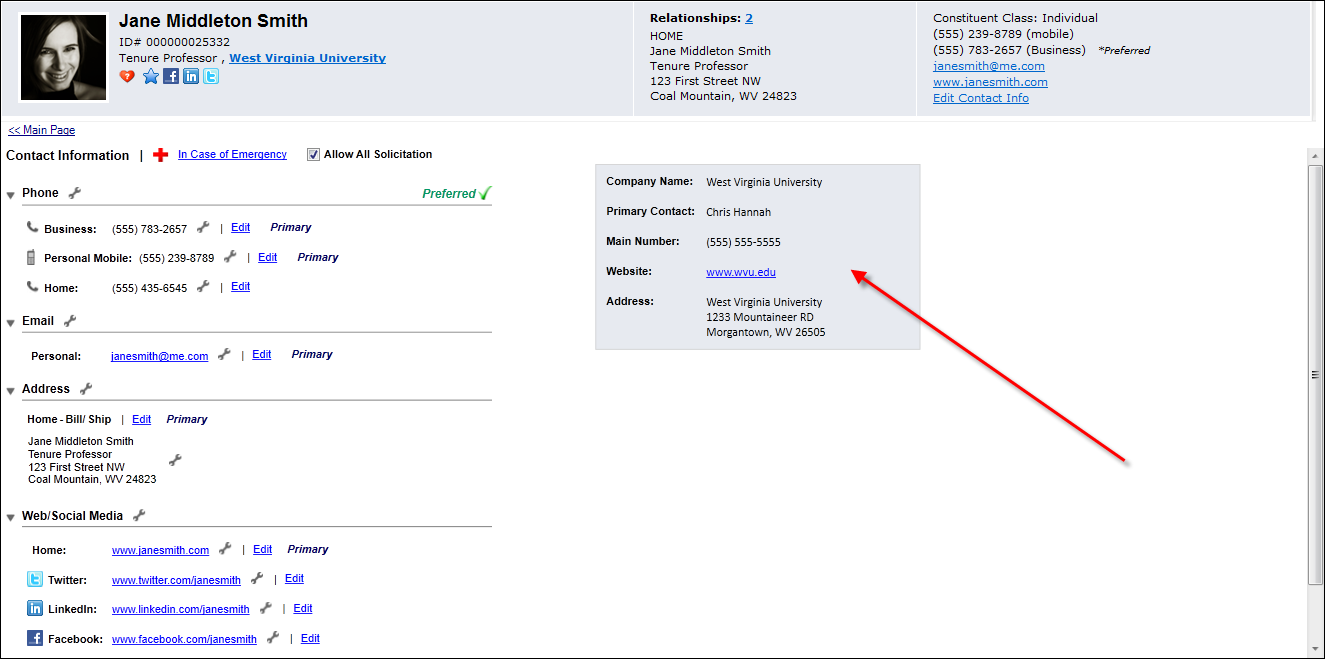
Additionally, from the CRM360 header, you can click the Edit Contact Information link. The Contact Information screen displays below the header in CRM360.
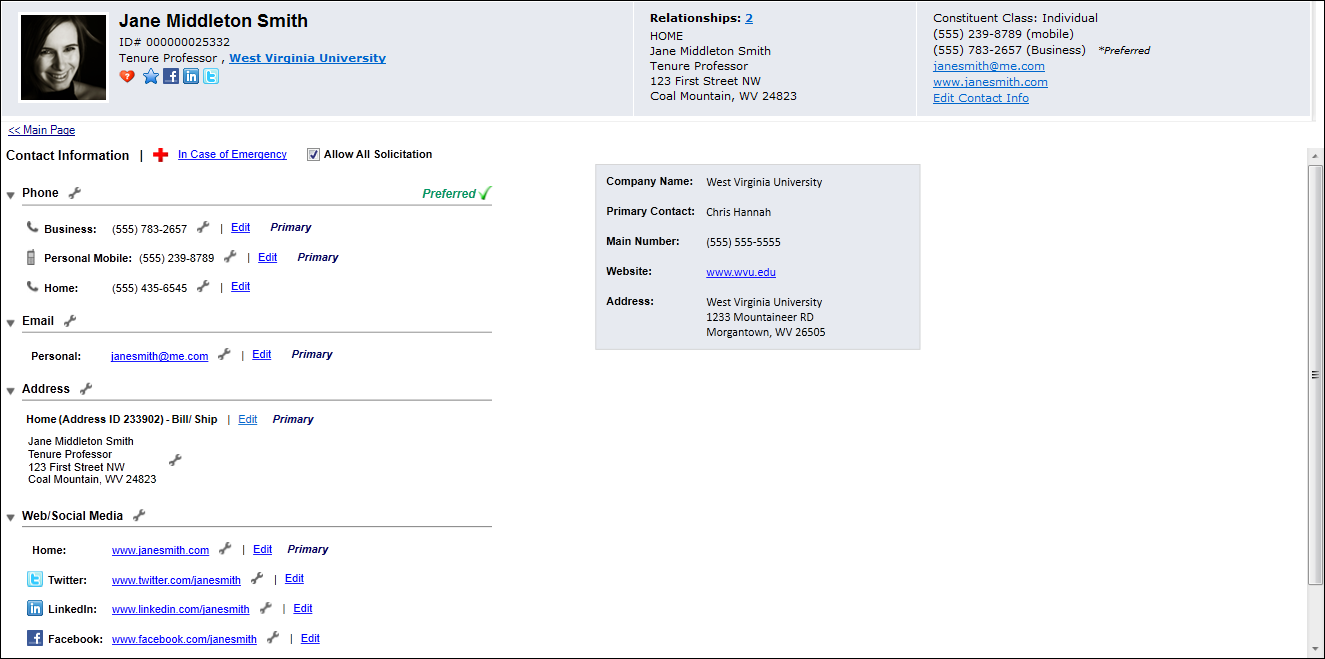
You can change the contact information for the customer, such as phone numbers, email addresses, and web pages. You can also add non-primary contact information and specify whether the added information should be included in the directory.
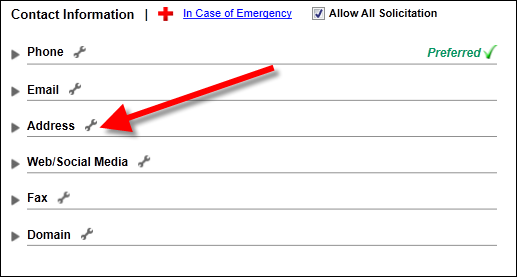
The Contact Information screen is broken down by the following categories, which will display regardless of whether or not a record has been defined:
· Phone - only one phone number can exist with the same Type and Location.
· Email - from this section, email addresses defined for the constituent will display as a hyperlink. You can click the email address link to open the Send E-Mail (APP140) screen or a blank Outlook email, depending on your configuration.
· Address - when a constituent is first added to Personify360, the address added at the time of creation is the constituent's default bill-to/ship-to address on all orders. If necessary, additional addresses can be added and this can be changed. Only one address can be marked as primary.
· Web/Social Media - from this section, web site addresses defined for the constituent will display as a hyperlink. You can click the web site address link to open the web site directly in a browser.
· Fax
· Domain- as of 7.5.0, from this section, you can enter a company's name as a registered domain. On the web, group managers are able to manage individuals with the Domain that the staff member assigns them to. For more information, please see Adding a New Domain Record to a Constituent's Record in CRM360.
Additionally, you can define a constituent's emergency contact from this screen.
To access a constituent’s contact information from the Background Information
task category in CRM360,
click Contact Information.
Additionally, from the CRM360 header, you can click the Edit
Contact Information link. The Contact Information screen displays
below the header in CRM360.
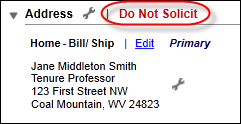
From the Contact Information section, you can perform the following actions by using the wrench icon at the communication method level (as highlighted below).
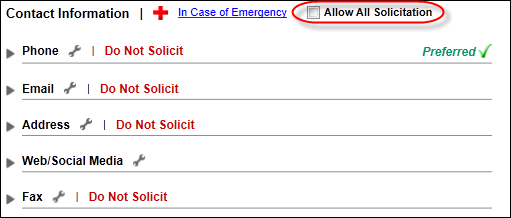
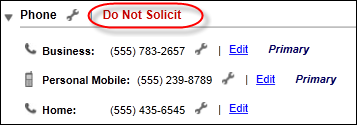
 If
the constituent does not under any circumstance want to be solicited in
any communication method, uncheck the Allow
All Solicitation checkbox. Doing so will add "Do Not Solicit"
in right text to the right of each communication method, as shown below.
If
the constituent does not under any circumstance want to be solicited in
any communication method, uncheck the Allow
All Solicitation checkbox. Doing so will add "Do Not Solicit"
in right text to the right of each communication method, as shown below.
If the Allow All Solicitation checkbox
IS checked, the system will mark the "Allow Solicitation" flag
for each type of communication method. The only place the "Allow
Solicitation" flag is specifically used in Personify360 is in Marketing:
(1) from the Marketing
and Communication List Maintenance (MKT002) screen from which marketing
lists can be generated, and (2) the MKT800
process. But the expectation is that organizations will use this flag
frequently as an Advanced Parameter when they generate mailing labels
using CUS500 and with custom
reports and Data Analyzer queries used to generate calling lists and mailing
lists.
Action |
Communication Method(s) |
Description |
|---|---|---|
Contact Information level wrench |
||
Add New |
Phone Domain |
From the Phone section, this link opens
the Contact Method Details window to add
a new phone number. From the Domain section, this link opens the Contact Method Details window to add a new Domain. |
Mark as Preferred |
Phone |
Of the five types of communications methods (Phone, Email, Address, Web/Social Media, and Fax), a constituent can choose their preferred communication method. Please see Selecting a Constituent's Preferred Communication Method in CRM360 for more information. |
Phone |
Indicates that the constituent does not want to receive commercial (telemarketing) phone calls. When this option is selected, the list of constituents and phone numbers generated for purposes of making phone calls to promote or sell a product, service, or membership, etc. will not include this constituent. |
|
Allow Solicitation by Phone |
Phone |
If the "Do Not Solicit by Phone" option described above is selected, this option now displays in the wrench menu. Selecting this option will remove the "Do Not Solicit" text to the right of the Phone communication method.
|
Indicates that the constituent does not want to receive internal emails from the organization. This does not include automated system notifications.
If this option is selected, "Do Not Solicit"
will display in red text to the right of the Email communication
method, as shown below. |
||
Allow Solicitation by Email |
If the "Do Not Solicit by Email" option described above is selected, this option now displays in the wrench menu. Selecting this option will remove the "Do Not Solicit" text to the right of the Email communication method.
|
|
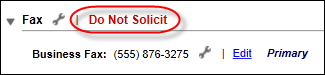
Fax |
Indicates that the constituent does not want to receive commercial faxes. When this option is selected, no faxed communications will be sent to this constituent, regardless of whether it is considered a promotional solicitation.
If this option is selected, "Do Not Solicit"
will display in red text to the right of the Fax communication
method, as shown below. |
|
Allow Solicitation by Fax |
Fax |
If the "Do Not Solicit by Fax" option described above is selected, this option now displays in the wrench menu. Selecting this option will remove the "Do Not Solicit" text to the right of the Fax communication method.
|
Phone |
Indicates that the constituent does not want to receive automated emails generated from the Email Notifications system in the system.
Once selected, the "Allow System Notifications" option (described below) will display in the wrench menu for ALL communication methods to reverse the selection. |
|
Allow System Notifications |
Phone |
If the "Do Not Allow System Notifications" option described above is selected, this option now displays in the wrench menu. |
Phone |
Opens the Deleted Communication Methods window. |
|
Phone Domain |
By default, when you first access a constituent's contact information, communication records that have been marked as inactive will NOT display. Selecting this option will display all communication records that have been marked as Inactive. When selected, the "Exclude Inactive Records" option will display in the wrench menu. |
|
Phone Domain |
Select this option if you want to temporarily hide inactive records from the list of communication records. This exclusion option applies only to the communication method section from which it is selected.
|
|
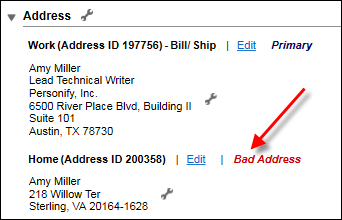
Include Bad Addresses |
Address |
By default, when you first access a constituent's contact information, address records that have been marked as Bad will NOT display. Select this option to display all addresses that have been marked as bad. Please note that selecting this option will not persist if you open a new constituent.
If this option is selected, "Bad Address"
will display in red text to the right of the bad addresses, as
shown below. |
Exclude Bad Addresses |
Address |
If the "Include Bad Addresses" option described above is selected, this option now displays in the wrench menu. |
Address |
Indicates that the constituent does not want to be included in solicitation mailings from the organization. The primary purpose of this checkbox is to exclude constituents from receiving multiple mailings when there is more than one member in a household.
Once selected, the "Send Internal Mail" option (described below) will display in the wrench menu to reverse the selection. |
|
Send Internal Mail |
Address |
If the "Do Not Send Internal Mail" option described above is selected, this option now displays in the wrench menu. |
Address |
Indicates that the constituent does not want to be included in label sets sold to third parties. This is used by the MKT800 process when selecting constituent records for exported marketing lists used outside the organization.
If this option is selected, "Do Not Solicit"
will display in red text to the right of the Address communication
method, as shown below. |
|
Include in Label Sales |
Address |
If the "Do Not Include in Label Sales" option described above is selected, this option now displays in the wrench menu. Selecting this option will remove the "Do Not Solicit" text to the right of the Address communication method. |
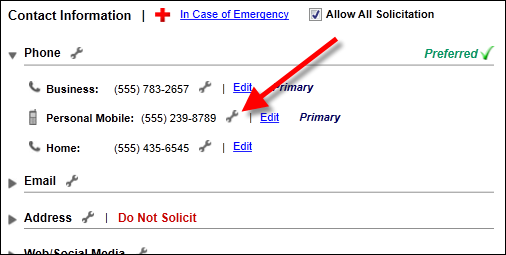
Once you have added a constituent's contact information, you can perform the following actions for the records defined by using the wrench icon at the record level (as highlighted below).
Action |
Communication Method(s) |
Description |
|---|---|---|
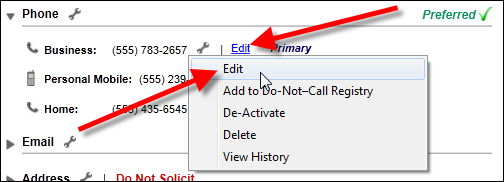
Edit |
Phone |
Opens the Contact Method Details screen
for phone, email, web/social media, and fax records or the Additional
Address screen for address records. This option displays as a
link next to a specific communication records, as well as an option
in the wrench menu for a specific communication record, as shown
below. |
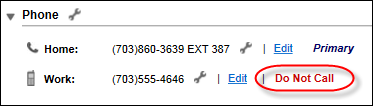
Phone |
When selected, "Do Not Call"
will display to the right of the communication record on the Contact
Information screen, as highlighted below.
Additionally, the Do Not Call icon will display to the right of the selected phone number in the constituent's header, as shown below.
|
|
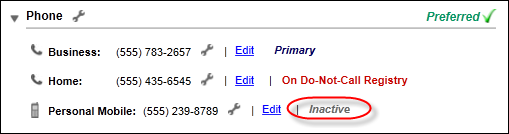
De-Activate |
Phone |
When selected, "Inactive" will
display to the right of the communication record on the Contact
Information screen, as highlighted below. By default, inactive records will NOT display
when you access a constituent. However, you can display inactive
records by selecting "Include
Inactive Records" from the communication method wrench
menu, as discussed above.
|
Delete |
Phone Address |
When clicked, the communication record will be removed. Please note that the system will not display a warning message or confirmation message before removing the record. To open the Deleted Communication History screen, select "View History of Deleted Records" from the communication method wrench menu.
|
View History |
Phone |
For Phone, Email, Web/Social Media, and Fax records, this option opens the Communication Edit History screen. For Address records, this option opens the Address History screen. |
Mark as Primary |
Phone |
Marks the communication records as primary. Only one communication record type (phone, email, address, etc.) can be marked as primary.
|
Mark as Bad |
Address |
Address Status to "BAD". Addresses marked as bad will display "Bad Address" to the right of the address on the Contact Information screen, as highlighted below.
|
Mark as Bad and Add New |
Address |
Changes the Address
Status to "BAD" and opens the Add
Additional Customer Address window. Addresses marked as bad
will display "Bad Address" to the right of the address
on the Contact Information screen, as highlighted below. |
The constituent's primary employer information displays in the grey box to the right of the communication methods, as highlighted below. From this box, you can click the company's website link to open the website in a new browser (if a website has been defined).
This
section only displays for individual records with an active, primary employment
relationship.
 The only place the "Allow
Solicitation" flag is specifically used in Personify360 is
in Marketing: (1) from the
The only place the "Allow
Solicitation" flag is specifically used in Personify360 is
in Marketing: (1) from the 
 If you change the primary address
on the constituent record, you must execute the
If you change the primary address
on the constituent record, you must execute the