The Event Details page displays first by default on the Meeting Details page. This section gives you all the information you need to set up a meeting in the back office to display on the Event Details page, including:
· Speakers
As a best practice, Personify recommends that you drop the Meeting Detail control on an e-Business page that does not already have a left navigation panel defined. The Meeting Detail control includes a left navigation panel that displays by default, which includes Event Details, Event Schedule, Exhibitor Information, and Attendee List links. Web users can navigate through these options to display more information about the meeting, as displayed below.
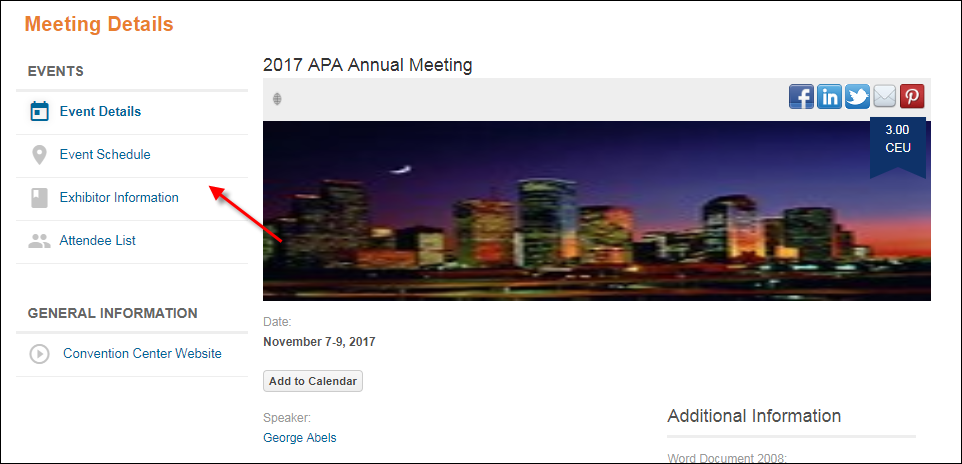
You can add more links to the left navigation panel in the back office to direct users to a URL of your choice, as highlighted below. For steps to configure additional links in the left navigation panel, please see Defining Meeting Product Related Links.

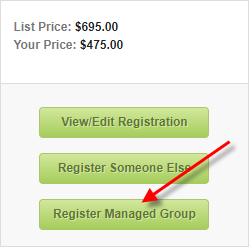
If a web user is defined as a group manager and the Allow Group Purchase checkbox is checked on the eBusiness Control screen in Product Maintenance, he/she will have access to register a group for the meeting using the Register Managed Group button. The Buy for Group control is built into the Meetings Detail control, and will automatically display as long as it is enabled in the control settings. See Buy for Group for more information.
 Meetings
with session products are not appropriate for group registration. If individuals
need to choose their sessions, they must log in and do it themselves.
In addition, a product that has prerequisites, such as a certification,
meeting, etc. should not be purchased using group purchases.
Meetings
with session products are not appropriate for group registration. If individuals
need to choose their sessions, they must log in and do it themselves.
In addition, a product that has prerequisites, such as a certification,
meeting, etc. should not be purchased using group purchases.
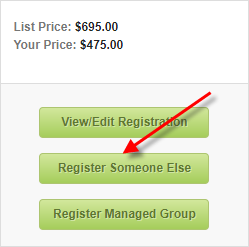
As of 7.6.0, web users have the ability to register other people, as
well as themselves, for a meeting; this functionality is referred to as
Register Someone Else. After logging in, when a web user clicks the Register Someone Else button on
the Meeting Detail page, he/she will be directed to the Registrant
Selection step where he/she can select either the Register
Myself or Register Someone Else
radio button. Depending on which radio button he/she select will determine
their next step in the meeting register workflow. In order for the Register
Someone Else button to display, the Allow
Registrant to Register Others checkbox must be
checked in the back office on the eBusiness
Control screen. For more information about Register Someone
Else functionality, refer to Register
Someone Else.
 The
Register Someone Else feature is different than the Group
Management functionality released in previous versions of Personify360,
because in order for a web user to purchase a meeting product for another
individual, he/she had to be a group manager, where as with the Register
Someone Else functionality, the meeting product must be enabled in the
back office to allow web users to register other people for the meeting.
The
Register Someone Else feature is different than the Group
Management functionality released in previous versions of Personify360,
because in order for a web user to purchase a meeting product for another
individual, he/she had to be a group manager, where as with the Register
Someone Else functionality, the meeting product must be enabled in the
back office to allow web users to register other people for the meeting.
 The name of the Register
Someone Else and Register Managed
Group buttons are hard coded in the Meeting Detail control. To
change the text of these buttons, you need to customize the control.
The name of the Register
Someone Else and Register Managed
Group buttons are hard coded in the Meeting Detail control. To
change the text of these buttons, you need to customize the control.
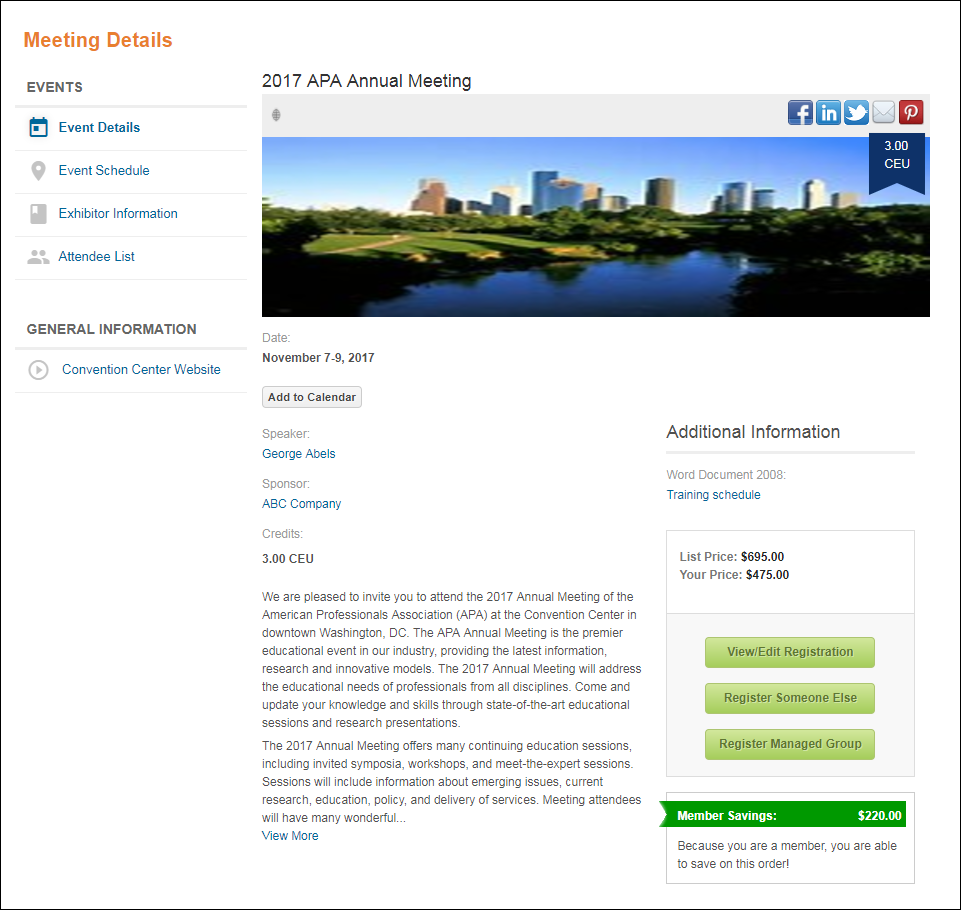
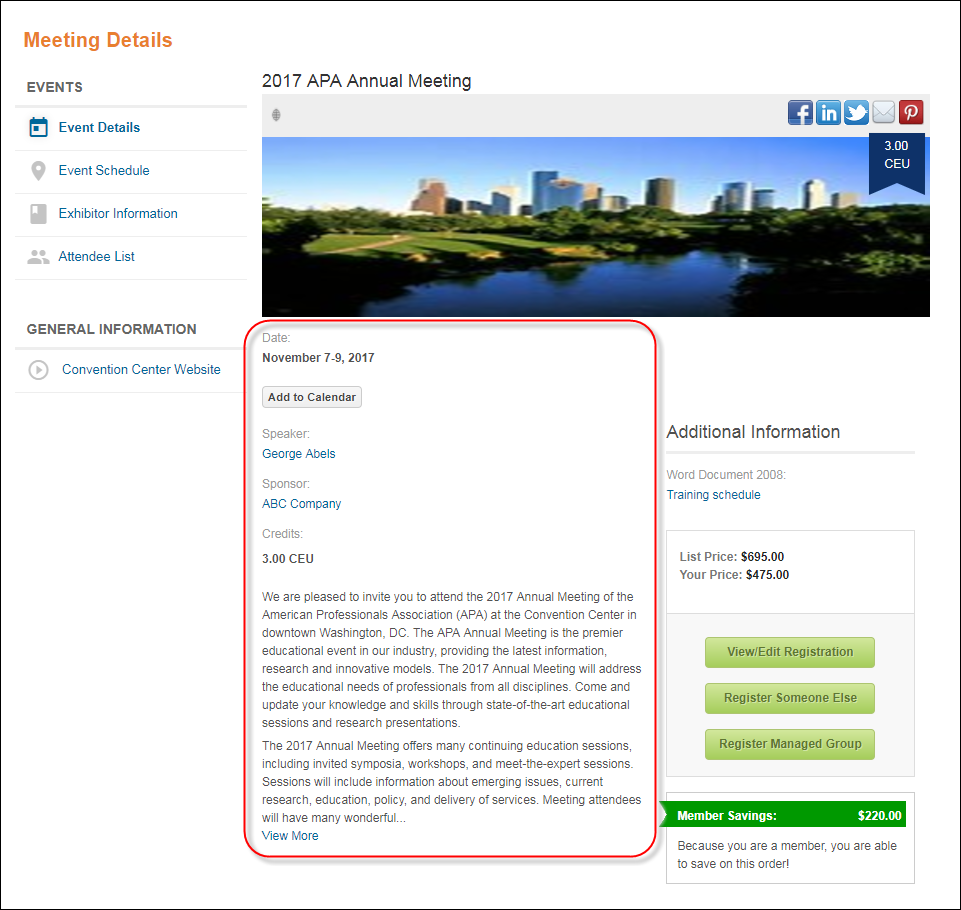
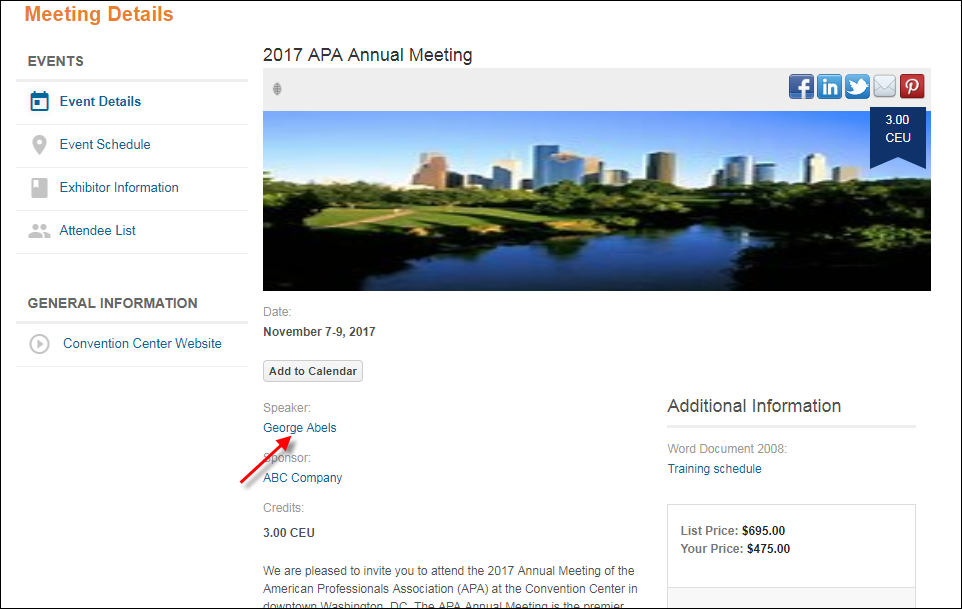
The Event Details screen displays a range of information that has been
defined for a meeting including the format,
location, date and time, any associated
credits, related
customers, short
description, and long
description, as highlighted below. From this screen, a web user can
add
the meeting to their personal calendar by clicking Add
to Calendar. If a speaker's profile is web-enabled, the name will
be a link for web users to click on and view more information. For information
on configuring your meeting to display information on the web, please
see Defining
Meeting Product eBusiness Control.
If
a Facility location is defined
for the event, the City and State of the facility customer record's primary
address will display in the Location column. Alternatively, if a facility
is NOT defined for the event, the Location
defined for the event will display in the Location column.
If there are any product alerts associated with a meeting, they will
display above the images defined for the meeting, as highlighted below.
For information on product alerts, please see Configuring
Product Alerts.
Icons display above the product image on the Meeting Detail control
if you have defined them in the back office, as displayed below. These
images help users to identify different meeting categories. For more information
about iconography, please see Configuring
Categorical Iconography.

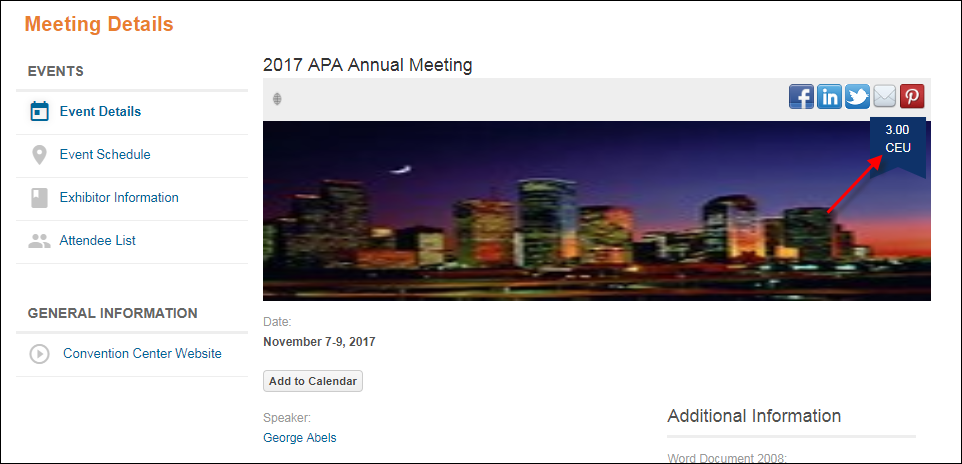
If you have associated credits with a meeting, a ribbon will appear
over the corner of the product image, as highlighted below. The ribbon
will display the default credit type and the number of credits associated
with the meeting. As of 7.7, the Event
Calendar and Event Detail controls display CE credits that are linked
directly to the meeting product AND CE credits that are linked to a transcript
programs which are linked to the meeting product. For instructions on
how to assign credits to a meeting, please see Defining
Meeting Product Related Transcript Information.
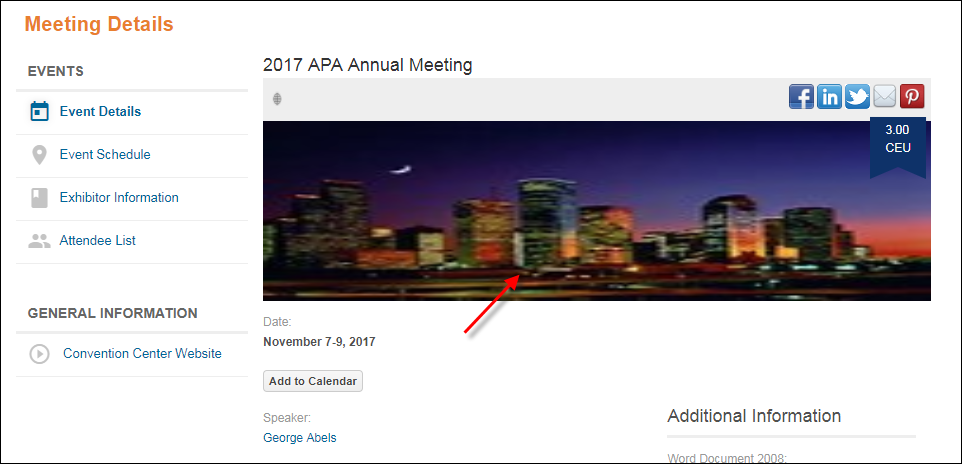
You can define up to three images in the back office that will rotate
at the top of the Event Details screen, as highlighted below. For steps
to configure rotating images, please see Defining
Meeting Rotating Images.
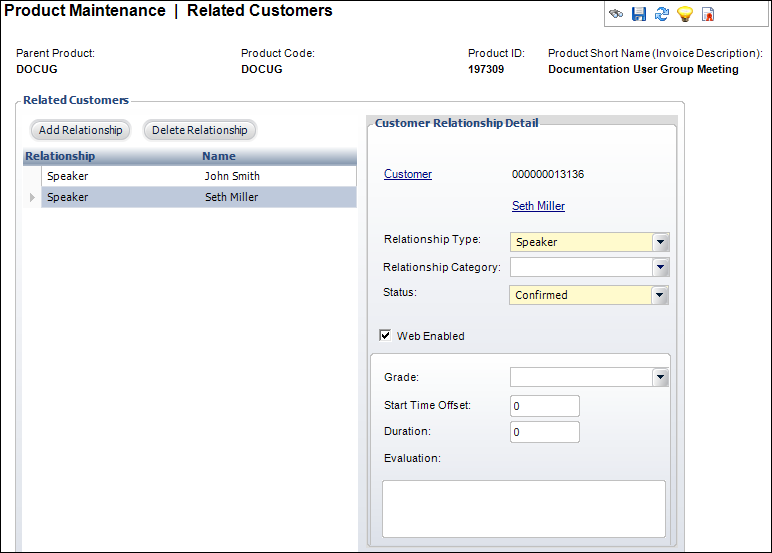
You can define speakers, sponsors, authors, vendors, or any other values you have defined for the MTG "CUSRELATION" system type to fill numerous different roles and display them on the meeting details page, as shown below. In addition, the system will sort these values by last, first name or search name.
This option is based on related customers that are defined in the back
office from the Related
Customers task in the Relationships task category. The customer needs
to be added with a defined Relationship Type,
and check the Web Enabled checkbox, as highlighted
below. For more information on adding a related customer to a meeting,
please see Defining
Meeting Product Related Customers.
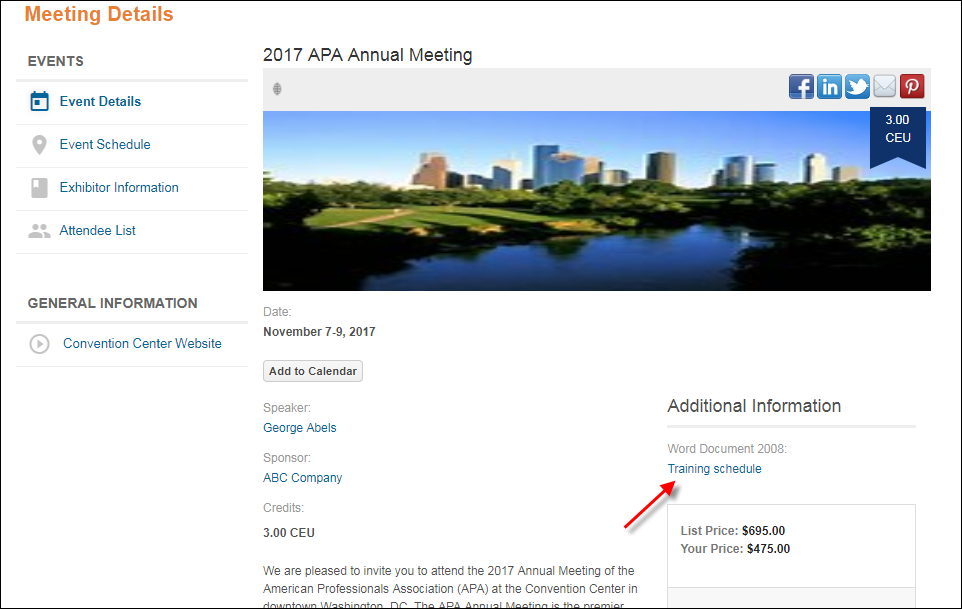
The Additional Information section highlighted below can be configured
to display more information about a meeting product, outside of the general
product set up. You can directly upload related
files or add
a link to a website in the back office for web users to easily access
from the Meeting Detail control. For steps to configure the additional
information section, please see Defining
Meeting Product Related Links and Defining
Meeting Product Related Files. If no related links or files have been
defined, the Additional Information section will not display to the web
user.
The Register Someone Else workflow allows you to use group discounts and have it display to the web user. If you have a group discount set up for a meeting, you should explain how registrants can qualify for group discounts. Please note that the discounts are only visible on step 2 of the checkout process. If a product discount has been defined based on quantity, the quantity discount breakdown will display on the meeting detail page. Currently, quantity discounts are limited to the inventoried and meeting products subsystems only. For more information, please see Creating a Discount.
 It
is critical that the discounts are set up as order-level for meeting products,
because each meeting registration will always result in distinct line
items.
It
is critical that the discounts are set up as order-level for meeting products,
because each meeting registration will always result in distinct line
items.
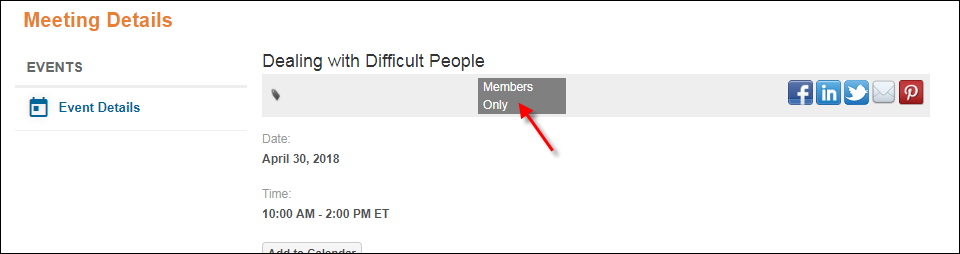
As of 7.6.1, if the Enable Registration for Invite-Only Meetings web setting is unchecked, the "Register Now" and "Register Someone Else" buttons will NOT display for meetings in which the Invite Only checkbox is checked on the General Setup screen in Product Maintenance.
If
you set up a separate page with the product ID of the invite-only meeting,
the URL for that Meeting Detail page can be emailed to invitees for them
to register for the invite-only meeting. On that Meeting Detail control,
the Enable Registration for Invite-Only
Meetings checkbox should be checked in the control web settings,
so that invitees can start the registration process for the invite-only
meeting from the meeting detail page for that invite-only meeting.