Many products are related to authors, publishers, vendors, product managers, etc. This information is searchable both by Web users as well as operators of the customer service system. For instance, you might use this feature to see all products authored by a specific person. This screen maintains a list of customers associated with this product, along with optional links to their abstract, if available.
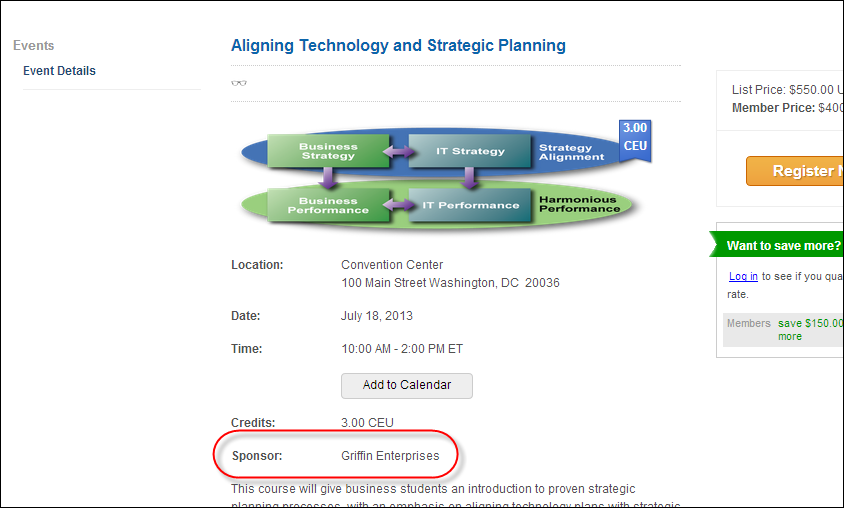
As of 7.5.0, check the Web Enabled checkbox if you want the related customer to display in the Additional Information section on the meeting detail page on the web, as shown below. In addition, the system will sort these values by last, first name or search name.
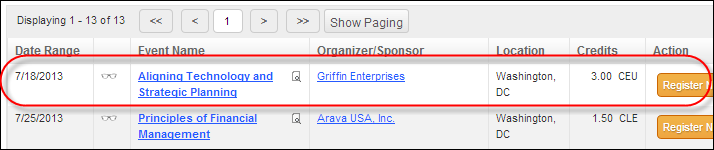
Please note that if the related customer has a website defined and the "Include in Web/Mobile Directory" checkbox is checked on the Contact Method Details screen, the related customer will display as a hyperlink on the Event Calendar page, as highlighted below. Web users can click the hyperlink to open the related customer's website in a new tab.
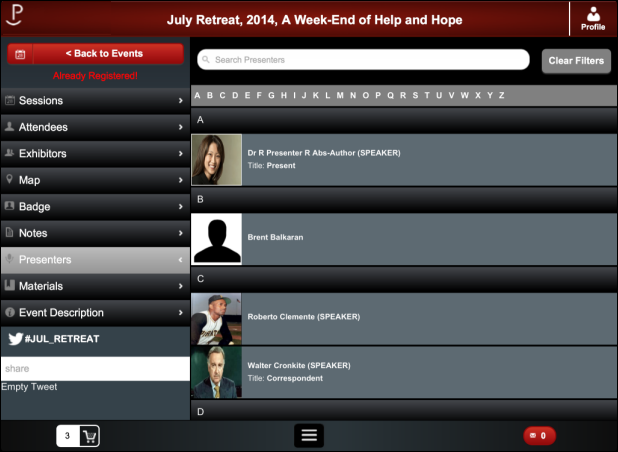
Related customers added to a meeting that has been configured to display in the mobile application display in the Presenters menu option, as displayed below. Please note that the bio that displays for each presenter is defined on the Biography Information screen in CRM360®.
To set up related customers:
1. From the Personify360 main toolbar, select Products > Product Central.
The Product Maintenance search screen displays.
2. Click Search to find a product or click Create New Product.
3. From the Relationships task category, click Related Customers.
The Related Customers screen displays, as shown below.
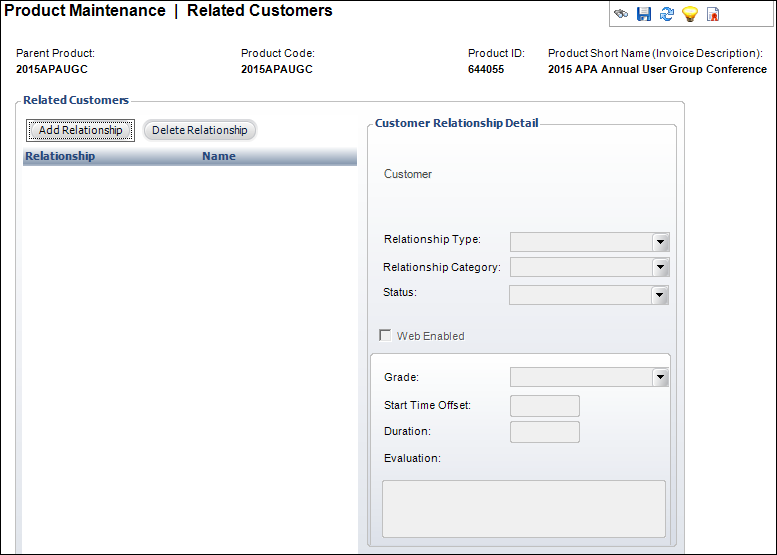
4. Click Add Relationship.
The Customer Chooser screen displays.
5. Search for and select the appropriate customer to relate to the product.
6. Select the Relationship Type from the drop-down.
Values in the drop-down are populated based on the codes defined for the non-fixed MTG "CUSRELATION" system type.
7. As of 7.5.0, select the Relationship Category from the drop-down.
Values in the drop-down are populated based on the codes defined for the non-fixed MTG "CUSRELATION_CATEGORY" system type.
8. Select the Status from the drop-down.
Values in the drop-down are populated based on the codes defined for the non-fixed ORD "RELATION_STATUS" system type.
 In order for a presenter to appear in the Presenters menu option in the mobile application, the relationship Status must be "Confirmed".
9. Check the Web Enabled checkbox if you want the related customer to display in the Additional Information section on the product detail page on the web.
Please note that this checkbox will be disabled until e-Business control has been setup. For more information, please see Defining Meeting Product eBusiness Control.
10. After a speaker has given a speech, select a Grade from the drop-down, if necessary.
Values in the drop-down are populated based on the codes defined for the non-fixed MTG "GRADE" system type.
11. Enter a Start Time Offset, if necessary.
This field identifies when the speech will start based on the start time.
12. Enter a speech Duration, if necessary.
13. After a speaker has given a speech, enter an Evaluation of the speech, if necessary.
14. Click Save.