Working with Committees in Committee Central
Once you create a committee,
you can use the various tasks and tabs to perform different committee
record management functions.
 You
can make a committee membership visible across multiple org units by setting
the CUS application parameter SHOW_COMMITTEE_CURRENT_ORGUNIT to "N".
When set to "Y", only committee members that belong to the current
org unit display. The system defaults this parameter to "Y".
See Setting Up Application
Parameters for more information.
See Also:
· For the
list of reports you can run for a committee, see Committee
Reports.
· For more
information on how to create a new committee, refer to Creating
a New Committee.
· For the
system types and codes you must set up for committees, refer to Committees
System Types and Codes.
To view a committee in Committee Central:
1. From the
Personify360 main toolbar, select Customers
and Committees > Committee Central.
The Committee Central search screen displays.
2. Create
a new committee or search for and select an existing committee.
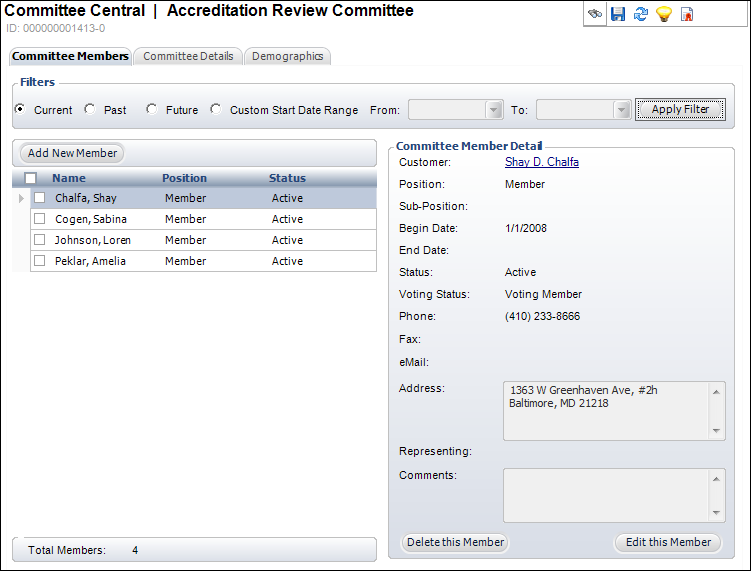
The Committee Central screen displays, as shown below.

Using the various tabs and tasks on the Committee Central screen, you
can perform the following tasks:
 Because
much of the functionality in Committee Central is identical to that in
CRM360®, many
of the links below will take you the corresponding topic in the Customers
section.
Committee Members
· Viewing
Committee Members
· Adding
a New Committee Member
· Registering
Committee Members for a Meeting
· Inactivating
a Committee Member
· Emailing
the Committee
Committee Details
· Changing
a Customer Address
· Changing
a Committee's Contact Information
Demographics
· Defining
the Committee Structure
· Adding
a Committee Nomination
· Adding
Committee Activities
· Changing
a Committee Name
· Changing
a Committee Address
o Viewing
the Communication History
§ Propagating
the Primary Address to Orders
o Adding
an Additional Address
· Adding
Committee Demographics
· Adding
a Committee Profile
· Defining
Dues Basis
· Adding
Tax Exempt Info
· Viewing
DCD File Downloads
· Editing
Web Access
· Editing
Aliases
· Adding
Lists
· Adding
Special Interests
· Defining
Solicitation Preferences
· Making
Special Groups Visible in Committee Central
Relationships
· Displaying Hierarchical Tree View
· Displaying
Relationships by Type
· Adding
a New Relationship
 You
can make a committee membership visible across multiple org units by setting
the CUS application parameter SHOW_COMMITTEE_CURRENT_ORGUNIT to "N".
When set to "Y", only committee members that belong to the current
org unit display. The system defaults this parameter to "Y".
See Setting Up Application
Parameters for more information.