As
of 7.5.1, on the web, segmentation is referred to as "Group Management”.
In 7.5.0 it was refereed to as "Corporate and Staff Management"
and in releases prior to 7.5.0, it was referred to as "Affiliate
Management".
As
of 7.5.1, on the web, segmentation is referred to as "Group Management”.
In 7.5.0 it was refereed to as "Corporate and Staff Management"
and in releases prior to 7.5.0, it was referred to as "Affiliate
Management".Customers themselves can represent a segment. On the web, this person is known as the "Group Manager", which is the person assigned to manage a segment or group of people. For example, a company can be made into a segment and add its employees to this segment. Then, an employee from the company can be given control over a segment(s) and can perform the appropriate customer management functions. The permissions you assign to a group manager determine what customer record management functions he/she can perform on the web using the Group Management controls. See Configuring the Group Management Controls for more information.
As
of 7.5.1, on the web, segmentation is referred to as "Group Management”.
In 7.5.0 it was refereed to as "Corporate and Staff Management"
and in releases prior to 7.5.0, it was referred to as "Affiliate
Management".
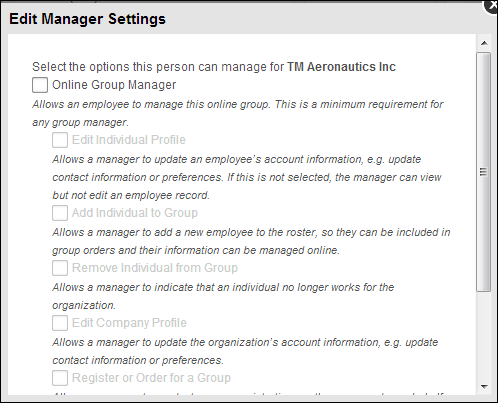
The following are different permissions that you can assign to your group manager:
· Online Group Manager checkbox
When checked, a web user becomes a group manager.
· Edit Individual Profile checkbox
When checked, it allows the group manager to be able to edit individual
group members' profiles on the web.
· Edit Group Profile checkbox
When checked, it allows the group manager to be able to edit the group's
profile on the web.
· Add Individual to Group Profile checkbox
When checked, it allows the group manager to add new individuals to the
group on the web.
As of 7.5.2,
for the Chapter
Management workflow, group managers are unable to add/remove individuals
from their group. In order for group managers to view the most up-to-date
roster on the web, a staff member must, first, run MBR700
to pull in new members and remove expired members, next, run CUS603
to maintain the segment based on who is currently in the subgroup, and
finally, run MBR900
to update the Fulfill Status of membership orders and to populate a reporting
table called Cus_Current_Membership_Info. See Maintaining
the Roster for Chapter Management for more information.
· Remove Individual from Group checkbox
When checked, the manager can remove members from the group on the web.
This only
applies to the Corporate
and Staff Management workflow.
· Identify Group Manager checkbox
When checked, the group manager has the ability to assign another user
to be a group manager, as well as change the existing manager's permissions
from the web.
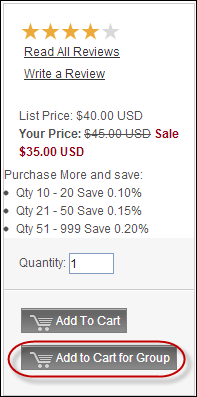
· Place Order checkbox
When checked, the group manager can place orders for members in the group
on the web.
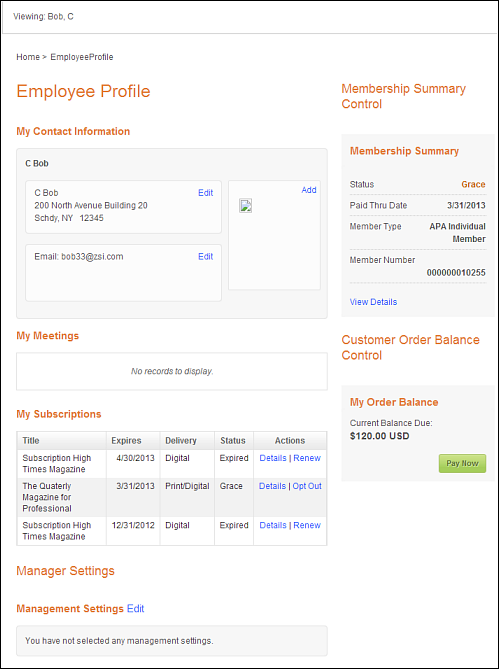
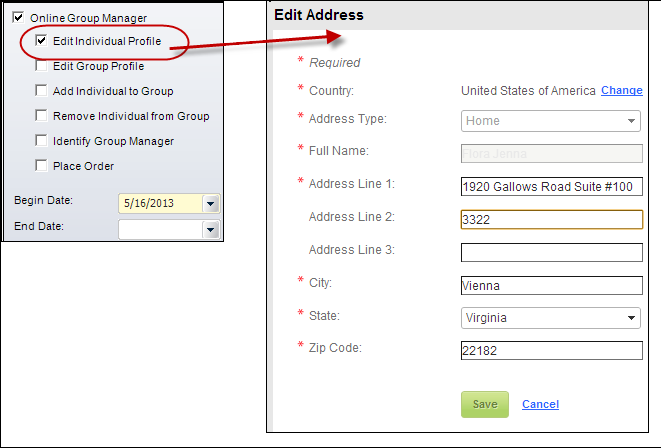
For example, if the Edit Individual Profile field is enabled in the
back office, as highlighted below, on the web, the group manager would
be able to edit a group member's profile, such as his/her contact information.
To add an individual to be a group manager:
For
a video demonstrating how to assign an individual to be a group manager
of a committee, refer to Video
Demo: Assigning an Individual to be a Committee Manager.
1. Before assigning an individual to be a group manager, a committee, chapter (subgroup), or company must be set up for segmentation. Refer to Adding Web Segments for more information.
2. From the Personify360
main toolbar, select Customers and Committees
> CRM360.
The CRM360® screen displays.
3. Click Search to find an existing constituent or click Create New Customer.
Before assigning
a user as a group manager, make sure he/she has a web user ID and password.
If not, create one for him/her. See Viewing
a Constituent's Web Credentials in CRM360 for more information.
4. On the CRM360® screen, from the Background
Information task category, click Segmentation Details.
The Segmentation Control screen displays, as shown below.
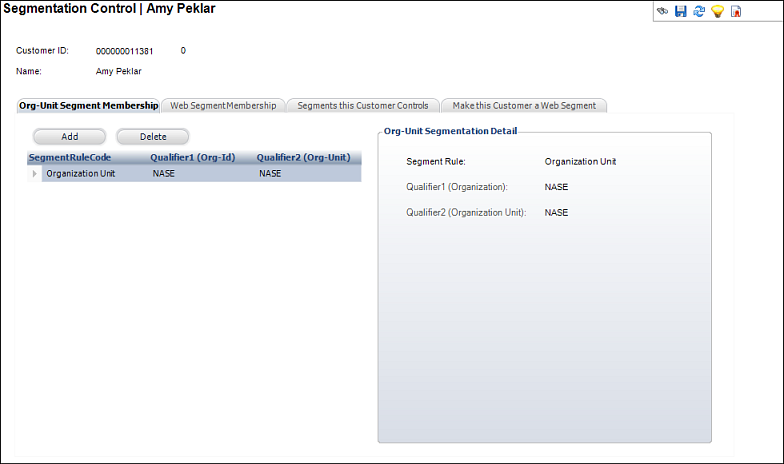
5. Navigate to the Segments this Customer Controls tab.
6. Click
Add.
The Segment Ownership Detail fields are enabled, as shown below.
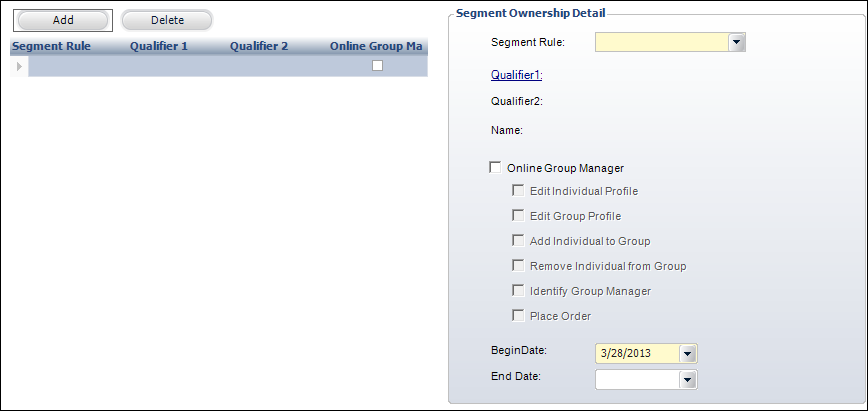
7. Select a Segment Rule from the drop-down.
8. Click
the Qualifier 1 link.
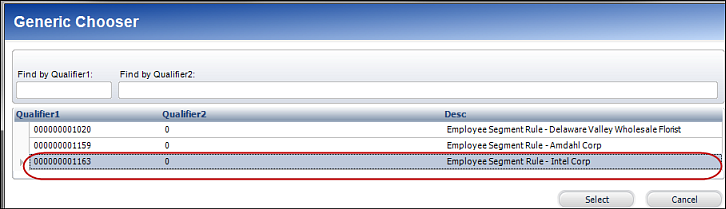
The Generic Chooser window displays.
a. Select
the company, committee, or chapter (subgroup) that you want the individual
to be a group manager of.
The Qualifier 1 and Qualifier
2 fields default to the master customer ID and sub customer ID,
respectively.
b. Check
the Online Group Manager checkbox. If this is
NOT checked, the user will NOT be a group manager.
When checked, the following fields enable:
 Only customers
that have a customer segment where the web segment is enabled, the begin
date is less than or equal to the current date, and the end date is null
or greater than or equal to the current date, is considered an active
group manager.
Only customers
that have a customer segment where the web segment is enabled, the begin
date is less than or equal to the current date, and the end date is null
or greater than or equal to the current date, is considered an active
group manager.
· Edit Individual Profile
· Edit Group Profile
· Add Individual to Group Profile
· Remove Individual from Group
· Identify Group Manager
· Place Order
c. Select the Begin Date from the drop-down.
d. Select the End Date from the drop-down.
e. Click Save.
Screen Element |
Description |
|---|---|
Segments this Customer Controls |
|
Segment Rule |
Drop-down. Is used to restrict group managers from records they can view. Select one of the following options: · "Subgroup Segment Rule" if in Step 1 you created a Subgroup Segment rule · "Committee Segment Rule" if in Step 1 you created a Committee Segment rule · "Employee Segment Rule" if in Step 1 you created a Company Segment rule
Values in the drop-down are populated based on the codes defined for the non-fixed CUS "SEGMENT_RULE" system type. |
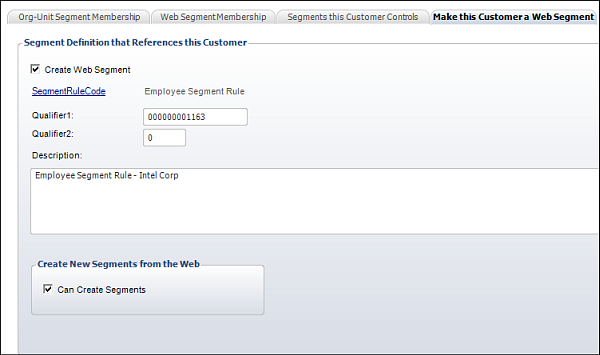
Qualifier 1 and Qualifier 2 |
Text boxes. The Qualifier 1 and Qualifier 2 fields default to the master customer ID and sub customer ID, respectively.
For example, in Step 1 you enabled the company
(employer), Intel Corp, as shown below. |
Online Manager |
Checkbox. When checked, the user becomes a group manager and can manage a segment or group of people on the web. |
Edit Individual Profile |
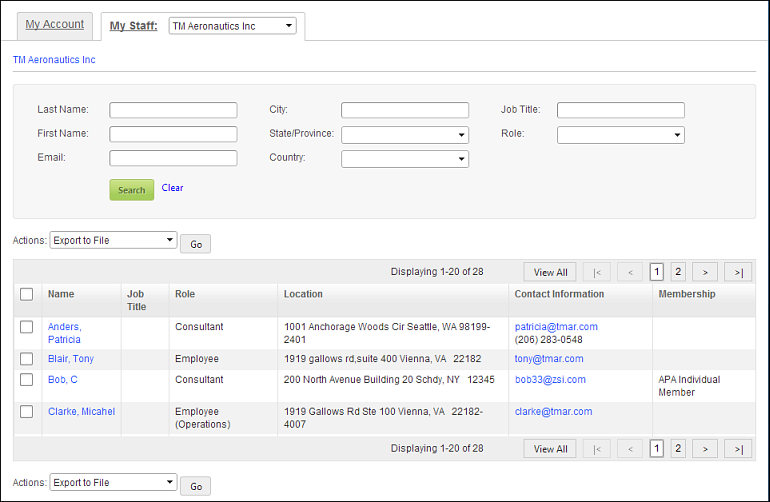
Checkbox. When checked, the group manager can edit individual group members' profiles on the web, as shown below. The information that the group manager can edit is based on the profile controls you drop on this page (e.g., contact information, addresses, emergency contacts, etc.). See Overview: Additional Steps for the Header Control for more information.
|
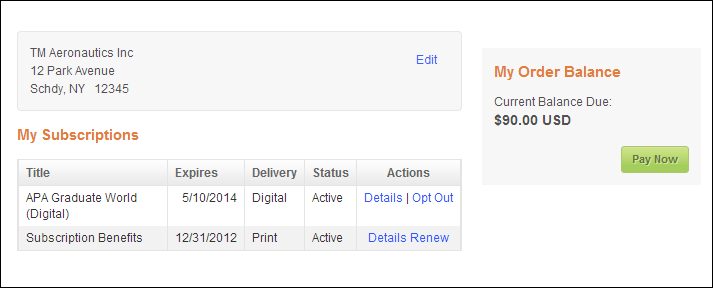
Edit Group Profile |
Checkbox. When checked, the group manager
can edit the group's profile on the web, as shown below. The information
that the group manager can edit is based on the profile controls
you drop on the group profile section (e.g., contact information,
addresses, pay open orders, etc.). See Overview:
Additional Steps for the Header Control for more information.
|
Add Individual to Group |
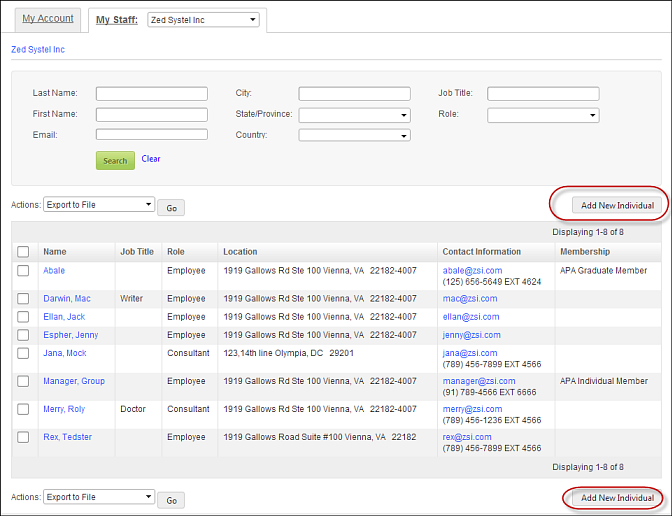
Checkbox. When checked, the group manager can add new individuals to the group on the web, as shown below. In addition to this flag being checked in the back office, a separate page needs to be created that allows the group manager to add a new individual to his/her roster. For more information, refer to the Roster control section.
|
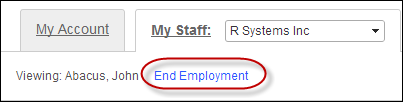
Remove Individual from Group |
Checkbox. When checked, the group manager can remove individuals from the group on the web, as shown below. As of 7.5.2, if a staff manager enters in the Effective Date field the employees' end date as the same date as his/her start date, the employee's record is NOT deleted from the CUS_RELATIONSHIP table in the back office. In addition, as of 7.5.2, when a staff manager sets a group member's end employment date as "today" and clicks End Relationship, he/she is redirected to the "Roster page". Here, the group member still displays on the roster until tomorrow, because the relationship is still considered valid.
|
Identify Group Manager |
Checkbox. When checked, the group manager has the ability to assign another individual in his/her roster group manager permissions, as well as change the existing manager's permissions from the web, as shown below. See Overview: Settings Control for more information.
|
Place Order |
Checkbox. When checked, the group manager can place orders for individuals in the group on the web, as shown below. See Overview: Buy for Group Control for more information.
|
Begin Date |
Drop-down. Select the date that you want segmentation to begin. This field defaults to the current date when record is created. |
End Date |
Drop-down. Select the date that you want segmentation to end. This is manually updated. This field is not required for the group manager. |
See Also:
· Customer Segmentation on the Web
· Viewing Web Segment Membership
 The options populated in this
window are based on the committees and/or companies you set up
for segmentation in Step 1. If the committee, chapter (subgroup),
or company you are looking for does not populate the Generic Chooser
window, you must configure it for segmentation.
The options populated in this
window are based on the committees and/or companies you set up
for segmentation in Step 1. If the committee, chapter (subgroup),
or company you are looking for does not populate the Generic Chooser
window, you must configure it for segmentation.