 As
of 7.6.1, you can also define alternative text for images that display
on the Product Detail
and Meeting
Detail controls. For more information, please see Adding
Inventoried Product Online Store Listing Images.
As
of 7.6.1, you can also define alternative text for images that display
on the Product Detail
and Meeting
Detail controls. For more information, please see Adding
Inventoried Product Online Store Listing Images.As of 7.6.0, enhancements have been made to the Personify360 .NET web controls to support Search Engine Optimization (SEO). SEO is the process of affecting the visibility of a website or a web page in a search engine's "natural" or unpaid ("organic") search results. In general, the earlier (or higher ranked on the search results page), and more frequently a site appears in the search results list, the more visitors it will receive from the search engine's users.
On-page optimization refers to factors that have an effect on your website or web page listing in natural search results. These factors are controlled by you or by coding on your page. As of 7.6.1, you can define on-page factors on a inventoried product.
As
of 7.6.1, you can also define alternative text for images that display
on the Product Detail
and Meeting
Detail controls. For more information, please see Adding
Inventoried Product Online Store Listing Images.
To define search engine optimization:
1. From the Personify360
main toolbar, select Products > Product Central.
The Product Maintenance search screen displays.
2. Click Search to find a product or click Create New Product.
3. From the
eBusiness Links task category, click Search
Engine Optimization.
The SEO control screen displays, as shown below.
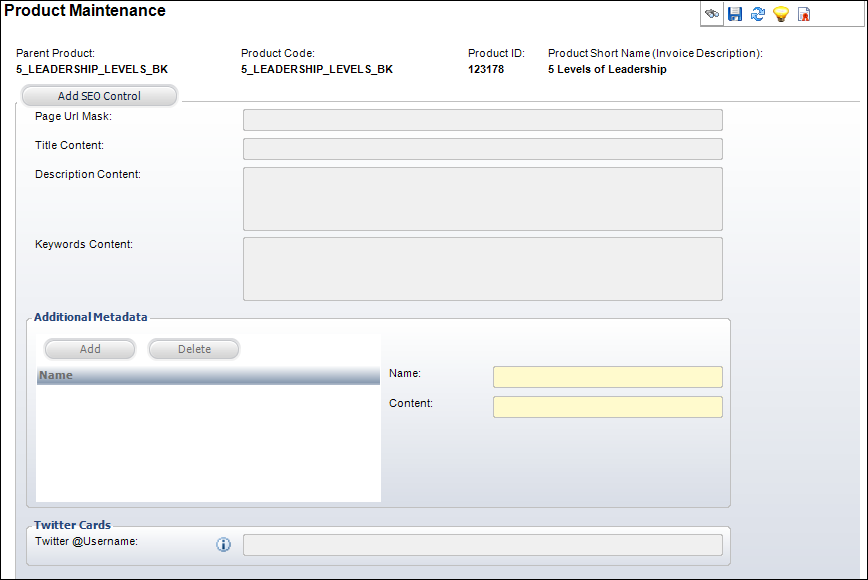
4. Click Add SEO Control.
5. If necessary,
enter a Page Url Mask.
For more information, please see User
Defined Page URL Mask.
 In order
to use this field on the SEO control, the use of Friendly URLs must be
enabled and set up. For more information, please see Derived
On-Page Factors.
In order
to use this field on the SEO control, the use of Friendly URLs must be
enabled and set up. For more information, please see Derived
On-Page Factors.
6. If necessary,
enter Title Content.
For more information, please see User
Defined Metadata Title.
7. If necessary,
enter Description Content.
For more information, please see User
Defined Metadata Description.
8. If necessary,
enter Keywords Content.
For more information, please see User
Defined Metadata Keywords.
9. From the Additional Metadata section:
a. Click Add.
b. Enter the Name.
c. Enter the Content.
For more information, please see User Defined Additional Metadata.
10. From the
Twitter Cards section, enter the
Twitter @Username, if necessary.
For more information, please see Twitter
Card Attributes.