Configuring the Web Settings for the BusinessObjects Report Control
The section below details how to set up the Personify Report control
on your website. The instructions are intended for a user with web admin/host
privileges. In addition, this is a standalone control, which means that
it has its own individual value, does not require another control in order
for it to function, as well as it is not part of a specific workflow on
the web. For more information, refer to the Standalone
Controls section.
 For
every report that you want a web user to be able to run, you will have
to create a new page and configure the Report control for the report you
want to run on that page. For example, if you want a logged in web user
to be able to run five different reports on your website, you will have
to create five different pages and configure the control five different
times on each page. As a best practice, the Report control should be the
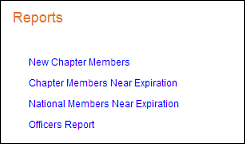
ONLY control on a page. In addition, as a best practice, create a landing
page that has links to the separate pages that contain the different reports,
as shown below. If you are using DNN, you can use the Links Module. See
Configuring the Links Module
for more information.
For
every report that you want a web user to be able to run, you will have
to create a new page and configure the Report control for the report you
want to run on that page. For example, if you want a logged in web user
to be able to run five different reports on your website, you will have
to create five different pages and configure the control five different
times on each page. As a best practice, the Report control should be the
ONLY control on a page. In addition, as a best practice, create a landing
page that has links to the separate pages that contain the different reports,
as shown below. If you are using DNN, you can use the Links Module. See
Configuring the Links Module
for more information.
Prerequisite
In order for a user to view/run reports on the web a system administrator
would have to perform the following:
1. Deploy
the reports in the BusinessObjects server and on the web.
The Crystal and Webi reports must be already set up and deployed before
configuring this control. If you are configuring this control, you should
have a thorough understanding of the Crystal and Webi report parameters,
because these are the parameters the control uses to call BusinessObjects
to render the report. You MUST have a proper named user license in order
to be able to view the report(s) online. See
Logic Behind the Report Control for more information.
2. Create a page. See
Creating a Page for more information.
3. Drop the Report control
on that page. See Adding a
.NET Control for more information.
4. Configure the Report
control for one of the following desired base Group Management reports
or for a report you created in BO:
· Past
Employee Roster - CSM1001
· Individual
Activity Profile - CSM1002
· Group
Activity Profile - CSM1003
· Past
Committee Member Roster- CSM1006
· Chapter
Members Nearing Expiration -MBR1012
· National
Members Nearing Expiration - MBR1013
· New
Chapter Members -MBR1014
· Officers
- MBR1015
· Analysis
of Chapter Health - MBR1016
5. Make sure the user
has been logged into Data Analyzer and that the password is synced between
the Data Analyzer and the web. See the Installation Guide BusinessObjects
Upgrade Step 5: Verifying Business Objects Reports will Display on the
web for more information.
6. Test and review the
report as a web user on your website.
 Chrome is NOT supported by Business Objects
at this time.
Chrome is NOT supported by Business Objects
at this time.
Control Settings
To configure the web settings for the Report control:
1. Add the
"PersonifyBoReport" control to the desired page. For more information,
please see Adding a Page on Your
Site Using DNN.
The Control Settings for this control display, as shown below.

 Text fields
have a 250 character limit.
Text fields
have a 250 character limit.
2. If
necessary, in the Additional
CSS Class for Control field, enter the CSS class.
This option allows you to add additional layout to the skin by developing
a new DOTNETNUKE style, which requires an advanced understanding of HTML
and CSS.
3. If
necessary, select
or create a new Error Message.
The error message will display on the control for the action that was being
performed at the time of the error.
a. If left
blank, the default error message, "An error occurred while performing
[Insert Action]. If the problem persists, please contact the site administrator",
will display. [Insert Action] will be substituted with the action the
control was performing at the time of the error.
b. If you
wish to change the default error message, customize it with a PWF Parameter.
See Setting up PWF Parameters
to learn more about these parameters and why your website's redirect URLs
are managed there.
 You do not
need to enter values in all the Param Key and Value fields listed below
in order to run a report on the web.
You do not
need to enter values in all the Param Key and Value fields listed below
in order to run a report on the web.
4. In the
Param 01: Key field, enter a "key"
(e.g., "GroupMasterID").
This is the report parameter key.
5. In the
Param 01: Value field, enter a "value"
(e.g., "pb_AFMRosterBag%$%GroupMCID").
This is the report parameter value.
6. In the
Param 02: Key field, enter a "key".
This is the report parameter key.
7. In the
Param 02: Value field, enter a "value".
This is the report parameter value.
8. In the
Param 03: Key field, enter a "key".
This is the report parameter key.
9. In the
Param 03: Value field, enter a "value".
This is the report parameter value.
10. In the
Param 04: Key field, enter a "key".
This is the report parameter key.
11. In the
Param 04: Value field, enter a "value".
This is the report parameter value.
12. In the
Param 05: Key field, enter a "key".
This is the report parameter key.
13. In the
Param 05: Value field, enter a "value".
This is the report parameter value.
14. In the
Param 06: Key field, enter a "key".
This is the report parameter key.
15. In the
Param 06: Value field, enter a "value".
This is the report parameter value.
16. In the
Param 07: Key field, enter a "key".
This is the report parameter key.
17. In the
Param 07: Value field, enter a "value".
This is the report parameter value.
18. In the
Param 08: Key field, enter a "key".
This is the report parameter key.
19. In the
Param 08: Value field, enter a "value".
This is the report parameter value.
20. In the
Param 09: Key field, enter a "key".
This is the report parameter key.
21. In the
Param 09: Value field, enter a "value".
This is the report parameter value.
22. In the
Param 10: Key field, enter a "key".
This is the report parameter key.
23. In the
Param 10: Value field, enter a "value".
This is the report parameter value.
24. In the
Param 11: Key field, enter a "key".
This is the report parameter key.
25. In the
Param 11: Value field, enter a "value".
This is the report parameter value.
26. In the
Param 12: Key field, enter a "key".
This is the report parameter key.
27. In the
Param 12: Value field, enter a "value".
This is the report parameter value.
28. In the
Param 13: Key field, enter a "key".
This is the report parameter key.
29. In the
Param 13: Value field, enter a "value".
This is the report parameter value.
30. In the
Param 14: Key field, enter a "key".
This is the report parameter key.
31. In the
Param 14: Value field, enter a "value".
This is the report parameter value.
32. In the
Param 15: Key field, enter a "key".
This is the report parameter key.
33. In the
Param 15: Value field, enter a "value".
This is the report parameter value.
34. In the
Parameters to Exclude field, enter the keys
that you do not want to include as parameters to generate the URL.
This list can contain comma separated values. See BusinessObjects
for more information.
35. In the
Report Name Key field, enter the query string
parameter name, which contains the report name to be replaced with the
web control setting "Report Name Value".
36. In the
Report Name Value field, enter a "Crystal
or Webi report name".
The "Report Name Value" field tells BusinessObjects the type
of report you want to render. If you do NOT know this value, the report
will not run and no results will be rendered. See BusinessObjects
for more information.
37. From the
Report Type drop-down, select the type of report
you want to run.
This will allow you to run other types of reports using this control (e.g.,
Webi or Crystal).
· Webi
HTML reports opens on the same page (i.e., Analysis
of Chapter Health - MBR1011 )
· Webi
PDF reports opens on a separate page (e.g., Officers-
MBR1015)
· Crystal
reports opens on a separate page (e.g., Past
Employee Roster - CSM1001 )
38. Click
Save.