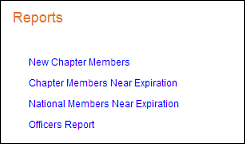
The Links module allows you to create links to different pages on your
e-Business website, as shown below.
 Personify's
.NET controls do NOT need any of the DNN system controls to work; this
control is specific to DNN. See Using
DNN as Your CMS Platform for more information.
Personify's
.NET controls do NOT need any of the DNN system controls to work; this
control is specific to DNN. See Using
DNN as Your CMS Platform for more information.
To configure the Links module:
1. Log into your site as host.
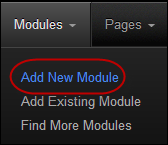
2. On the Control Bar,
from the Modules drop-down, select "Add New Module",
as highlighted below.
A list of all the modules displays.
3. Select the Links
module, and drag it to where you want it to be located on your
page, as shown below.

The Links module displays on your page, as shown below.

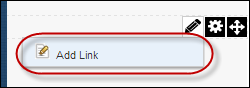
4. From the pencil icon,
select Add Link, as highlighted below.
The Edit Links screen displays, as shown below.
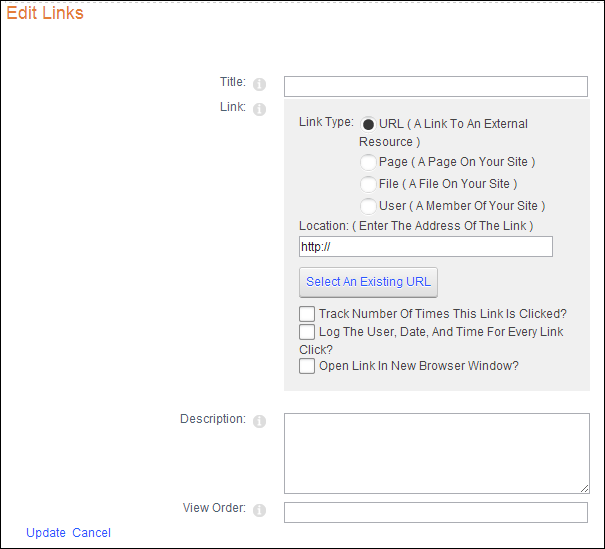
5. In the Title field, enter the name of the link.
6. In the Link section,
select the Page (A Page On Your Site) radio button as the Link
Type, as highlighted below.
.png)
7. From the Select a Web Page from Your Site drop-down, select the page that you want to display in the link module.
8. If necessary, check the Track Number Of Times This Link Is Clicked? checkbox.
9. If necessary,check the Log The User, Date, And Time For Every Link Click? checkbox.
10. If necessary,check the Open Link In New Browser Window? checkbox.
11. If necessary, in the Description field, enter a description of the link.
12. If necessary, in the View Order field, enter a number representing the position on the list for this link.
13. Click Update.
The steps
described above need to be repeated for every link that you want to display
on a page.