This
step only displays for the Register
Someone Else workflow. For the Register
Myself workflow, the Primary
Contact Information step displays instead.
This
step only displays for the Register
Someone Else workflow. For the Register
Myself workflow, the Primary
Contact Information step displays instead.This
step only displays for the Register
Someone Else workflow. For the Register
Myself workflow, the Primary
Contact Information step displays instead.
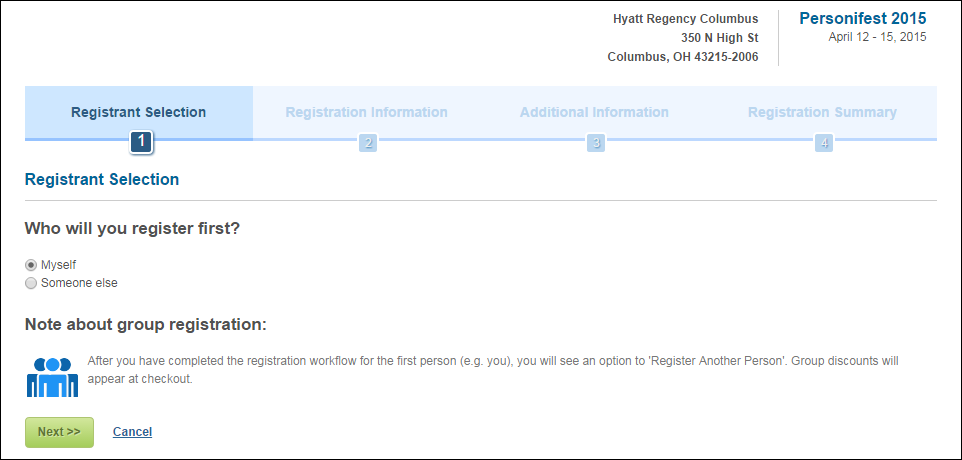
After logging in, when a web user clicks Register Someone Else from the Meeting Detail page, he/she will be directed to the Registrant Selection step, as shown below. From there, web users can select either the Myself (see below) or Someone else (see below) radio button. The radio button they select will determine their next step in the meeting registration workflow. Once the web user completes the meeting registration workflow, he/she can click Register Someone Else to "loop" back through the meeting registration workflow. The Register Someone Else workflow will “loop” through each registrant, one at a time, until the web user finishes registering all desired individuals for the meeting.
For more information on the back office settings required to display the Registration Selection step in the meeting registration workflow, please see Configuring the Back Office Settings for the Registrant Selection Step. For information on how to set up the Meeting Registration control to display on the web, please see Configuring the Web Settings for the Meeting Registration Control.
 In order for non-mangers to
be able to purchase a meeting product for a group of individuals, the
Allow Registrants to Register Others checkbox
must be checked on
the eBusiness
Control screen in the back office. When checked, the Register
Someone Else button displays
on the Meeting Detail
page and upon clicking this button, the web user will be taken to
the Registrant Selection step.
In order for non-mangers to
be able to purchase a meeting product for a group of individuals, the
Allow Registrants to Register Others checkbox
must be checked on
the eBusiness
Control screen in the back office. When checked, the Register
Someone Else button displays
on the Meeting Detail
page and upon clicking this button, the web user will be taken to
the Registrant Selection step.
 The
image and text are hard coded in the Meeting Registration control, as
highlighted below. To change the image and/or text, navigate to the following
location and modify this piece of code in the markup:
The
image and text are hard coded in the Meeting Registration control, as
highlighted below. To change the image and/or text, navigate to the following
location and modify this piece of code in the markup:
<p
class="workflow-note
clearfix">
<img id="imgWorkflowNote"
src="~/images/group-registration-icon.png"
alt="Group Registration"
runat="server" />After you have completed the registration workflow for
the first person, you will see an option to 'Register Another Person'.
Group discounts will appear at checkout.
</p>
In the above markup, the path is "images" folder from the root
of the web site.

If the web user selects the Myself radio button and clicks Next, the Primary Contact Information displays, as shown below.
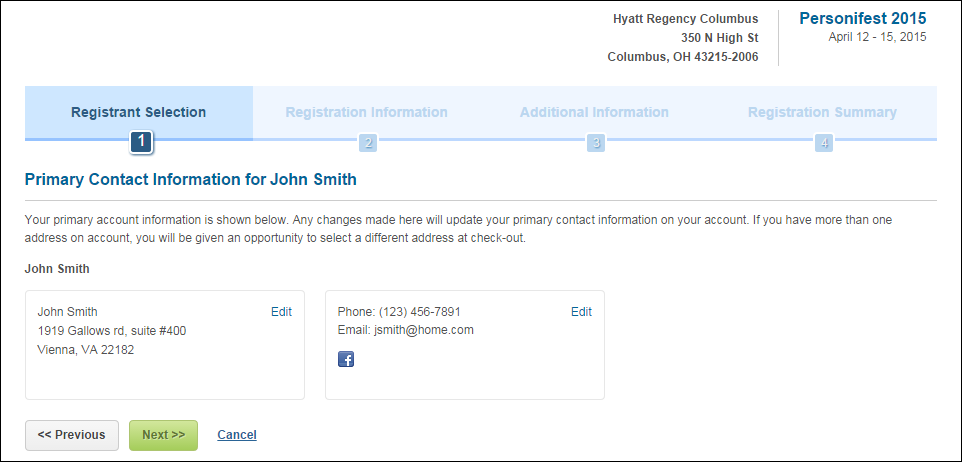
If
the Display Registrant Contact Info
checkbox is NOT checked on
the eBusiness
Control screen in the back office, the web user's Primary Contact
Information will NOT display and the web user will proceed to the Registration
Information step.
After completing the meeting registration for themselves, he/she can click Register Someone Else in order to register another individual for the meeting. After he/she registers himself/herself for a meeting and clicks Register Someone Else, the Myself radio button no longer displays on the Registrant Selection step. If the web user registered someone else before registering himself/herself for a meeting and clicked Register Someone Else, both the Myself and Someone else radio buttons display.
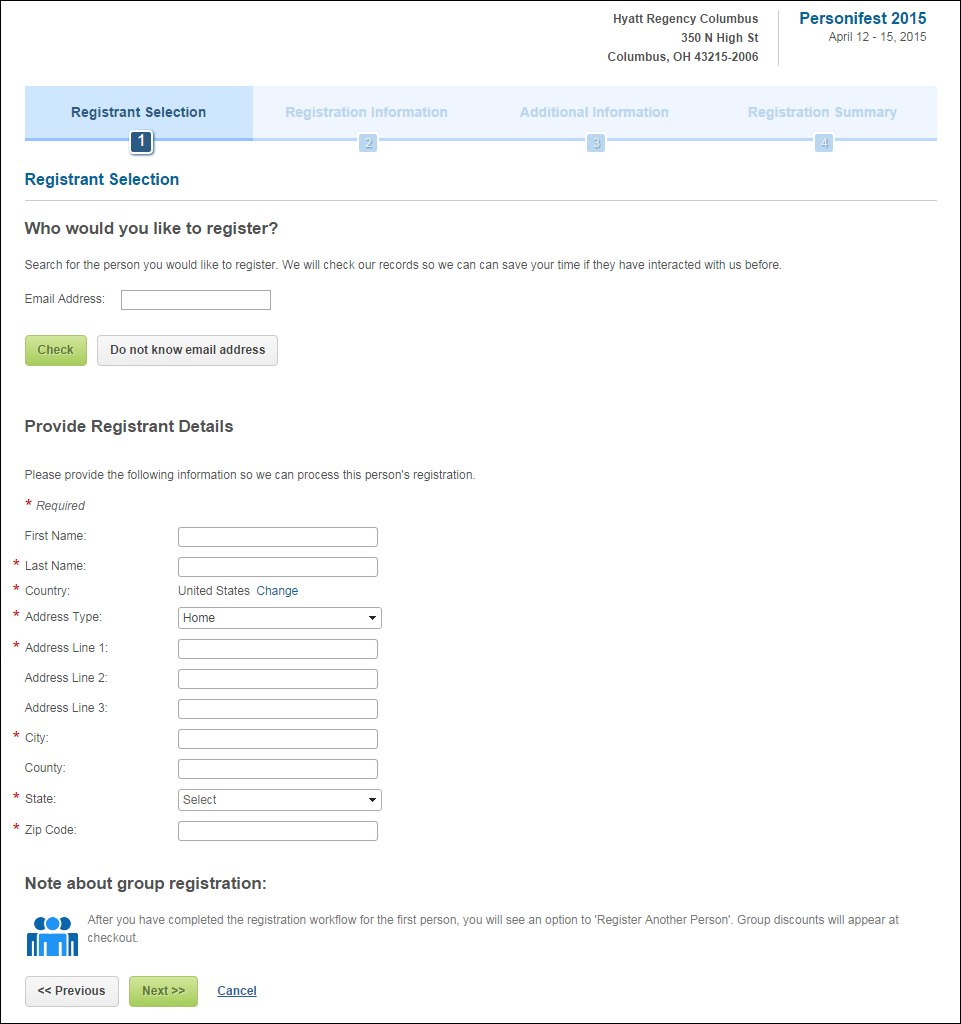
If the web user selects the Someone else radio button and clicks Next, he/she will be given the option to search for the registrant based on his/her email address. Depending on whether or not the web user knows the registrant's email address determines the web user's next step. To see the next step based on whether or not the web user knows the registrant's email address, as well as if the registrant is already registered for the meeting, refer to:
· Check Registrant's Email Address
· Already Registered for the Meeting
For
privacy reasons, the registrant's contact information (i.e., address,
phone, email, etc.) is not displayed to the web user completing the meeting
registration.
· Check Registrant's Email Address
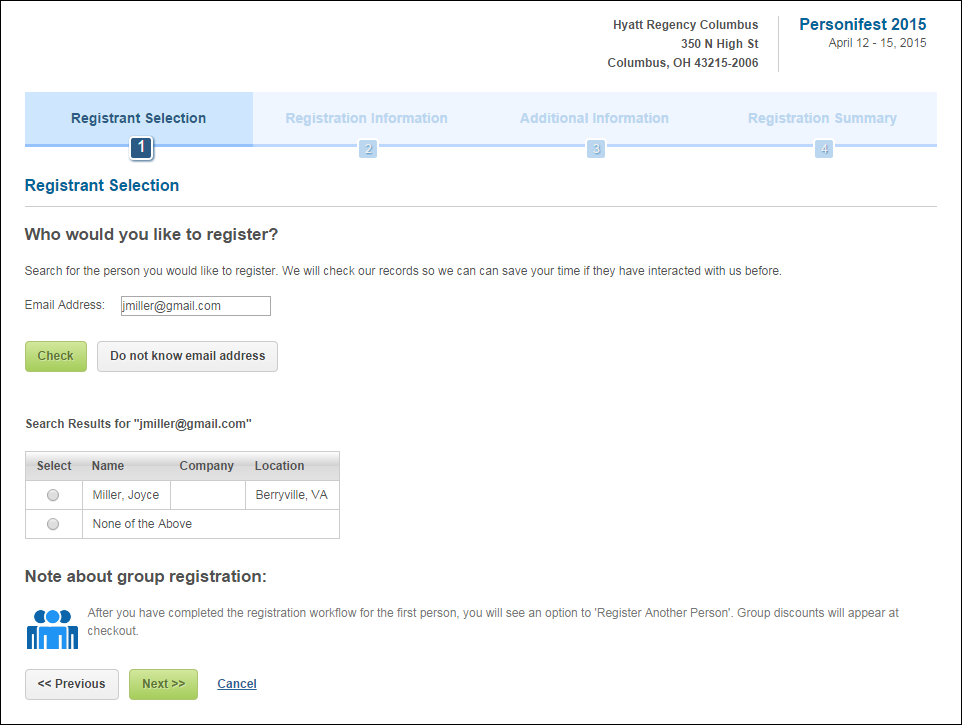
If web users know the email address
of the individual they are registering for the meeting, they can enter
it in the Email Address field. The system will check to see if the
email address is in the database. If the email address is in the database,
the system will display a list of constituents with that email address,
as shown below.
If the email address (ANY email address,
not just primary) is in the database, but the matched email is not for
the desired constituent, the web user can select the None of the
Above radio button and the system will
display data entry fields for the web user to provide the registrant's
information, as shown below. Please note that if you select this option,
the constituent will be created in the database WITHOUT an email address,
regardless of how the CHECKDUPLEMAIL application
parameter is setup.
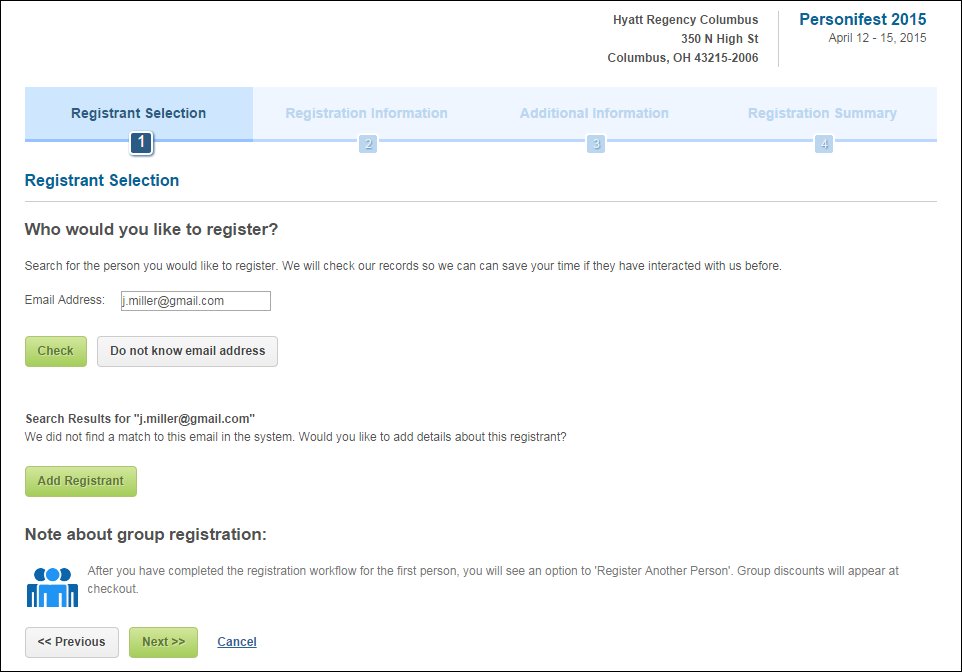
If the email address (ANY email address,
not just primary) is NOT in the database, the system will display that
no matches were found, as shown below. The web user can then click
Add Registrant to be redirected to
the screen where he/she can provide the registrant's information. Please
note that if you select this option, the email address you entered in
the Email Address field and checked for in the database will be displayed
as part of the contact information fields when adding the constituent's
information and will be read-only.
· Do Not Know Email
Address
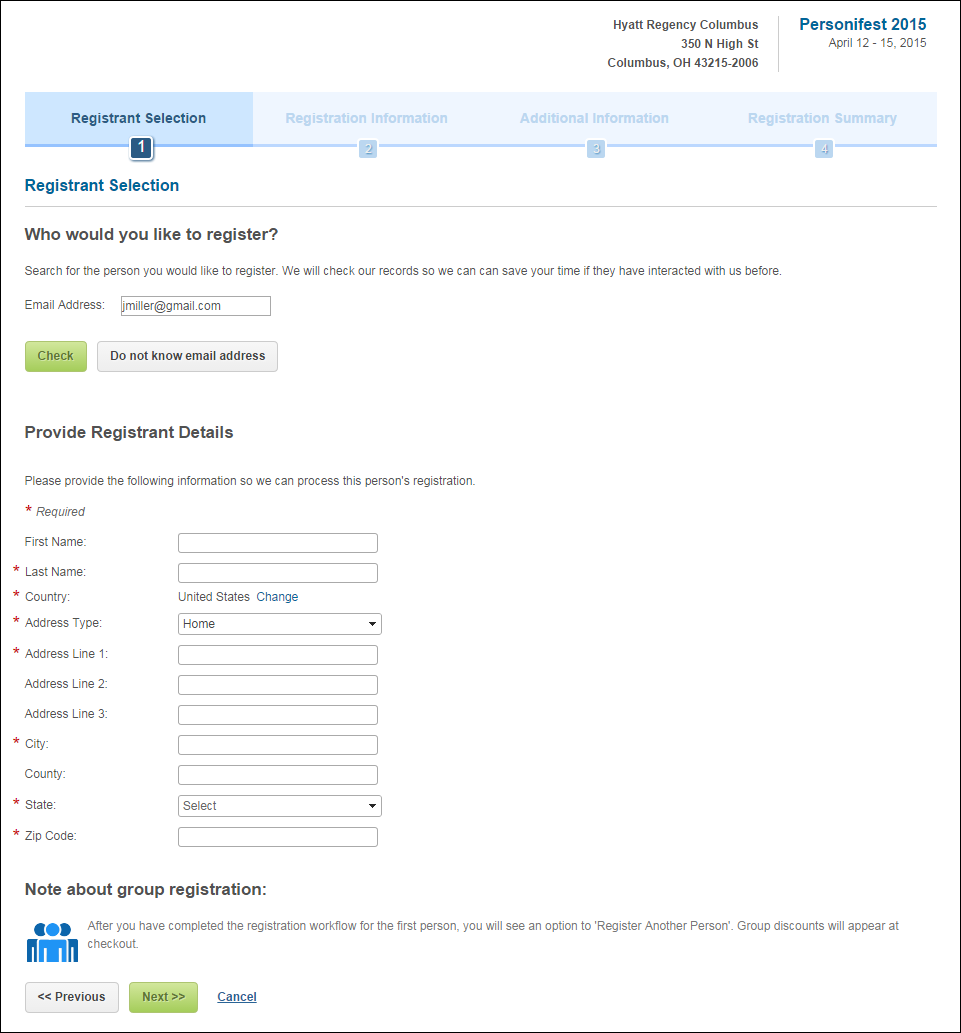
If the web user does not know the email address of the person he/she is
trying to register the meeting for, the web user can click Do
not know email address. The system will display data entry fields
for the web user to provide the registrant's information, as shown below.
The web user can then click Next
to begin the standard meeting registration process for the registrant.
· Already Registered
for the Meeting
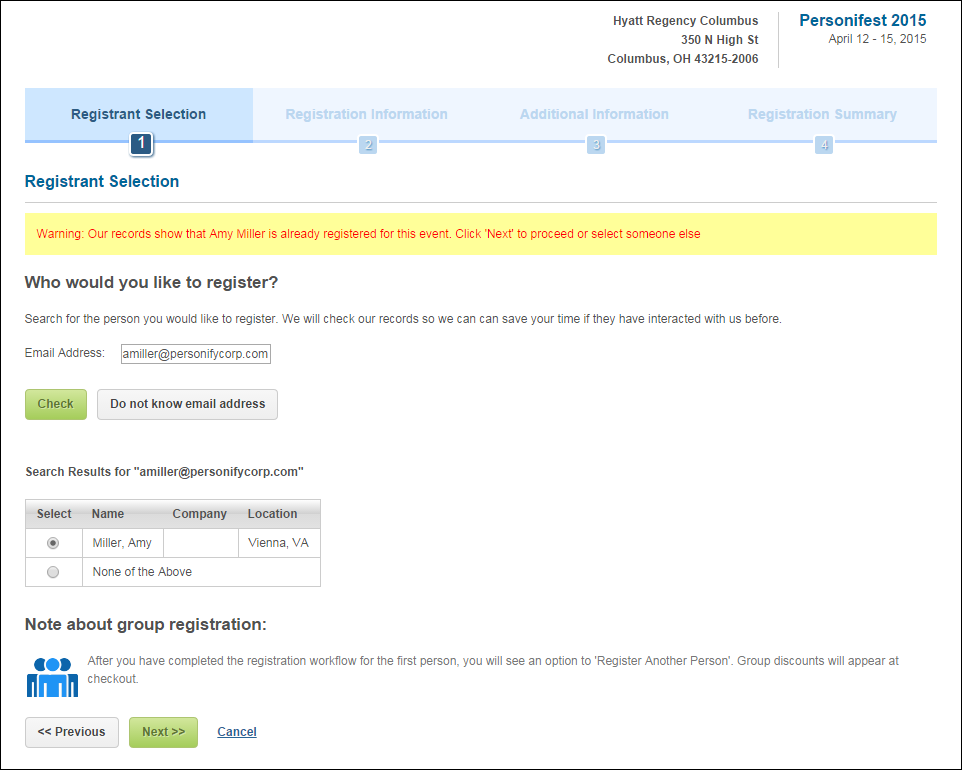
When registering someone else for a meeting, there is a chance that he/she
may have already registered for the meeting. If the user is already registered
for the meeting, the system checks to see if this event allows unlimited
registrations per person on the Max
Registration per Registrant field on the Capacity
Definition screen in the back office. If a 0 value is not entered
in this field, the system checks the ORDER_DETAIL for an active registration
for the line ship-to customer. If an order exists for the individual,
a message displays similar to what is shown below.
 If you are
trying to register someone else for a meeting and Allow
Registration Time Conflicts checkbox is unchecked on the General
Setup screen in the back office, the system will not check to make
sure that the web user is not registered for a different meeting that
occurs at the same time. However, while selecting the sessions for someone
else and this checkbox is unchecked, the system will not allow you to
register for the sessions that occur at the same time because of the time
conflicts.
If you are
trying to register someone else for a meeting and Allow
Registration Time Conflicts checkbox is unchecked on the General
Setup screen in the back office, the system will not check to make
sure that the web user is not registered for a different meeting that
occurs at the same time. However, while selecting the sessions for someone
else and this checkbox is unchecked, the system will not allow you to
register for the sessions that occur at the same time because of the time
conflicts.
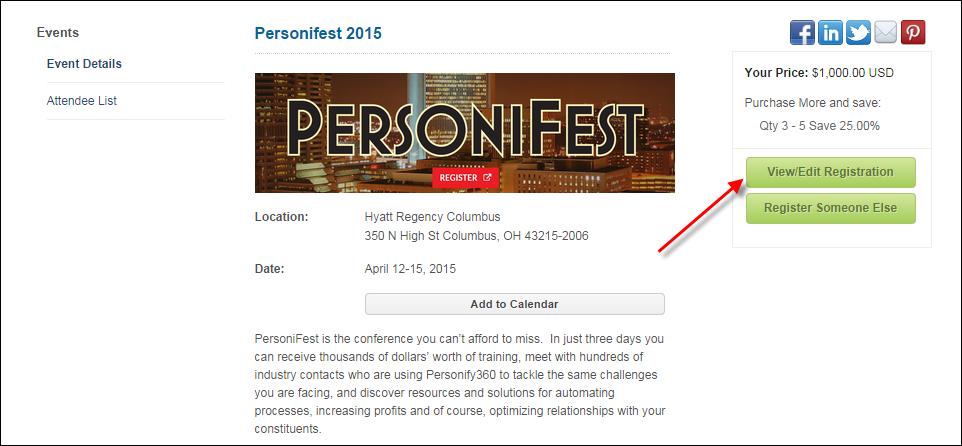
If the web user is already registered for the meeting and logged into the
website, the Meeting
Detail page displays similar to what is shown below. He/she can click
the View/Edit Registration button,
as highlighted below, to be redirected to the Registration
Summary step, where he/she can add details, sessions, badge information,
etc. He/she can also click the Register
Someone Else button to register other individuals for the meeting.