Viewing a Constituent's Activities and Contact Tracking Records in CRM360®
The Activity and Contact Tracking screen gives you an overall view of all communication with a constituent. From the Activity and Contact Tracking screen, you can track certain events that pertain to a constituent in Personify. These fall into the following two general categories: events that are auto-created by Personify (activities) and those that are manually created by staff (contact tracking).
Contact tracking records are created when staff needs to log a phone call, save the contents of a constituent email, note that a fax was sent, and etc. These are entered on a case-by-case basis at the discretion of staff. Typically, organizations have policies in place to dictate when a contact tracking record should be created (rather than jotting notes onto a notepad or saving them elsewhere). The benefit of having these notes in a standard place and format is that clients can report on this data. For instance, how many calls were received per topic, how many touch points have we had this year with this person/company, etc.
 In addition to CRM360, you can search across all constituents for contact tracking records from the Contact Tracking screen. This screen is very similar to the list described here, but is used by each user to manage their personal workload, or to search for all records with a particular topic and learn how prevalent a request is, or how other staff members resolved a type of situation. For more information, please see Viewing Contact Tracking Records in Contact Tracking.
To view activity and contact information:
1. In CRM360, from the Background Information task category, click Activity and Contact Tracking.
The Activity and Contact Tracking screen displays, as shown below. In the new CRM360 screen, all of these records are listed in the same sequential list (as highlighted below) so you get a complete sense for what has happened with a constituent.
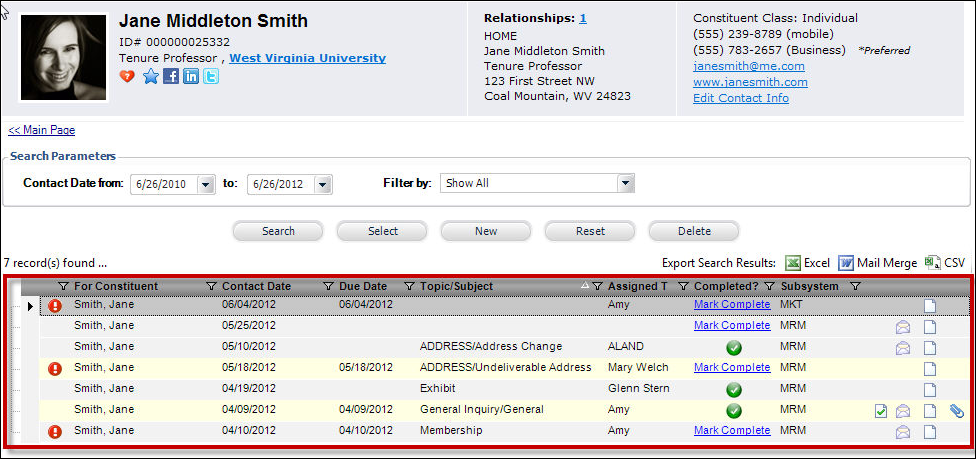
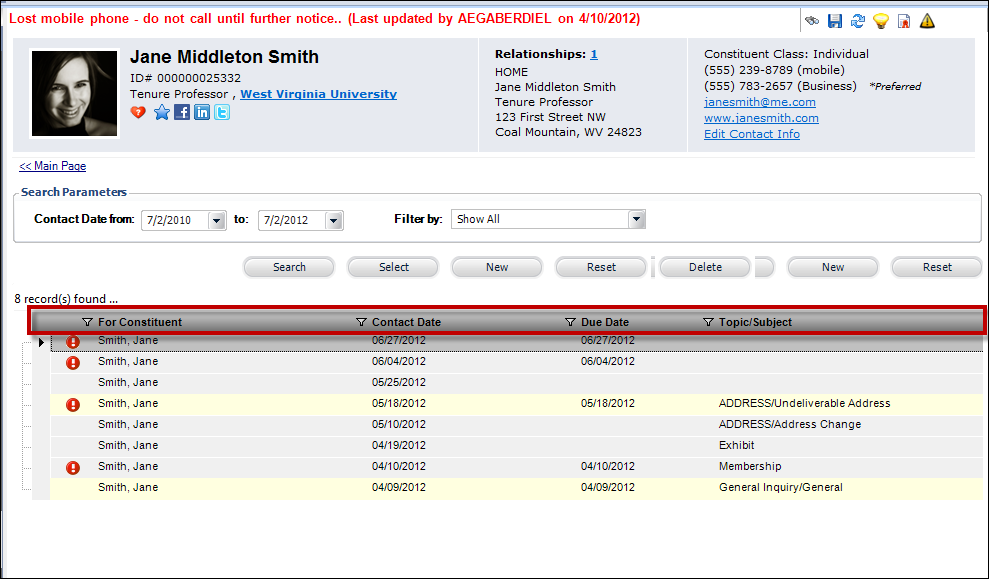
2. You can filter out items that are not of interest, if desired, using column header filters, as highlighted in figure below.
3. When you double-click on a contact tracking record, the new detail screen opens (see "Contact Tracking Details" below for more information). Double-clicking on an activity record opens the Activities screen (which provides less detail than contact tracking).
If you select a record in the grid and click Delete, the system will display a confirmation message asking if you want to permanently delete the record. Please keep in mind that once a record is deleted, it cannot be retrieved without getting it from a backup database. Delete is offered as a way to correct mistakes, but should be used rarely so as much history as possible is preserved. Deleting a contact tracking record or activity will also remove it from the Activities tab in the Latest Interactions section on the Main Page.
4. Click New to create a new contact tracking record. For more information, please see Adding a Contact Tracking Record to a Constituent's Record in CRM360.
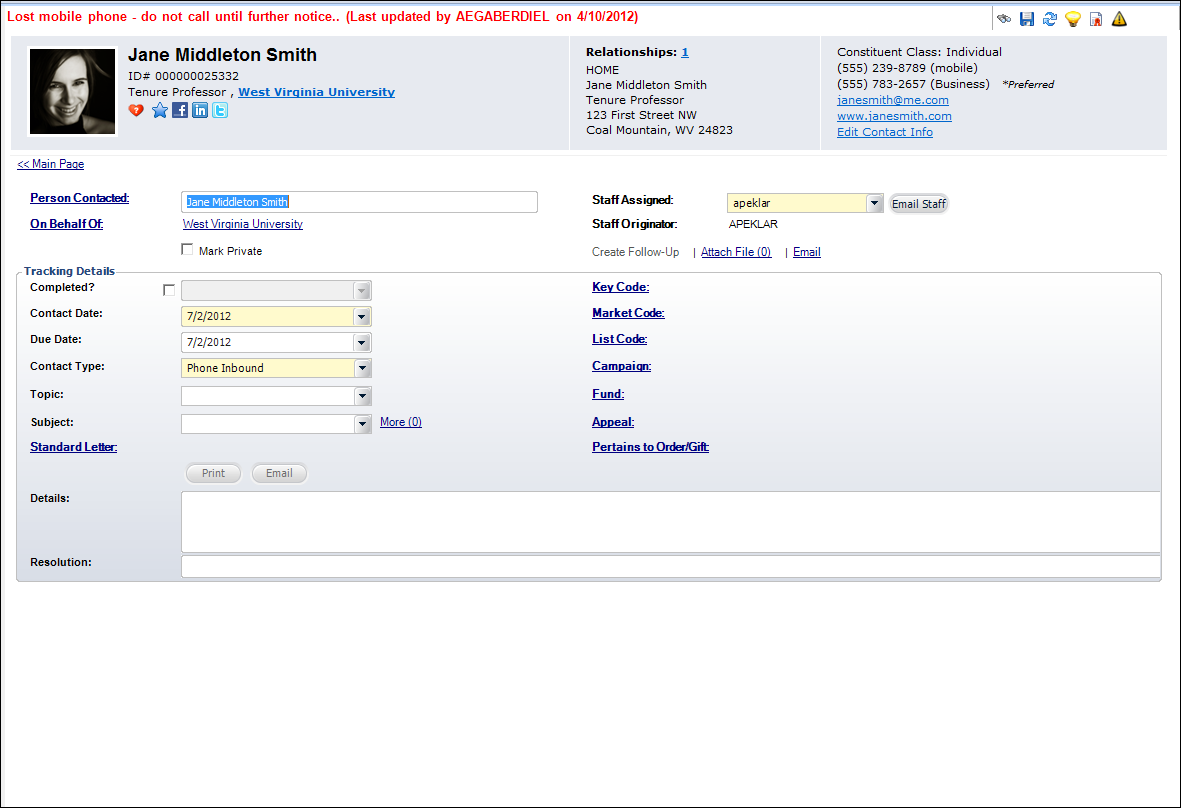
The new Contact Tracking record screen displays, as shown below.
Contact Tracking Details
When you create a new contact tracking record or double-click an existing contact tracking record in the records grid on the Activity and Contact Tracking screen, the detail screen opens with more information about the contact tracking record, as highlighted below.
Depending on the type of record, this screen may appear different. In the image above, a contact tracking record is displayed.
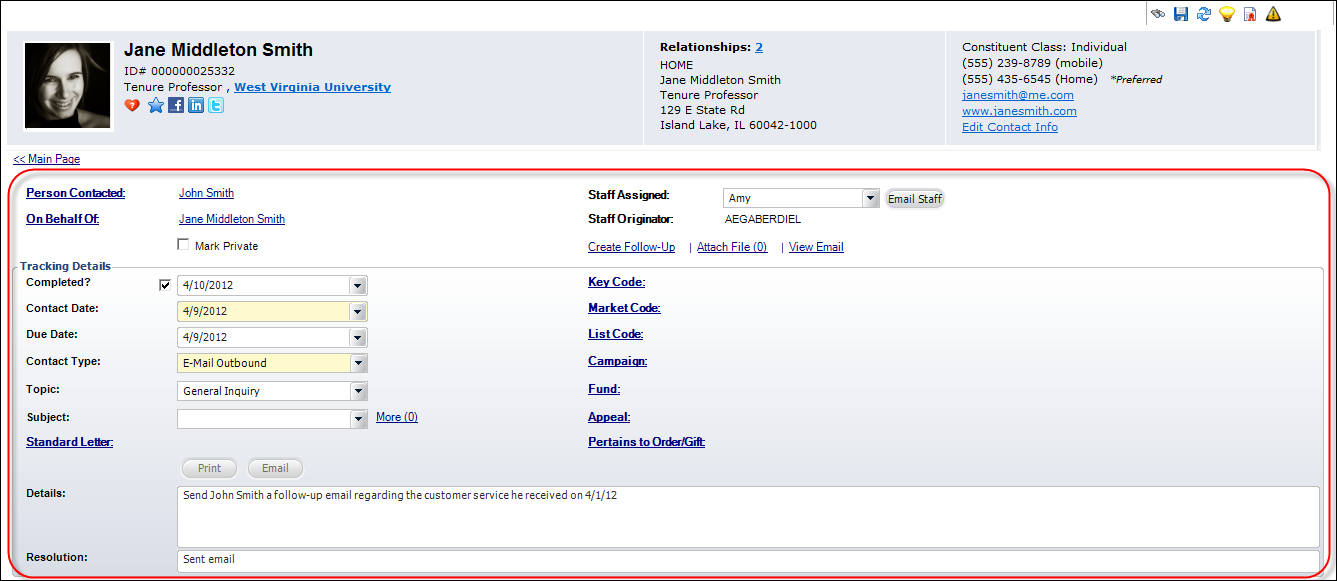
You can capture details and interact with this screen in numerous ways. The following tasks can be accomplished at the contact tracking record detail level from the links highlighted in the image below:
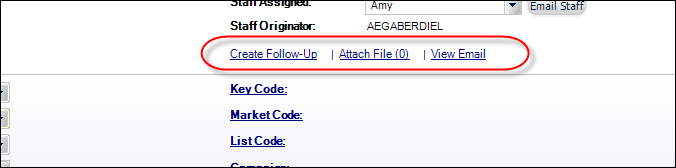
· Create Follow-Up: click this link to create a follow-up record for this contact tracking record. The screen will refresh and display in add mode, with data entry fields. Some fields will default for the new record, but can be changed. Note that the "Create Follow-Up" link will be present on parent AND follow-up records. If you select this action while on a follow-up record it will simply create another follow-up for that parent. (There is no additional tier in the data structure – just parent and follow-up.)
· Attach File: click this link to open the Attachments window, as shown below. If attachments have been uploaded to this contact tracking record, they will be listed in this window and you can double-click the record to open it. Additionally, you can select the appropriate attachment and click Delete to remove it from this contact tracking record. Please use discretion when deleting, so history is preserved. This action should be reserved for fixing mistakes. Click Browse to add a new attachment to this contact tracking record. Note that the browse window looks for documents by default. If you wish to attach a different type of file (e.g. a spreadsheet or PDF) then you can override this default. The Attach File link will display the number of attachments in parentheses. For example, if a contact tracking record has two attachments, the link will display: Attach File (2).
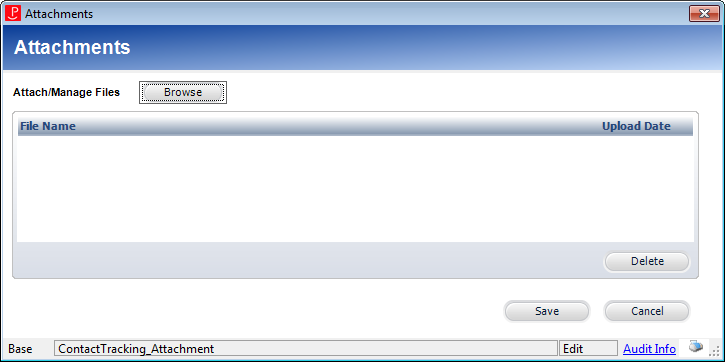
 Attaching file will add the attachment to the contact tracking record, NOT the email. If you want to view an attachment on an email, click the View Email link.
· Email: (not pictured above as a link on the screen in the image above) click this link to open a blank email to this constituent. Please note that if a standard letter has been attached to the contact tracking record, the body of the standard letter will display in the email. The standard letter‘s contents can be removed from the email if you did not intend to email it. Depending on the parameter value for the ENABLE_OUTLOOK parameter, the email will open in Outlook, the Send E-Mail (APP140) screen, or the Outlook Plug-In.
· View Email: if an email has already been sent from this contact tracking record, this link will display instead of the "Email" link discussed above. For more information, please see Opening an Email Attached to a Contact Tracking Record. The system only captures one email per contact tracking record. If you want to reply or forward an existing email or send a new email, it is recommended that you do so from a follow-up record.
As of 7.4.1SP1, if an attachment was included on an email sent from the Outlook Plug-In, when you click the View Email link, the email will open in edit mode in Outlook so you can view the attachment.
See Also:
· Adding a Contact Tracking Record to a Constituent's Record in CRM360
· Creating a Contact Tracking Record for an Anonymous Constituent in CRM360
· Creating a Follow-Up to a Contact Tracking Record in CRM360
· Marking a Contact Tracking Record as Complete in CRM360
· Adding a System Activity to a Constituent's Record in CRM360