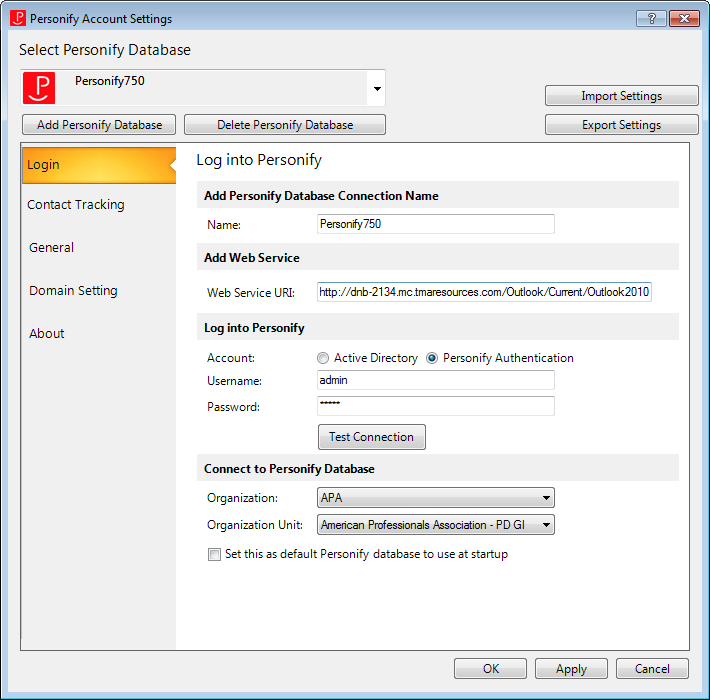
The Account Settings screen displays, as shown below.
The General Options for Working with Personify Outlook Add-In screen allows you to define alert and contact settings.
Some of the configurations on the General Tab screen interact together
and the following table explains what is expected to occur with each combination
of settings when sending an email,
assigning a task, or sending
a meeting request when users click "Save":
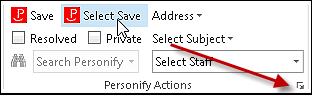
Alternatively, to ignore the default settings, simply click "Select Save" to manually select the email addresses for which to create a contact tracking record. This option can also be used if you only want to create a contact tracking record for a select few individuals on an email, meeting, or task with multiple recipients.
Field and Description |
The following result is expected: |
|
|---|---|---|
Automatically
creates an "anonymous" activity is set to: checkbox. |
Do not
alert me if an email address is not found is set to: checkbox. |
N/A |
Scenario 1: When I communicate with a customer, I need to track that in Personify360, even if their email address is unrecognized. I can find or add a customer record later. My email volume is so high, I do not want to be prompted every time I save. |
||
Y |
Y |
Anonymous activity is automatically created for unmatched emails (respecting CC and BCC rules). User does not receive the "activity not created" prompt. |
Scenario 2: I expect to save most of my customer-related emails in Personify360, so anyone viewing those customer records can see the communications with them. However, I may not want to create an activity record for an email address that does not match a Personify360 customer record (e.g., if no follow-up is necessary). |
||
N |
N |
Anonymous records are not created. User does not receive the "activity not created" prompt. |
Scenario 3: I am not sure if I want to be alerted about unmatched emails or not. |
||
Y |
N |
Anonymous records are created. User does not receive the "activity not created" prompt. |
Scenario 4: I only want to create activity records if the person that contacted me is in Personify360; otherwise, there is no need to save the email message. |
||
N |
Y |
Activity is not saved for unmatched emails. User does not receive the "activity not created" prompt. |
To configure the options on the General tab:
1. From the
Personify360 Outlook Plug-in, select the drop-down arrow, as highlighted
below.
The Account Settings screen displays, as shown below.
2. From the Personify
Account Settings screen, click the General tab.
The General Options for Working with Personify Outlook Add-In screen displays,
as shown below.
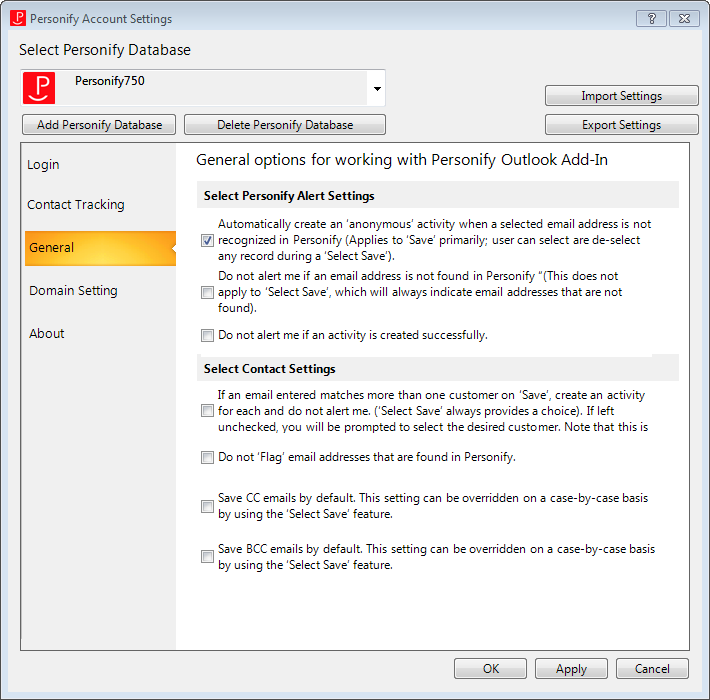
3. From the Select Personify Alert Settings section, check the checkboxes that apply:
· Automatically create an 'anonymous' activity when a selected email address is not recognized in Personify (Applies to 'Save' primarily; user can select or de-select any record during a 'Select Save').
· Do not alert if an email address is not found in Personify (This does not apply to 'Select Save', which will always indicate email addresses that are not found).
· Do not alert me if an activity is created successfully
4. From the Select Contact Settings section, check the checkboxes that apply:
· If an email entered matches more than one customer on 'Save', create an activity for each and do not alert me. ('Select Save' always provides a choice). If left unchecked, you will be prompted to select the desired customer. Note that this is not necessary if 'Search Personify' was used to find a customer.
· Do not ‘Flag’ email addresses that are found in Personify.
· Save CC emails by default. This setting can be overridden on a case-by-case basis by using the 'Select Save' feature.
· Save BCC emails by default. This setting can be overridden on a case-by-case basis by using the 'Select Save' feature.
 Refer to Save vs.
Select Save Option to see how the configurations interact with one
another.
Refer to Save vs.
Select Save Option to see how the configurations interact with one
another.
5. Click Apply.
6. To close the General Settings screen, click OK.
Screen Element |
Description |
|---|---|
Select Personify Alert Settings |
|
Automatically create an 'anonymous' activity when a selected email address is not recognized in Personify. |
Checkbox. If this is unchecked, the system does not allow you to save emails that are NOT already in Personify360. When checked, an anonymous contact tracking record is created in Personify360 for an email that is not already in your system. Please refer to Viewing Anonymous Contact Tracking Records for additional information. In addition, this setting can be overridden on a case-by-case basis by selecting the Select Save feature.
|
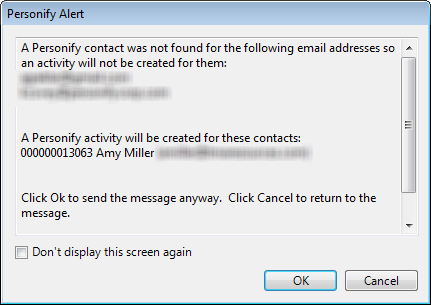
Do not alert if an email address is not found in Personify. |
Checkbox. When unchecked, the following
message displays. Check this checkbox in order for the system
to not display this message.
This does not apply to 'Select Save', which will always indicate email addresses that are not found. |
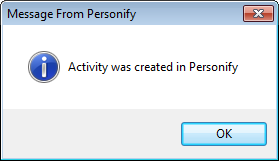
Do not alert me if an activity is created successfully. |
Checkbox. When unchecked, the following
message displays when a contact tracking record is successfully
created. Check this checkbox in order not to display the message. |
Select Contact Settings |
|
If an email entered matches more than one customer on ‘Save’, create an activity for each and do not alert me. |
Checkbox. This controls the default behavior
of the plug-in when ‘Save’ is selected while sending an email,
saving an email that was received, creating a task, or sending
a meeting request.
This setting does not impact Select Save because that workflow gives users the option to review matches to Personify360 before saving. |
Do not 'Flag' email addresses that are found in Personify. |
Checkbox. This gives users the option to disable flagging functionality in Outlook so that users can continue to use or not use the Outlook flagging functionality. You have the option to flag contacts that exist in the Personify360, in case that information is helpful to you. For more information on what flagged email addresses look like in Outlook, please see Identifying Emails to Personify Contacts in the Personify Outlook Plug-In. |
Save CC emails by default. This setting can be overridden on a case-by-case basis by using the 'Select Save' feature. |
Checkbox. When checked, when sending an email, creating a task, or sending a meeting request, CC emails will be saved. This setting can be overridden on a case-by-case basis by selecting the Select Save feature. |
Save BCC emails by default. This setting can be overridden on a case-by-case basis by using the 'Select Save' feature. |
Checkbox. When checked, when sending an email, creating a task, or sending a meeting request, BCC emails will be saved. This setting can be overridden on a case-by-case basis by selecting the Select Save feature. |
See Also: