You can use the plug-in to perform the following tasks:
When you install the Personify360 Outlook Plug-In, the plug-in adds
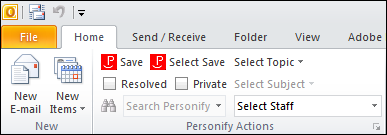
a new “Personify Actions” group to your Outlook toolbar that looks similar
to the standard “New”, “Delete”, “Respond”, etc. groups. This group gives
you access to specific Personify360-related tasks. The Personify Actions
group provides access to all of the Personify360 Outlook Plug-In functions,
as shown below.
You can use the plug-in to perform the following tasks:
· Send a Meeting Request to Personify360 Contacts
· Assign a Task regarding a Personify360 Contact
· Save an Existing Email, Meeting, or Task to Personify360
 For
a change in Personify360 to display in the Outlook Plug-In, Microsoft
Outlook must be launched once after the change, closed, and then launched
again. Only then, the change will display to the user in the Personify360
Outlook Plug-In.
For
a change in Personify360 to display in the Outlook Plug-In, Microsoft
Outlook must be launched once after the change, closed, and then launched
again. Only then, the change will display to the user in the Personify360
Outlook Plug-In.
Action |
Description |
|---|---|
Save |
When selected, a new contact tracking record is created in Personify360 based on your default settings defined on the Contact Tracking, General Alert Options, and Domain Setting screens.
If the email address is not found in the system, an anonymous activity record can be created. This occurs if a selected email does not match in Personify360 but is saved anyway. The unmatched email address is inputted into the Person Contacted field on the new activity, for reference. This applies regardless of which field the email is on: To, CC, BCC, or From. For more information on saving contact records in Personify 360, refer to Viewing Contact Tracking Records and Viewing Anonymous Contact Tracking Records. |
Select Save |
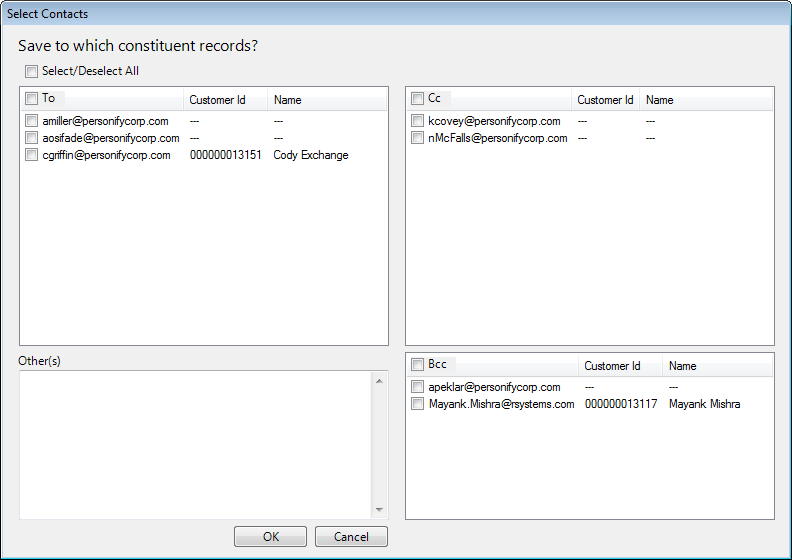
This allows you to select who is assigned a contact tracking record from the list of recipients and it reduces the risk of duplicate records being created. In addition, if the email is being sent, the first section is "To" and if the user is saving an email that he/she received, the first section is "From". This is different than the Save option, which uses the default configurations to determine how many records get created automatically.
When this field is selected and you click Send, the Select Contacts screen displays similar to what is shown below. The checkboxes in the Select Contacts screen default based on global account settings for domain and CC/BCC. However, you can override these default settings by checking/unchecking the email addresses on this screen. This screen lists the email address in the distribution list broken out by To, CC, BCC, and Other. The CC and/or BCC fields are suppressed if they do not contain email addresses. The Other field allows you to enter the email address you would like to create a contact tracking record for, such as the originator of an email, who may no longer be in the email’s address fields by the time the message is saved.
If the email address is not found in the system, an anonymous activity record can be created. This occurs if a selected email does not match in Personify360 but is saved anyway. The unmatched email address is inputted into the Person Contacted field on the new activity, for reference. This applies regardless of which field the email is on: To, CC, BCC, From, or Other. For more information on saving contact records in Personify 360, refer to Viewing Contact Tracking Records and Viewing Anonymous Contact Tracking Records.
|
 You can enter more than one email
address in the
You can enter more than one email
address in the