 After
creating a task regarding a Personify360 contact, marking the task as
complete in Outlook does NOT mark the contact tracking record in Personify360
as Resolved.
After
creating a task regarding a Personify360 contact, marking the task as
complete in Outlook does NOT mark the contact tracking record in Personify360
as Resolved.Using the Personify360 Outlook Plug-In, you can create an Outlook task regarding a Personify360 contact and assign it to a Staff person. Please note that you CANNOT assign a task to yourself. Additionally, if you save the task as a contact tracking record, the record will be created only for the staff person, NOT the Personify360 contact in which the task is regarding. In order for a contact tracking record to be created for the staff creating the task, the staff MUST have a customer record in Personify360.
After
creating a task regarding a Personify360 contact, marking the task as
complete in Outlook does NOT mark the contact tracking record in Personify360
as Resolved.
The
Catalog Population on FTC_FTS_CUSTOMER_INFO
SQL job is responsible for retrieving any contact information that has
been changed in Personify360 and displaying the information when you search
for a Personify360 contact. By default this job is configured to run every
4 hours, but it can be changed if necessary by your system administrator.
To send a task regarding a Personify360 contact:
1. On the
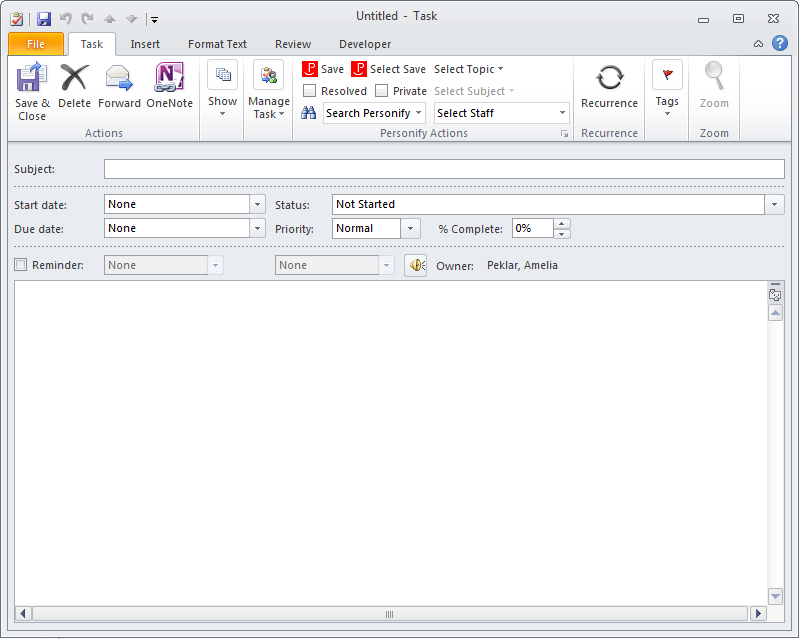
Home tab of the Tasks screen, click New Task.
A new, blank meeting task window displays, as shown below.
2. From the Personify Actions section of the ribbon bar, search for the Personify360 contact in which the task is regarding using the Search Personify field. For more information, please see Searching for Personify360 Contacts. Search terms must be three or more characters in length.
 For
a video demonstrating how to narrow down search results, refer to Video Demo: Narrowing
Search Results.
For
a video demonstrating how to narrow down search results, refer to Video Demo: Narrowing
Search Results.
3. From the search results
grid, select the appropriate contact(s) and click the Regarding
button, as shown below.
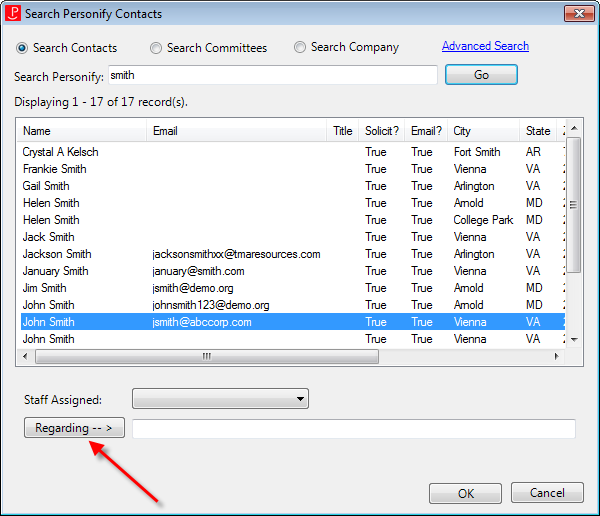
4. If necessary, select
the Staff Assigned.
The staff available in this drop-down are active
users that have access to Personify360. Please note that if you want to
create a contact tracking record for the selected staff assigned, the
staff person MUST have a customer record in Personify360.
If you select
a Staff Assigned from the Search Personify Contacts screen, that person
will be added to the To field on the task.
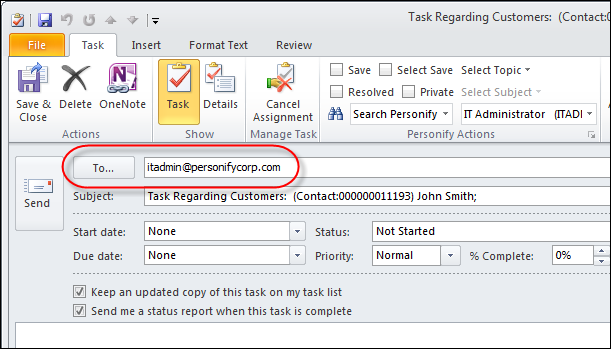
5. Click OK.
The Search Personify Customers screen closes and the Untitled new task
displays with the selected contact(s) email address(es) in the Subject.
You can proceed to write and send your task from this point.
6. The following fields in the Personify Actions section will default based on the settings defined on the Personify Account Settings screen. You can manually change any of these settings as necessary.
· Select Topic
· Select Subject
· Select Staff
· Resolved
· Private
See table below for more information on these options.
7. To save this task as a contact tracking record for the staff assigned in the "To" field, check the Save checkbox.
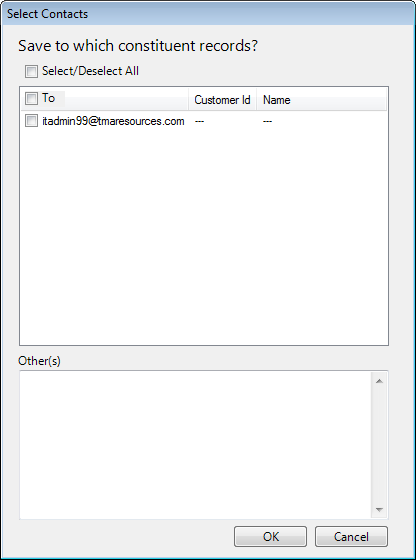
8. Alternatively,
you can check the Select Save
checkbox to manually add additional email addresses for which you want
to create a contact tracking record.
This is different than the Save option, which uses the default configurations
to determine how many records get created automatically. The Select Contacts
screen displays similar to what is shown below. The selected staff assigned
(if applicable) displays in the "To" list. The Other
field allows you to manually enter an additional email address (comma
separated) you would like to create a contact tracking record for, such
as the originator of an email or the Personify360 contact in which the
task is regarding. Depending on your settings on the General
Tab, the system will automatically check which emails will be saved
by default.
 If the email
address is not found in the system, an anonymous activity record can be
created. This occurs if a selected email does not match in Personify360
but is saved anyway. The unmatched email address is inputted into the
Person Contacted field on the new activity, for reference. This applies
regardless of which field the email is on: To, CC, BCC, From, or Other.
For more information on saving contact records in Personify 360, refer
to Viewing Contact Tracking
Records and Viewing
Anonymous Contact Tracking Records.
If the email
address is not found in the system, an anonymous activity record can be
created. This occurs if a selected email does not match in Personify360
but is saved anyway. The unmatched email address is inputted into the
Person Contacted field on the new activity, for reference. This applies
regardless of which field the email is on: To, CC, BCC, From, or Other.
For more information on saving contact records in Personify 360, refer
to Viewing Contact Tracking
Records and Viewing
Anonymous Contact Tracking Records.
Screen Element |
Description |
|---|---|
Select Topic |
Drop-down. Select the topic of the task from a predefined list of topics, which are based on the non-fixed codes defined for the MRM "CALL_TOPIC" system type. For more information, please see Customers System Types and Codes. |
Select Subject |
Drop-down. Based on the topic selected, select the subject of the task from a predefined list of subjects, which are based on the non-fixed subcodes defined for the MRM "CALL_TOPIC" system type. For more information, please see Customers System Types and Codes. |
Select Staff |
Drop-down. Select the Personify360 staff user to be assigned to the contact tracking record. This drop-down lists only active staff members in alphabetical order, making it easier and more intuitive to assign a contact tracking record to a staff member. You can type directly into this field or select the drop-down to see a full list of available users. If you enter a digit into the field, the list jumps to the first record that starts with that digit, and as the user continues to type, the cursor moves further down the list until the desired record is selected.
|
Resolved |
Checkbox. When checked, it indicates that the task does NOT require any attention after it has been sent. |
Private |
Checkbox. Checking this checkbox will mark the task as “Private” in the Personify360 Actions section. If the task is saved to Personify360, checking this checkbox will mark the contact tracking record as “Private” in Personify360 and only you and system administrators can see the contact tracking record in the back office. |
 When you try typing in the