Configuring the Web Settings for the Member Directory Detail Control
While this control should be dropped on its own page, it is NOT a standalone
control and must be referenced by the Member
Directory control via the Detail
Page URL web
setting.
Tips for styling the Online Member Directory detail
page:
· To modify
the styling on the customer name, target the class “membership-dir-person-name”.
· To modify
the section labels (Address, To Contact, etc.), target the class “membership-dir-section-label”.
· For multiple
fields set to show up as a "Grid" in the back office, the results
for each section will show up side by side. Currently, we have css capable
of handling up to five side-by-side results from each section. If you
want more, you have to create a new rule. The rule should be written like
this: “.grid-col-{#} .membership-dir-detail-item” with {#} being replaced
with the number of results you expect to have side-by-side. Under this
rule, you should specify the width for each result by diving 100 by the
number of results and putting the result number as the width in a percentage.
For example, if a section had six fields and was set to show up as a grid
in the back office, write a rule that says “.grid-col-6 .membership-dir-detail-item”
and specify “width: 16.66%” in the new rule.
See also:
· For an
overview of this control, please see the Member
Directory Detail Control Overview.
· For information
on the back office configuration required for this control, please see
Configuring
the Back Office Settings for the Member Directory Detail Control.
To configure the web settings for the member directory
detail control:
1. Add the
"MembershipDirectoryDetailControl" control to the desired page.
For more information, please see Adding
a .NET Web Control to a Page.
 If you would
like to use the same directory setup, but grant different permissions
to authorized (logged in) versus non-authorized (not logged in) users
or members versus non-members, the .NET controls would have to be configured
accordingly. For example, you may want not want unauthorized users to
be able to access the detail page. In order to accomplish this, you would
need to place the control twice on the page. One control is configured
via a security role (and/or IMS role) to be only viewed by unauthorized
users. This control does not have the detail page parameter defined. The
other control is configured via a security role (and/or IMS role) to be
only viewed by authorized users. This control does have the detail page
parameter defined.
If you would
like to use the same directory setup, but grant different permissions
to authorized (logged in) versus non-authorized (not logged in) users
or members versus non-members, the .NET controls would have to be configured
accordingly. For example, you may want not want unauthorized users to
be able to access the detail page. In order to accomplish this, you would
need to place the control twice on the page. One control is configured
via a security role (and/or IMS role) to be only viewed by unauthorized
users. This control does not have the detail page parameter defined. The
other control is configured via a security role (and/or IMS role) to be
only viewed by authorized users. This control does have the detail page
parameter defined.
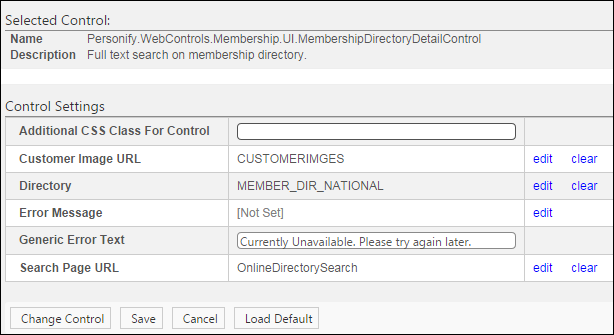
The Control Settings for this control display,
as shown below. For a detailed description of each parameter, see the
table at the bottom of this topic.
Text fields
have a 250 character limit.
2. Configure
the necessary parameters.
3. Click
Save.
 It is recommended
that you do NOT add a Page Title when adding
a new page AND "hide" the DNN Web Control Container title
from the module
settings.
It is recommended
that you do NOT add a Page Title when adding
a new page AND "hide" the DNN Web Control Container title
from the module
settings.
Parameter |
Description |
Additional CSS Class For Control |
This option allows you to add an additional
layout to the skin by developing a new DOTNETNUKE style, which
requires an advanced understanding of HTML and CSS. |
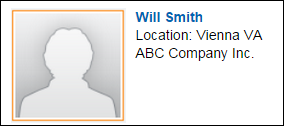
Customer Image URL |
Select the PWF parameter that contains
the location where customer images are stored.
For customer who do NOT have a customer image
defined, you should create a generic image to be displayed, such
as a silhouette shown below. This image must be stored in the
location defined by the PWF parameter selected here.
|
Directory |
Select the PWF parameter that will take
the user to the Online
Member Directory page in your site where he/she clicks "Back
to Results". |
Error Message |
The error message will display on the
control for the action that was being performed at the time of
the error. If left blank, the default error message, "An
error occurred while performing [Insert Action]. If the problem
persists, please contact the site administrator", will display.
[Insert Action] will be substituted with the action the control
was performing at the time of the error. If you wish to change
the default error message, customize it with a PWF parameter.
See Setting up PWF
Parameters for more information. |
Generic Error Text |
This generic error message displays in
case of unexpected errors. |
Search Page URL |
You should set the PWF parameter to a
value that will take the user to the Membership
Directory Control when he/she clicks "Back to Results". |