It is up to each client to determine the appropriate location of this
page, and to create the menu item that will lead web users to this page.
The section below details how to set up this control on your website.
The instructions are intended for a user with web admin/host privileges.
In addition, this is NOT a standalone control, which means that
in order for it to function, it needs to be incorporated into the Checkout
workflow on the web. For more information, refer to the Standalone
.NET Web Controls section.
Parameter |
Description |
Additional CSS Class For Control |
This option allows you to add an additional
layout to the skin by developing a new DOTNETNUKE style, which
requires an advanced understanding of HTML and CSS. |
Award Listing Url |
As of 7.6.0, you should set the PWF parameter
to a value that will take the web user to the awards
listing page. See Setting
up PWF Parameters to learn more about these parameters and
why your website's redirect URLs are managed there. |
DCD Files URL |
You should set the PWF parameter to a
value (e.g., DCD Page) that will take the web user to view all
of his/her purchased DCD files when he/she selects the "Access
from My Account" link, as highlighted below. See Setting
up PWF Parameters to learn more about these parameters and
why your website's redirect URLs are managed there.
 |
Empty Order Number Error Message |
This message should inform the web user
that the order number he/she entered is invalid or empty. For
example, "You must provide valid Order Number for this page,
as shown below."
 |
Error Message |
The error message will display on the
control for the action that was being performed at the time of
the error. If left blank, the default error message, "An
error occurred while performing [Insert Action]. If the problem
persists, please contact the site administrator", will display.
[Insert Action] will be substituted with the action the control
was performing at the time of the error. If you wish to change
the default error message, customize it with a PWF Parameter.
See Setting
up PWF Parameters to learn more about these parameters and
why your website's redirect URLs are managed there. |
Guest Account Reset URL |
If you are using the guest
checkout process, you should set the PWF parameter to a value
that will take the guest web user to a page that contains the
Username/Password
control when he/she clicks on the "set a username and
password" link, as shown below. See Setting
up PWF Parameters to learn more about these parameters and
why your website's redirect URLs are managed there.
.png)
 The label "Now that your
order is completed, would you like to set a username and password
for your account?" is hard coded as part of the Order Summary
control. In order to change the label's text, you must use Visual
Studio. The label "Now that your
order is completed, would you like to set a username and password
for your account?" is hard coded as part of the Order Summary
control. In order to change the label's text, you must use Visual
Studio.
|
Meeting Detail Page URL |
You should set the PWF parameter to a
value (e.g., MTG_ProductDetails) that will take the web user to
the Meeting Detail page's URL when he/she clicks a meeting product.
See Setting
up PWF Parameter for more information. |
Membership Join Url |
You should set the PWF parameter to a
value (e.g., MbrJoinListing) that will take the web user to the
Membership Listing page's URL when he/she clicks a membership
product. See Setting
up PWF Parameters for more information. |
Nomination Process Url |
You should set the PWF parameter to a
value that will take the web user to the awards
nomination process. See Setting
up PWF Parameters for more information. |
Product ID Parameter Name In Query String |
This is the default name of the parameter
to read the product’s ID, but if the environment's redirection
logic uses a different Query String name set it here. See Setting
up PWF Parameters for more information. |
Product Page URL |
You should set the PWF parameter to a
value (e.g., ProductDetails) that will take the web user to the
Product Details page's URL when he/she clicks a product. Here
the web user can view more information about a product. See Setting up PWF
Parameters to learn more about these parameters and why your
website's redirect URLs are managed there. |
Session Detail Page URL |
You should set the PWF parameter to a
value (e.g., SessiontDetailsURL) that will take the web user to
the Session Details page's URL when he/she clicks a session's
icon. See Setting
up PWF Parameters to learn more about these parameters and
why your website's redirect URLs are managed there. |
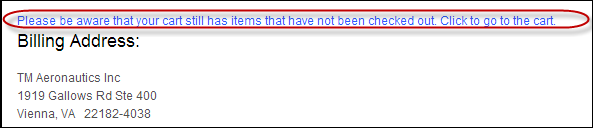
Shopping Cart Page URL |
You should set the PWF parameter to a
value (e.g., ShoppingCart) that will redirect a group manager
to his/her Shopping Cart. This link displays, as highlighted below,
when a group manger finishes purchasing a product for a group
and he/she still has items in his/her shopping cart.
 |
Show
Share Facebook Link |
When checked, it allows web user to share
a product he/she purchased from his/her order on Facebook, as
shown below. Web users will be required to log in to Facebook
with their credentials before being able to share the selected
product with their Facebook friends.
 |
Show Share LinkedIn Link |
When checked, it allows web user to share
a product he/she purchased from his/her order on LinkedIn, as
shown below. Web users will be required to log in to LinkedIn
with their credentials before being able to share the selected
product with their LinkedIn connections.
 |
Show Share MailTo Link |
When checked, it allows web user to email
the product's URL to another email address, as shown below. Web
User’s default email system will open a blank email.
 |
Show Share Pinterest Link |
When checked, it allows web user to pin
a product he/she purchased from his/her order on Pinterest, as
shown below. Web users will be required to log in to Pinterest
with their credentials before being able to pin the selected product
on one of their Pinterest boards. Please note that in order for
images to display on Pinterest, you must host your product images
on a public IP. If not, do not check this checkbox.
 |
Show Share Twitter Link |
When checked, it allows web user to tweet
a product he/she purchased from his/her order on Twitter, as shown
below. Web users will be required to log in to Twitter with their
credentials before being able to tweet the selected product to
their Twitter followers. Please note that in order for the
URL to display on Twitter, your website must be hosted on a public
IP with a valid internet domain. If not, do not check this checkbox.
 |
Tribute Card Button Caption |
As of 7.6.0, the text that displays above
the Tribute Card button at the bottom of the page, as highlighted
below. Clicking this button will take the web user to the page
defined by the View Tribute Card
Information Page URL parameter. |
URL for My Nominations Page |
As of 7.6.0, you should set the PWF parameter
to a value that will take the web user to the My
Nominations page. See Setting
up PWF Parameters for more information. |
View Fund Thank You Page URL |
As of 7.6.0, you should set the PWF parameter
to a value that will take the user to the Donation
Thank You page. If this PWF parameter does not exist or you
would like to create a new one, see Setting
up PWF Parameters for more information. |
View Tribute Card Information Page URL |
As of 7.6.0, you should set the PWF parameter
to a value that will take the user to the Tribute
Card Information page. If this PWF parameter does not exist
or you would like to create a new one, see Setting
up PWF Parameters for more information. |
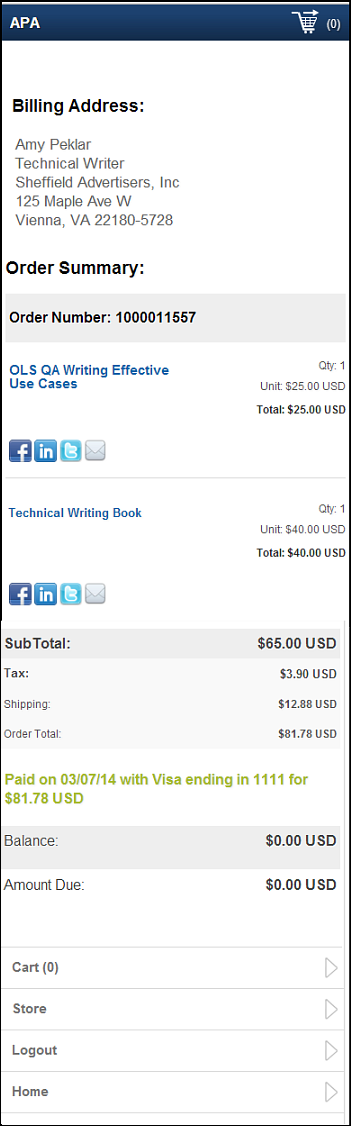
 As of 7.5.1 FP1, this control can be
configured to be responsive
to mobile users. After adding the responsive CSS to this page, your mobile
phone user will see the control on the responsive page similar to the
one shown below. For more information
about using this control on a responsive page, please see Making
a Page Responsive.
As of 7.5.1 FP1, this control can be
configured to be responsive
to mobile users. After adding the responsive CSS to this page, your mobile
phone user will see the control on the responsive page similar to the
one shown below. For more information
about using this control on a responsive page, please see Making
a Page Responsive.