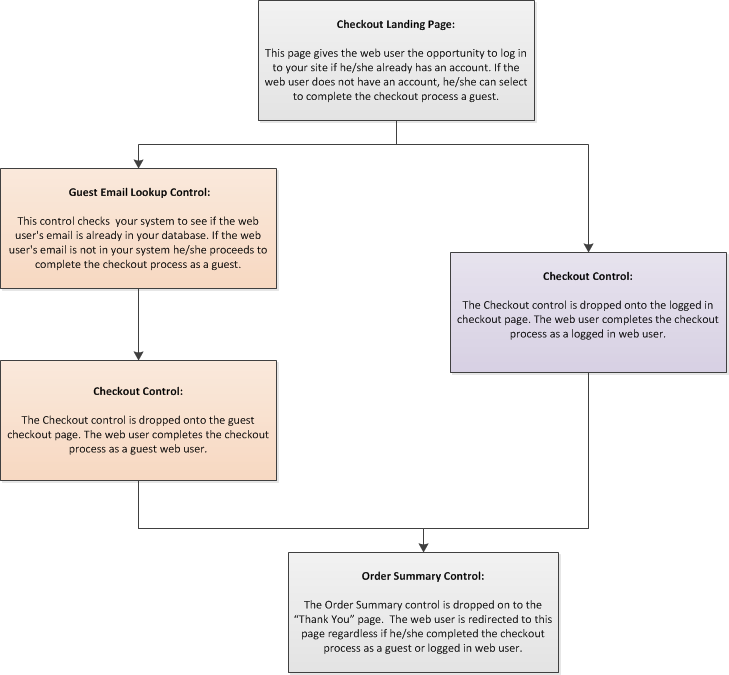
Page Setups for the Checkout Process
If you decide to use the guest checkout process, you will need
to created two separate workflows; one for logged in web users and the
second for guest web users. The flowchart below shows how each control
is dropped onto a separate page and how the different pages all link together.

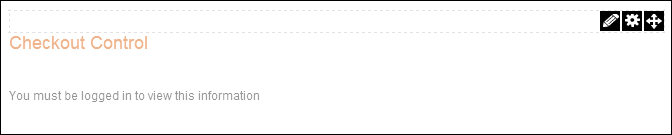
From the web, you drop the one control or module onto the page and configure
the web settings, as shown below. See Configuring
the Web Settings for the Checkout Control for more information.
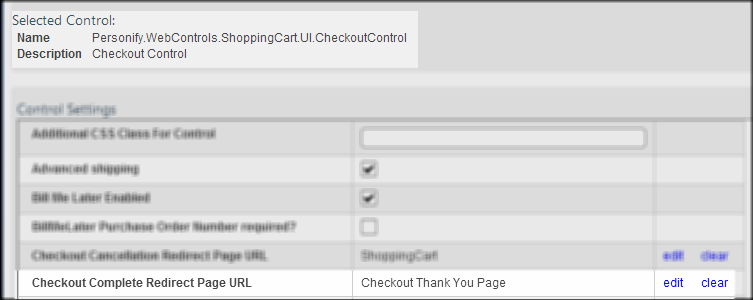
In order to link the pages in sequential order, you must set the PWF Parameter
field to the next page's URL in the checkout process. For example, if
you are configuring the web settings for the Checkout module, from the
Checkout Complete Redirect Page URL field, you would set the parameter
to be the Checkout Thank You page since it is the next step in the checkout
process.
 If
you have a simple membership join process and list it as a product in
the online store, if a web user does not have an account for your site,
and selects the membership product, when the user begins the checkout
process if he/she selects to proceed as guest to complete it, a user account
is generated for him/her. However, in order for the web user to access
it, he/she needs to select the "Forgot Password" link on the
Login screen. As a best practice, it is highly recommended that you setup
a welcome
notification to be sent to the new member informing him/her that an
account has been created and in order to access it he/she has to select
the "Forgot Password link on the Login screen, as shown below.
If
you have a simple membership join process and list it as a product in
the online store, if a web user does not have an account for your site,
and selects the membership product, when the user begins the checkout
process if he/she selects to proceed as guest to complete it, a user account
is generated for him/her. However, in order for the web user to access
it, he/she needs to select the "Forgot Password" link on the
Login screen. As a best practice, it is highly recommended that you setup
a welcome
notification to be sent to the new member informing him/her that an
account has been created and in order to access it he/she has to select
the "Forgot Password link on the Login screen, as shown below.

See Also:
· For an
overview on how the Checkout control works, refer to Workflows
for the Checkout Control
· To see
the back office set ups necessary for the Checkout control, refer to Back
Office Settings for the Checkout Control.
· To add
the Checkout control to a page on the web, refer to Web
Settings for the Checkout Control.
· For a
broad summary of the Checkout control, refer to Overview:
Checkout Control.
· For a
video demonstrating how to add the Checkout control to a page, refer to
Video Demo:
Configuring the Checkout Control.