This section discusses the back office settings required to display the Additional Information step in the meeting registration workflow, including:
· Emergency Contact Information
For information on how to set up the Meeting Registration control to display on the web, please see Configuring the Web Settings for the Meeting Registration Control.
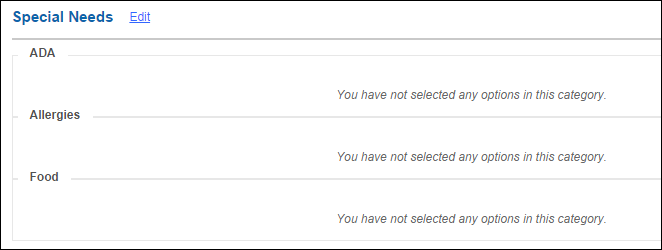
Special needs information can be a component of the Additional Information step in the meeting registration workflow. The special needs categories will be populated with the information defined in the web user's profile, as displayed below.
 As a best practice, if you are using the Register Someone Else workflow for a meeting, proceed with caution when checking the Display Special Needs Control checkbox, because some users may not want another individual to have access to their special needs information. Rather, using the Meeting Order Created notification, you can send the individual an email with a link so that he/she can add this information.
To display special needs information during meeting registration:
1. Open your meeting product in Product Maintenance.
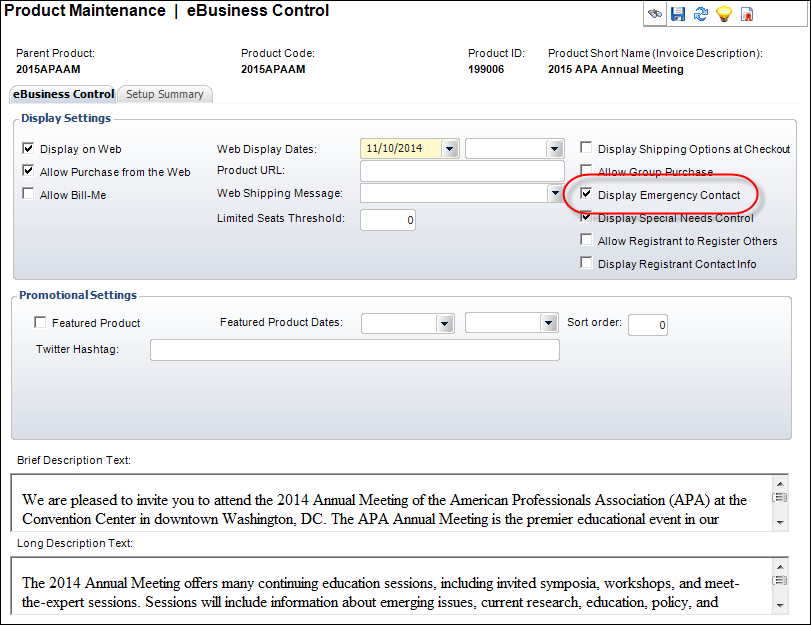
2. From the eBusiness Links task category, click eBusiness Control.
3. Check the Display Special Needs Control checkbox, as highlighted below.

 Only web-enabled codes defined for the CUS "SPECIAL_NEEDS" system type will display in the control. Special needs data collected from this control are stored at the customer level, and data is not meeting specific. If you want to collect data at the meeting level, add a questionnaire to the meeting to capture that data.
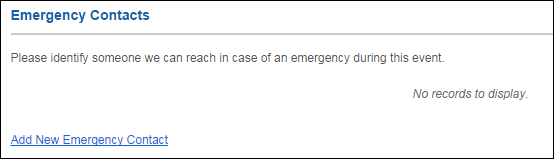
Emergency contact information can be a component of the Additional Information step in the meeting registration workflow. The emergency contacts will be populated with the information defined in the web user's profile, as displayed below.
As a best practice, if you are using the Register Someone Else workflow for a meeting, proceed with caution when checking the Display Emergency Contact checkbox, because some users may not want another individual to have access to their emergency contacts information. Rather, using the Meeting Order Created notification, you can send the individual an email with a link so that he/she can update his/her emergency contacts.
To display emergency contact information during meeting registration:
1. Open your meeting product in Product Maintenance.
2. From the eBusiness Links task category, click eBusiness Control.
3. Check the Display Emergency Contact checkbox, as highlighted below.
Badge information can be a component of the Additional Information step in the meeting registration workflow. If the web user is registering himself/herself (as opposed to registering someone else), the badge fields will be populated with the information defined in the web user's profile. If the web user is registering someone else (as opposed to registering himself/herself), the badge fields will be populated with the selected registrant's information, NOT the logged in web user.
![]()
 The badge is created in the ORDER_DETAIL_BADGE table for the meeting product order line.
To collect badge information from a meeting registration:
1. First, you must define a default badge configuration.
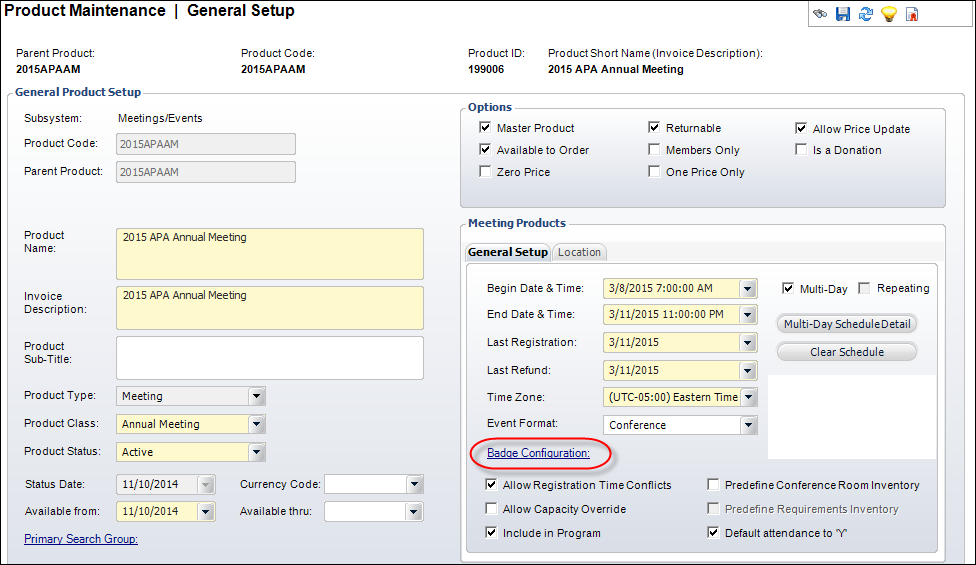
2. Open your meeting product in Product Maintenance.
3. From the General Setup screen, click the Badge Confirmation link, as highlighted below.
4. Select a configuration from the chooser window.
The Additional Information step in the meeting registration will display the data fields defined for the badge configuration selected.
5. From the Product Definition task category, click the Define Rates and Pricing task.
6. Enter the number of badges you want to provide in the Max Free Badges field, as highlighted below.
If the Max Free Badges field is set to greater than 1, the system will allow a web user to add additional free badges by displaying an Add Another Badge link, until the Max Free Badges limit is reached.

If the registrant adds a free badge, the name information defined will NOT be created as a customer in the database.
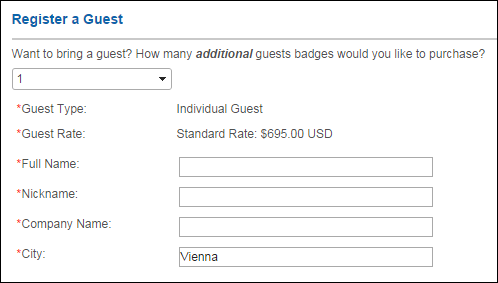
Paid guests can be a component of the Additional Information step in the meeting registration workflow, if a meeting has been defined to allow additional paid badges in the back office, as displayed below. The web user can select the number of additional tickets to purchase from the drop-down (he/she may only select up to five additional tickets), then enter badge information for the guests, as displayed below. The price will be added to the registrant's final price at checkout.
The guest badge is created in the ORDER_DETAIL_BADGE table for the meeting product order line.
The guest will NOT be added as a customer in the database.
 Guest meeting badges are different from paid guest tickets at the session level. For more information, please see Tickets vs. Badges.
To enable registering a paid guest:
1. Create a new MTG subproduct with a Product Type of "BADGE".
Ensure that the Parent Product is the master meeting product. For more information, please see Defining General Meeting Product Information.
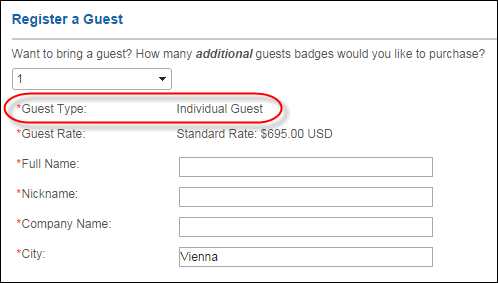
The value entered in the Invoice Description will display as the Guest Type, as highlighted below.
2. Define the price for additional paid guests.
Typically you would define one flat rate. However, if multiple rates are defined, the Guest Rate field will display as a drop-down. For more information, please see Defining Meeting Product Rates and Pricing.
3. Web-enable the badge product.
For more information, please see Defining a Meeting Product to Display on the Web.
4. Validate the badge product setup.
For more information, please see Validating a Meeting Product Setup.
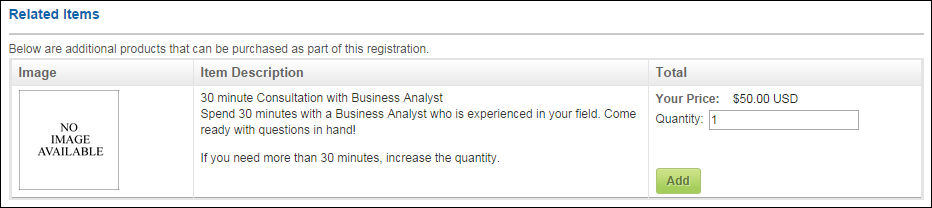
If related products are associated with a meeting product, they can be added to the registration during the Additional Information step of the meeting registration workflow. Web users can view information about a product, specify umbrella product components, and update the quantity before adding a product to the registration, as displayed below. See Defining Meeting Product Related Products for more information.
The title of this section and the description that displays below the title is defined in the web settings. For more information, please see Configuring the Web Settings for the Meeting Registration Control.
The Invoice Description, Brief Web Description, and default Online Store Listing image for the selected product will display in the Related Items section.
To add a related product for a meeting:
1. Open your meeting product in Product Maintenance.
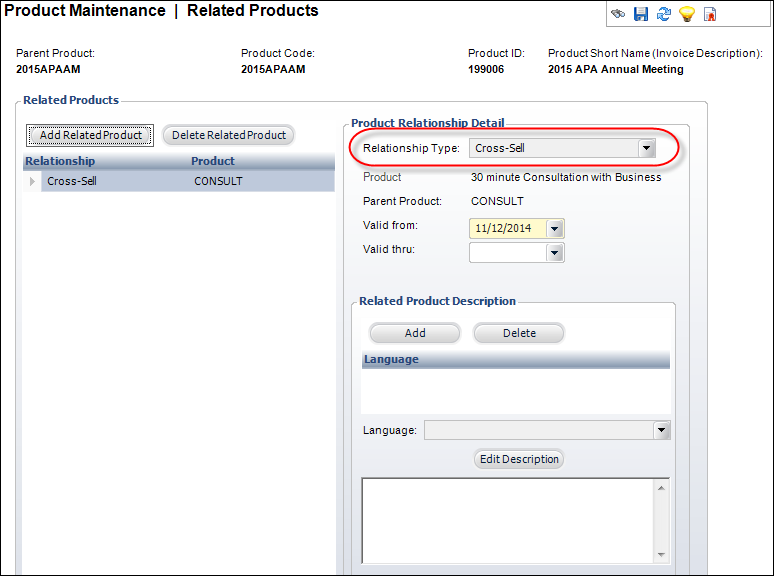
2. From the Relationships task category, click Related Products.
3. Click Add Related Product.
4. Select "Cross-Sell' from the Relationship Type drop-down, as displayed below.
5. Select a product from the Product link.
6. Make sure the Valid from date is current.
7. Click Save.
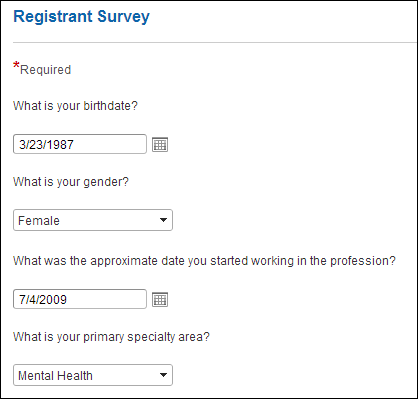
You can collect questionnaire data from meeting registrants during the additional information step, as displayed below. For instructions on adding a questionnaire to a meeting product, please see Creating a Product Questionnaire.
You should limit the number of required questions if Register Someone Else functionality is enabled, because web users registering other individuals may not have sufficient information on how to answer some questions (e.g., meal preference, golf handicap, allergies, etc.). Rather, using the Meeting Order Created notification, you can send the individual an email with a link so that he/she can provide you with this information. Additionally, it is not appropriate to set questions as "Required" for events where Register Someone Else is enabled, because the web user registering other people may not know the answers to personal questions (e.g., allergies, food preferences, etc.).
If a new question is added to the product questionnaire after customers have already completed their meeting registration, if the customer returns to view his/her meeting registration on the web, the system will prompt the customer to answer the new question(s) if the question is required.
 For a video demonstration, please see Video Demo: Product Questionnaire Setup and Workflow.