To start creating a new form:
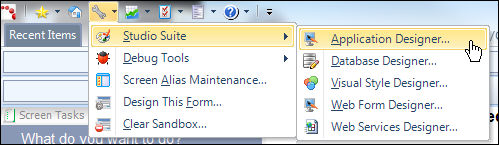
1. From the Personify360 main toolbar, select Tools > Studio Suite > Application Designer.
2. Click File > New, or the New icon.
3. Application Designer allows you to create one of five different types of forms. Select a New Form type from the New Form window as shown below.
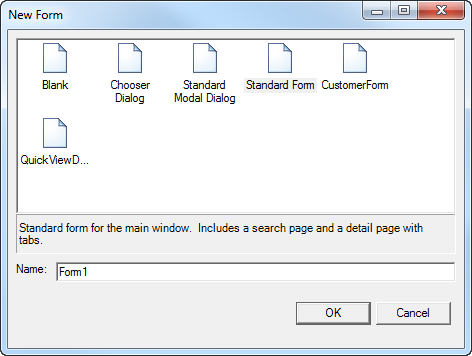
· Blank Form – This form type is ideal for designers who are comfortable with creating customized Personify360 screens for their users. With this form you can create your own HTML page and build a unique workflow.
· Chooser Dialog – You can customize a form designed to perform searches or to lookup an entry. This form template also contains a Search Control. The Chooser Dialog has two columns and allows users to select data. The Chooser Dialog form is used for creating a pop-up chooser, such as the Customer Chooser, Product Chooser, etc.
· Standard Modal Dialog – This form allows you to create a sub-screen (child screen). After creation, when this screen is opened, you will only be able to work with this screen and will not be able to tab to other screens. It has independent Save and Delete buttons for this reason. An example of this type of screen would be the Create New Customer screen in Customer Central.
· Standard Form (Default) – This is the typical form for the main Personify360 window. The Standard Form allows tabbing across other screens and multiple instances of the same screen. This is the template you are most likely to use, as it contains coding and search control features.
· Customer Form – The standard form for that has the target collection already defined. This makes it easier to create typical types of forms.
· Quick View Dialog – This form type contains an initial search screen similar to the Standard Form. The Detail Page, however, is a single control, which allows you to create an HTML view for the record selected. From this view, you can copy and paste the information to another medium (Word, NotePad, etc.). HTML code can be inserted, using the InnerHTML parameter, to give the Quick View a customizable view.
 If a user is creating a new form, he/she will be able to re-open it at any time from his/her sandbox location in the Application Designer, as long as the user was assigned to a Security group that has the Application Designer rights assigned to it. See Defining Security Groups and Defining Personify360 Users for more information.
4. Create a name the form in the Name text box of the New Form window.
5. Click OK.
Clicking OK allows you to design the form manually. Clicking the right-facing arrow button will take you through the New Form Wizard. For more information on the New Form Wizard, see Creating Forms Using the “New Form Wizard.
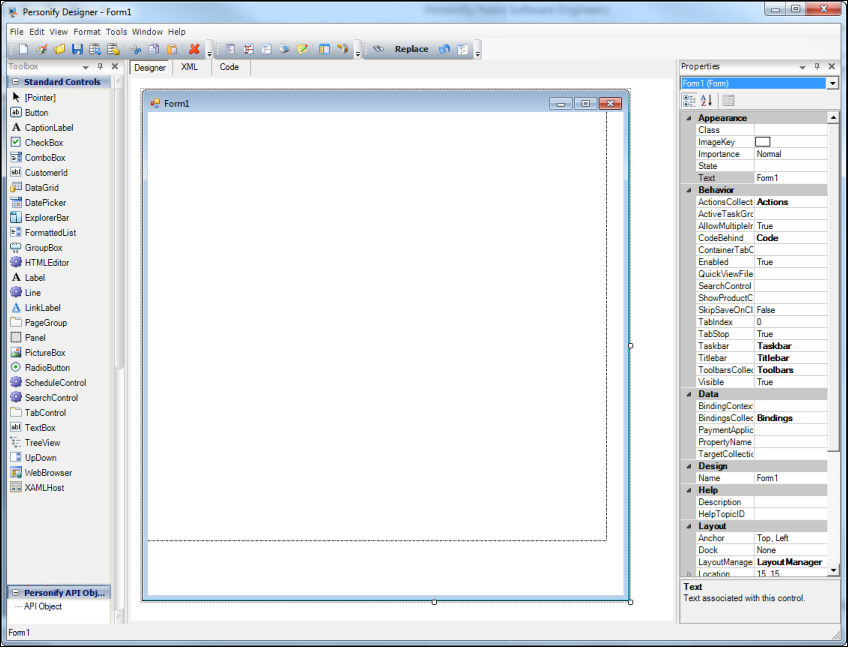
Once you select the desired form type, it appears in the Application Designer, surrounded by the necessary tools and properties to customize it as shown below.