 The Simple Gift Entry screen is not intended for INKIND, ASSET, STOCK, MEMO, or PLANNEDGIVING gifts. Those types of gifts need to be entered using the Flexible Gift Entry screen.
After searching for the appropriate constituent, the only required steps on the Simple Gift Entry screen (shown below) are selecting a gift code and entering the payment information.
The Simple Gift Entry screen is not intended for INKIND, ASSET, STOCK, MEMO, or PLANNEDGIVING gifts. Those types of gifts need to be entered using the Flexible Gift Entry screen.
To create a simple gift entry:
1. Access the Simple Gift Entry search screen using one of the following ways:
· On the Fundraising Launch screen, click Create a Simple Gift from the Gift Giving task category.
· On the Fundraising Launch screen, click New Simple Gift from the Quick Create task category.
· On the Fundraising Launch screen, click Create Gifts from the interactive workflow diagram.
· Using the Fundraising Gift Entry person, from the Personify360 main toolbar, select Take Donations > Simple Gift Entry.
· Using the Fundraising Manager, Fund Development Manager, or Fund Solicitor persona, from the Personify360 main toolbar, select Donate > Simple Gift Entry.
The Simple Gift Entry search screen displays, as shown below.
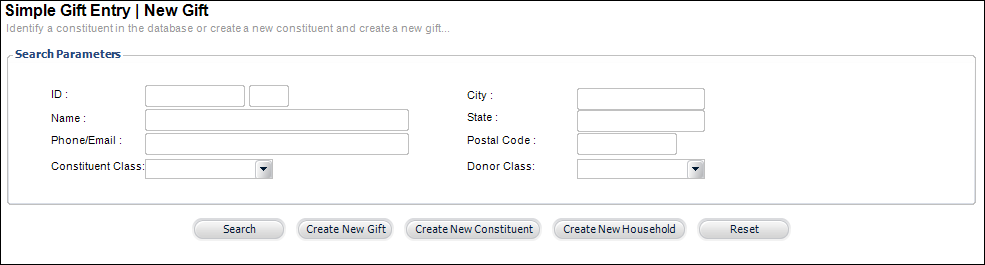
2. Search for the appropriate constituent and click Create New Gift. Alternatively, if you do not find the constituent you are looking for, click Create New Constituent. Additionally, as of 7.4.2, if the USE_HOUSEHOLDING application parameter is set to "Y", click Create New Household to create a new household for which to create a donation.
The Simple Gift Entry screen displays, as shown below.
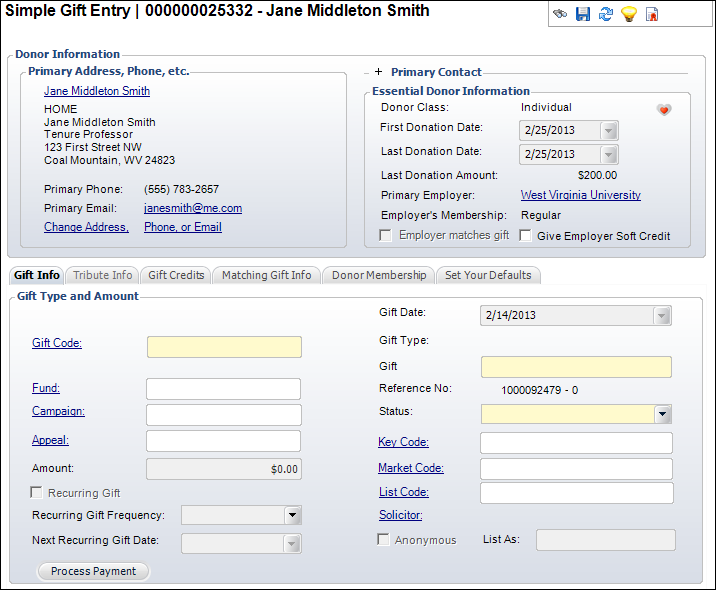
3. If necessary, check the Give Employer Soft Credit checkbox.
Soft credits can be given to the employer linked to the donor for Cash and Pledge fundraising products. All other fundraising products (including credits entered manually) are considered soft credits. If this checkbox is checked, the soft credit will display on the Transactions screen for the constituent's primary employer in Donor360®.
4. On the Gift Information tab, click the Gift Code link and search for the appropriate gift.
The gift information populates automatically and the Choose a Different Gift button displays if you want to select a different gift. The Choose a Different Gift and Clear Defaults for This Gift buttons will disappear when the gift is saved. Please note that if the gift code selected is a pledge, the system will automatically create the payment schedule on save. For more information, please see Working with Donation Payment Schedules.
5. If necessary, select the Fund/Campaign/Appeal for which the gift was made.
6. The gift Amount automatically populates based on the selected Gift Code. If necessary, change this.
The gift amount must be greater than zero.
If the selected gift is a FND "CASH" product with an agency discount, the Amount field is read-only and will be updated when payment is applied.
7. If you want to set up this gift as a recurring gift, check the Recurring Gift checkbox.
A recurring gift allows a user to create a gift that is paid incrementally over an unset length of time. If you process a Recurring Gift with a credit card, the credit card information is saved within the system for subsequent recurring gifts.
8. Select the Recurring Gift Frequency from the drop-down.
This sets how often a recurring gift will be paid. Values in the drop-down are populated based on the non-fixed codes defined for the FND "GIFT_FREQUENCY" system type.
9. Select the Next Recurring Gift Date from the drop-down.
This sets the date on which the recurring gift starts subsequent payments.
10. Edit the Gift name, if necessary.
11. Change the Status, if necessary.
12. If necessary, click the Key Code link to select a key code.
This code identifies the combination of the marketing piece (e.g., brochure, mailing, etc.) and list code used to solicit the customer. Selecting a value automatically populates the Market Code and List Code. For more information on key codes, please see Processing a New List.
13. If necessary, click the Market Code link to select a market code.
This code identifies the source of an order if it is based on a promotion created for a marketing campaign. Market codes are validated against the order detail date. For more information on market codes, please see Defining a Market Code.
14. If necessary, click the List Code link to select a list code.
This code identifies the mailing list from which the customer was solicited. For more information, please see Creating a New Marketing List.
15. Select the Solicitor assigned to the donor, if necessary.
16. Enter the List As name, which is how the donor’s name will appear in a list of donors.
17. Select whether the donor wishes to remain Anonymous.
If the Anonymous checkbox is checked, the List As field will display with ‘Anonymous’.
18. Click Process Payment.
If a batch is not already opened, the system prompts you to open a batch. The Quick Pay screen displays, as shown below.
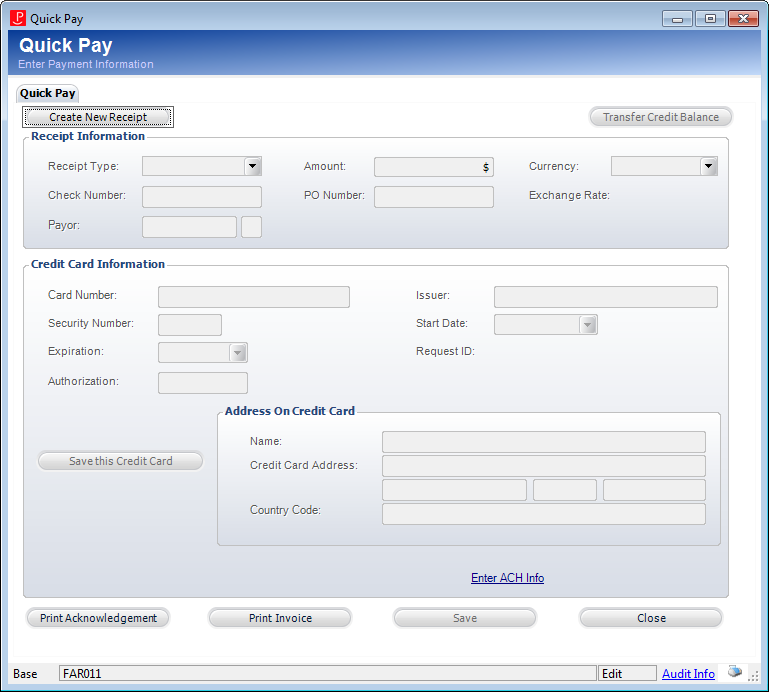
19. Enter payment information. For more information on this screen, please see Performing a Quick Pay.
 Electronic checks (eChecks) should NOT be used as a payment method for FND pledges or recurring gifts.
20. Click Save.