The
membership join process on the web does not validate (e.g., prove you
are a student).
The
membership join process on the web does not validate (e.g., prove you
are a student). The Membership Join .NET controls are designed to display a list of
memberships (e.g., student, retired, etc.) that your constituents can
choose from. You can use these controls as an alternative to the online
store. This membership join process is not meant for organizations with
an extensive membership join process, such as requiring letters of recommendation,
proof of license, etc., or for an organization that configures a constituents'
membership based on how they answer a series of initial questions (branching
logic) before they reach the membership join process. These controls were
designed to maximize the most widely used membership join scenario. For
a visual diagram of the membership join setup process and workflow, please
see Sample Membership Join Workflow.
Before configuring the Membership Join .NET controls, it is important that your back office configurations for membership, membership rate, special interest groups, etc. are accurate. Many system types and codes are used in both the Enterprise (back office) and in the e-Business website. It is important to make sure to web enable in the back office the system types and codes that you want to display on the e-Business website or they will not display on the web. The beginning of each control section (e.g., Membership Join Registration Control, Reviewing Membership Options Control, etc.) has a list of the system types and codes that need to be web enabled before setting up that control. See Enabling System Types and Codes for the Web for more information how to web enable system types and codes.
The
membership join process on the web does not validate (e.g., prove you
are a student).
 As
a best practice, make sure to test your website before releasing it to
your constituents in order to ensure that all settings are configured
properly.
As
a best practice, make sure to test your website before releasing it to
your constituents in order to ensure that all settings are configured
properly.
Rather than a single product detail page for a membership, as with books and many other products, joining an organization might require web users to follow a multi-step process. This process leads the user through the basic benefits and options for a new member and ends with either the cart or checkout. It is recommended that clients keep all of the steps described here in their member join workflow.
After selecting a membership from the Membership Listing control, the recommended setup for the membership join process involves the following three steps:
1. Step 1: Membership Join Registration
2. Step 2: Reviewing Membership Options
3. Step 3: Make a Bigger Impact
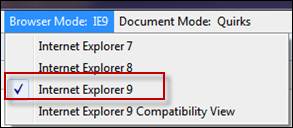
If
your organization uses Internet Explorer 9, your browser should be set
to Internet Explorer 9 Mode, not Internet Explorer 9 Compatibility Mode,
as highlighted below.
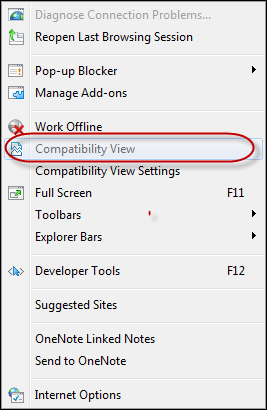
If you are using Internet Explorer 8, the "Compatibility View"
mode should not be selected, as highlighted below.
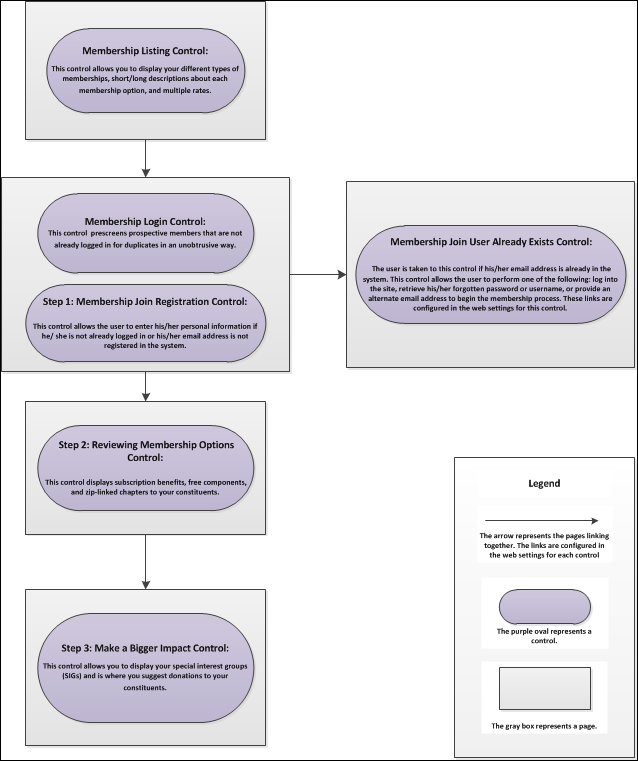
Below illustrates the recommended set up for the membership join process.
The name of each control correlates to its section in the online help.
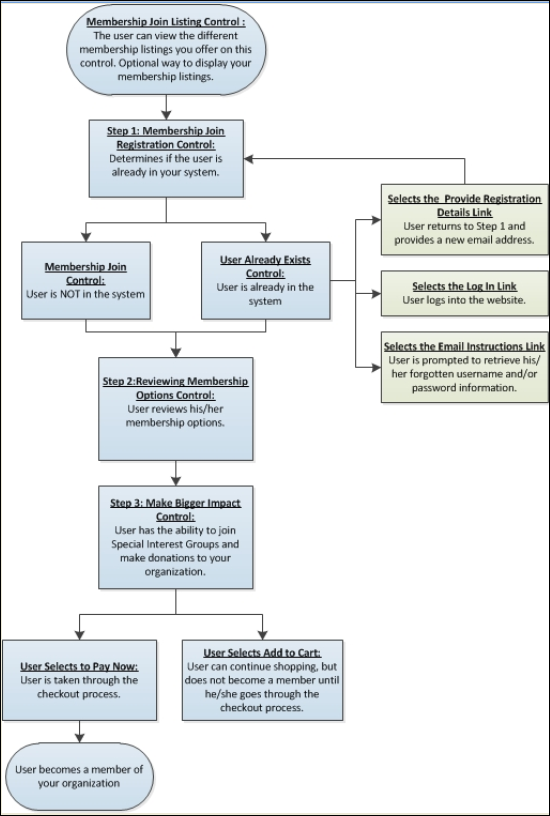
After setting up the recommended membership
join process, the workflow for users is as follows: