The membership listing control
is designed to leverage the standard setups for each membership. However,
it is important to understand which choices in the back office will impact
the way this control displays various membership options online.
After first creating a membership group (see Creating a Member Group for more information), and then defining the membership product (see Creating a Membership Product for more information), it is very important to web-enable the membership listing(s) that you want to display on the web. The Defining a Membership Product to Display on the Web section details general settings that need to be configured in the back office.
The section below details how the listing control interacts with the following specific back office settings:
· Membership group display order
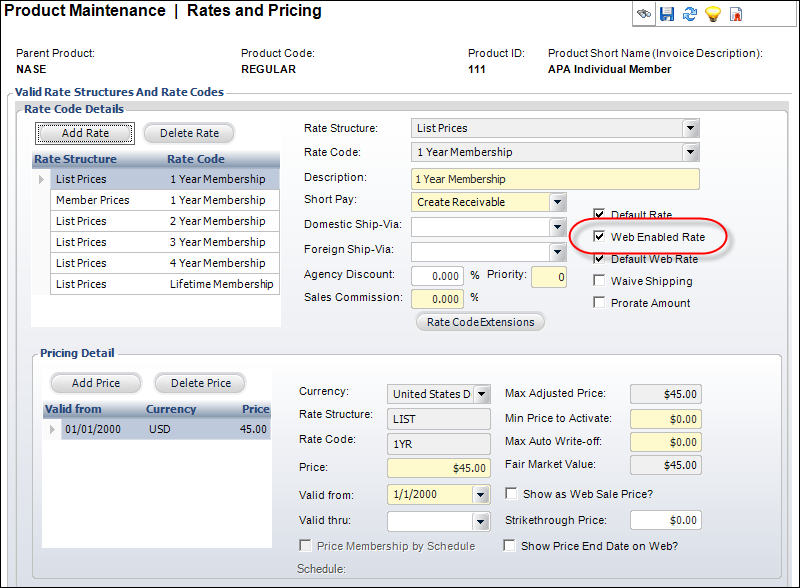
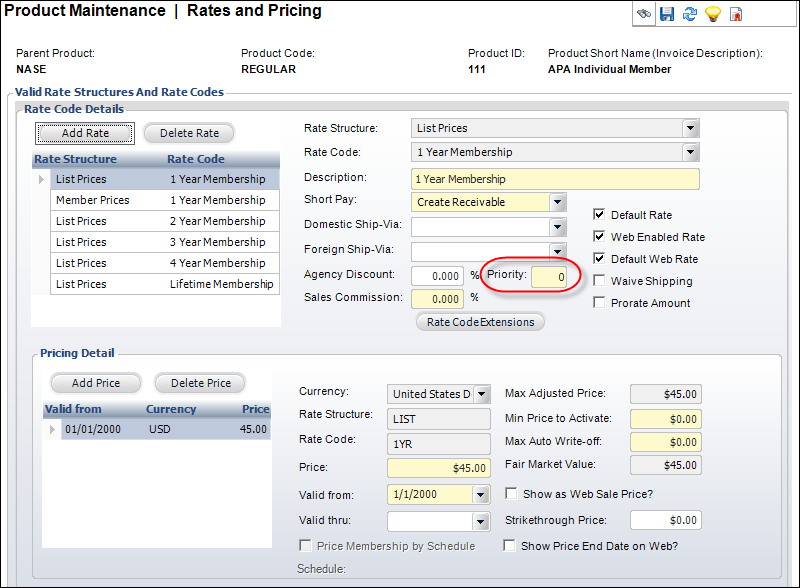
In order to display the membership rates on the web, the Web
Enabled Rate checkbox must be checked on the Rates
and Pricing screen in Product Maintenance, as highlighted below. If
this checkbox is NOT checked, the membership rate will NOT display on
the web.
 The
maximum number of rate codes that can display on the Membership
Listing control is three. The first three rates (based on the settings
in the Priority text box) will
be displayed; others will be suppressed from the listing page due to space
constraints. More than three membership rate listings can display after
a user has selected a membership and started the join process.
The
maximum number of rate codes that can display on the Membership
Listing control is three. The first three rates (based on the settings
in the Priority text box) will
be displayed; others will be suppressed from the listing page due to space
constraints. More than three membership rate listings can display after
a user has selected a membership and started the join process.
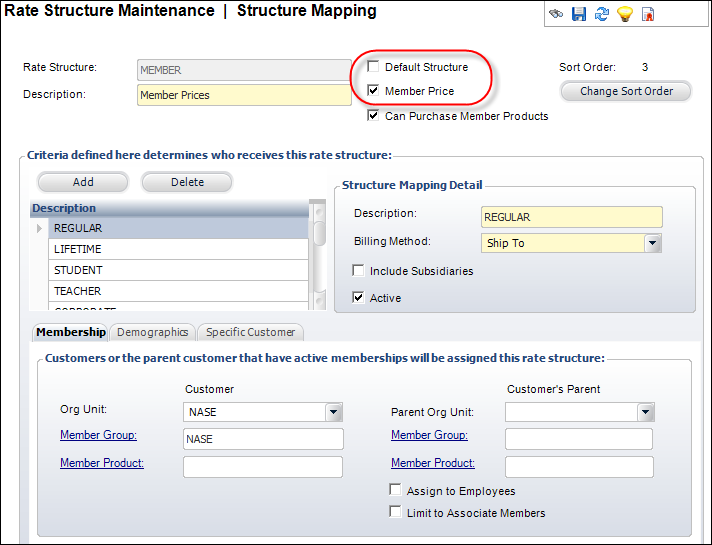
In order to maintain rate structures for membership on the web, the
"ListRateStructure" and "MemberRateStructure" values
in the Web.config for PersonifyDataServices
should be correctly mapped with the Rate
Structure Maintenance screen (ORD000) in the back office, as highlighted
below.
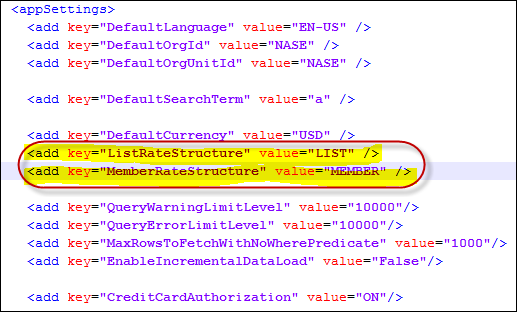
To do so, from the Rate Structure Maintenance screen in the back office, check Default Structure checkbox and Member Price checkbox, as highlighted below. The "List Rate Structure" corresponds to the "Default Structure" and the "Member Rate Structure" corresponds to the "Member Price". See Defining Rate Structure Defaults for more information.
The order in which the membership rates display is determined by the
number entered in the Priority
text box on the Rates
and Pricing screen in Product Maintenance, as highlighted below. If
you enter a "1" in the Priority text box, it will cause the
rate code to display first in the listing (i.e., farthest to the left).
If there is NOT a priority order set, the order will be random.
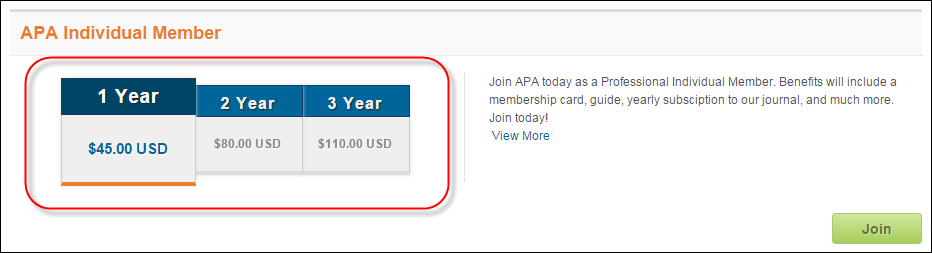
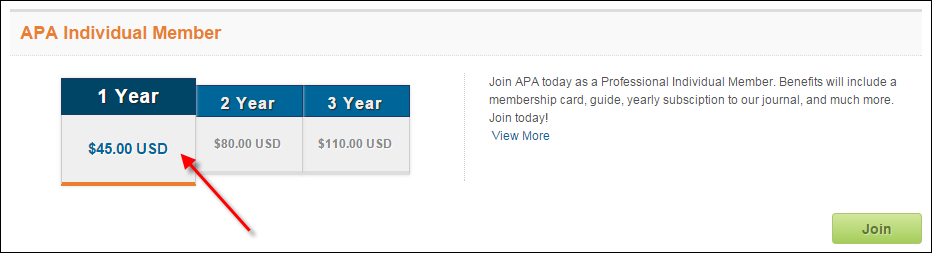
Web users will see the membership prices listed in the order you setup
in the back office, as shown below. The most prominent rate is the Default
Web Rate (see below for more information).
As a best practice, it is highly recommended that you set your membership
default web rate to the best per-year deal (e.g., the longest duration
of membership, this typically results in the most savings for potential
members) or the most popular membership rate. In addition, make sure to
be very consistent with your rate code descriptions, because this allows
potential members to easily compare and contrast the different membership
rates and options that you offer.
Similar to the Priority order, if there is NOT a Default Rate/Featured
Product defined, the featured membership will be random.
Additionally, the appropriate rate must have the Default Web Rate checkbox checked on the Rates and Pricing screen in Product Maintenance, as highlighted below.
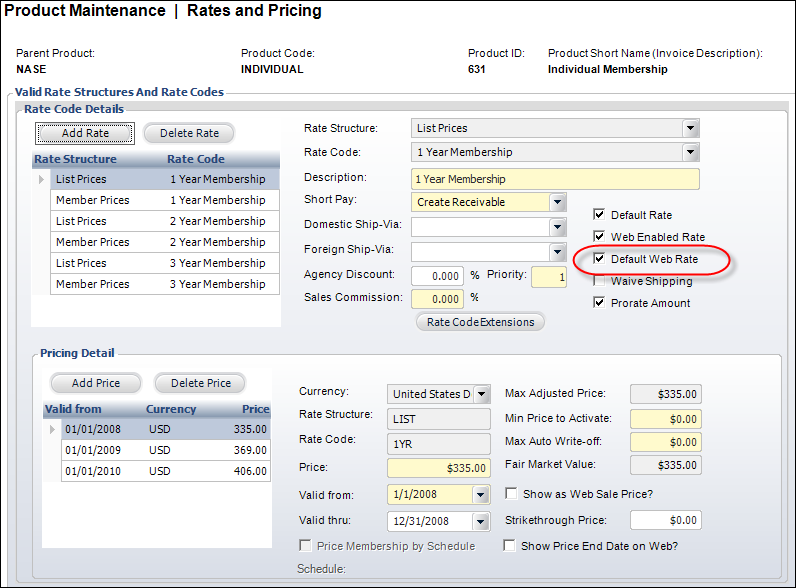
 You
can only have one featured membership for each membership group.
You
can only have one featured membership for each membership group.
Web users will see the default/featured web rate for membership displayed
on your e-Business site, as highlighted below.
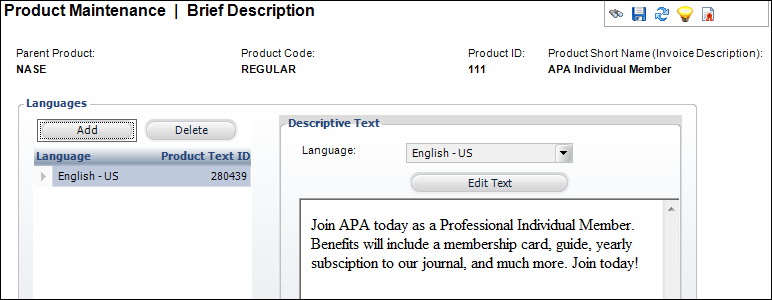
This should provide a brief overview of the membership’s most salient details (e.g., benefits,differences from other memberships, etc.). A user needs to know why he/she should choose one type of membership over another, as well as why he/she should become a member of your organization. As a best practice, Personify recommends a bulleted list that highlights the different membership benefits and indicates any variation by rate code (e.g., 1 year members receive Quarterly Journal, 2 year members also receive Industry Magazine, etc.).
The brief description is defined on the Brief
Description screen in Product Maintenance, as shown below.
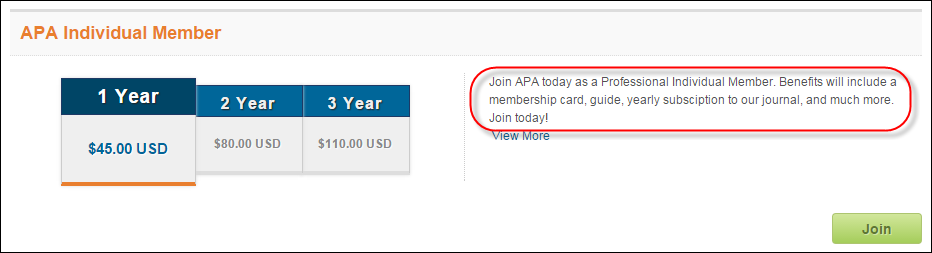
The brief description displays to the right on the Membership Listing
control, as highlighted below.
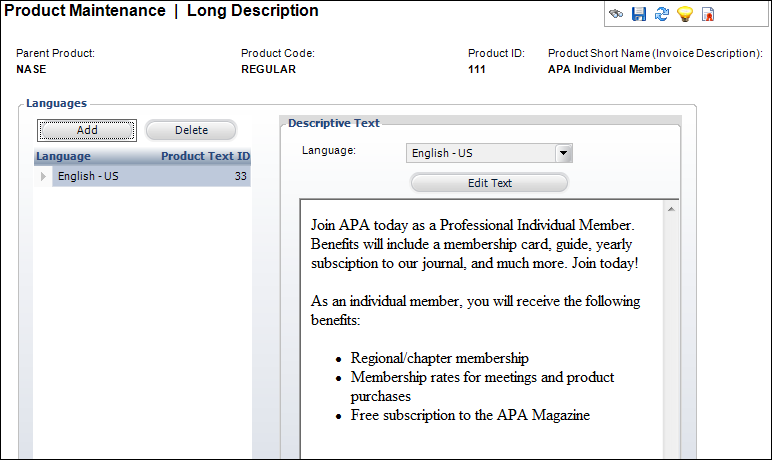
This is an opportunity to provide more details about a particular membership.
The long description is defined on the Long
Description screen in Product Maintenance, as shown below.
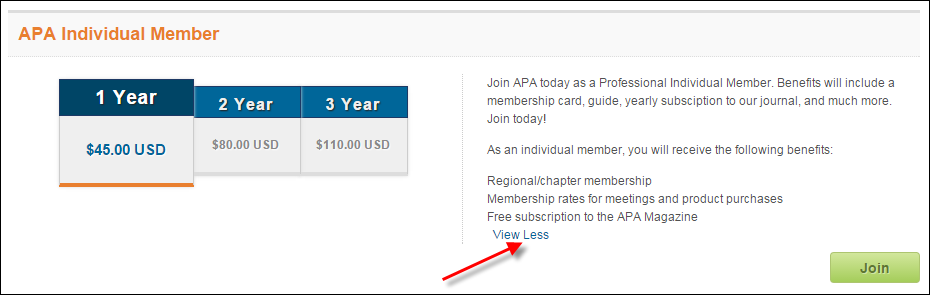
Long description text will display if the web user clicks the View More link, highlighted below.
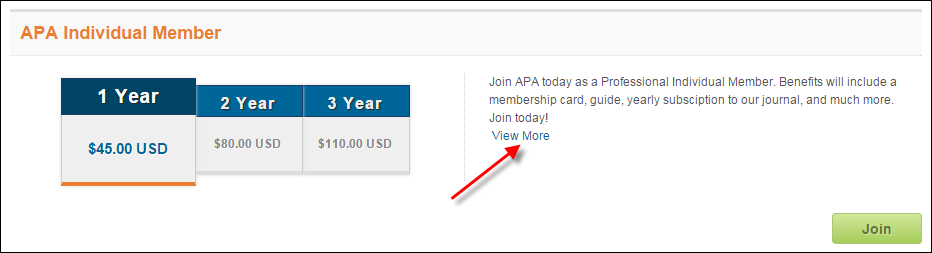
The web user can then click View Less (highlighted below) to collapse the long description.
The web control will respect formatting set up in Product Central. It
is the responsibility of the user setting up this data to ensure that
it will look good online. As a best practice, as little formatting as
possible should be used so the website’s style sheet can be leveraged
for a consistent user experience.
The
Sort Order field in the back office is only used by the Promotional
(Featured) Product control. If you define a Sort Order for a membership
product, it will NOT display on the Membership Product control. It only
will display on the Promotional (Featured) Product control.
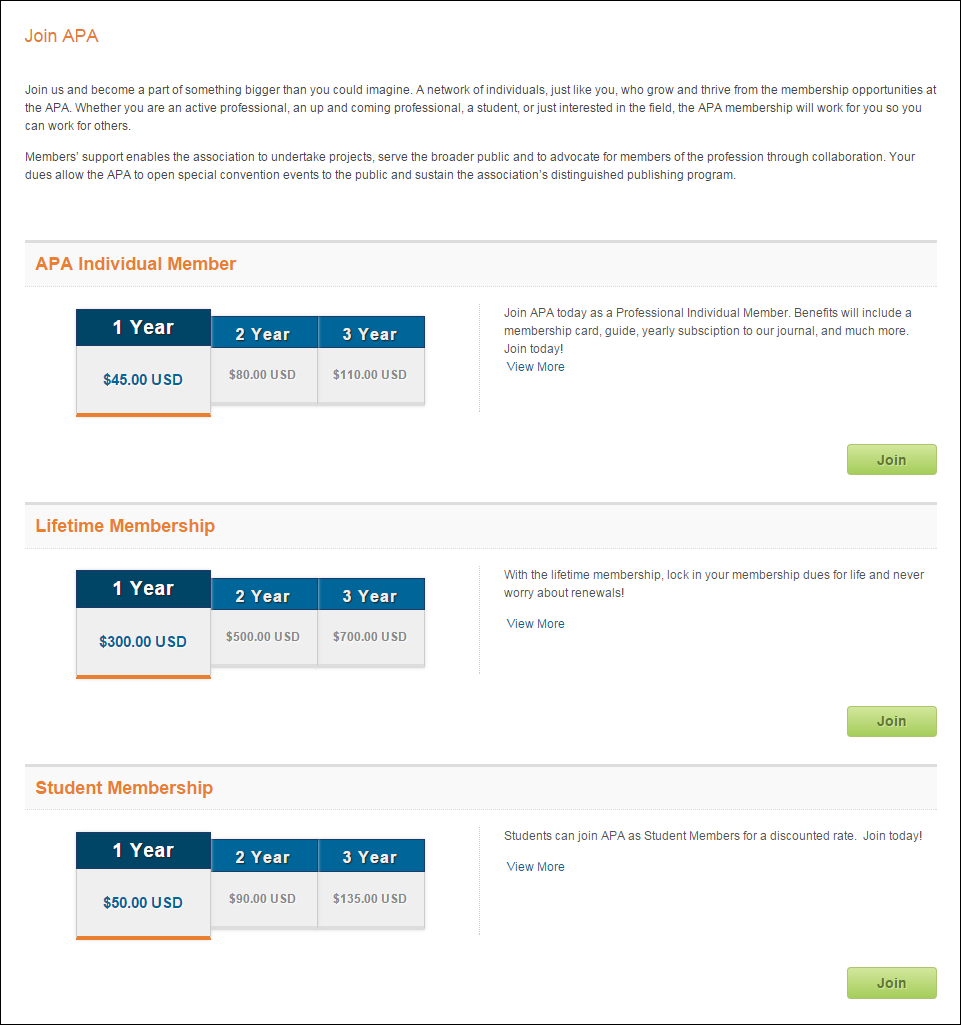
Currently, the order in which the membership groups are displayed on the web is determined by their product ID number. The product ID number is the default display order for membership groups on the web and is determined by the order that the membership groups were created in the back office.
As
of 7.6.0, the product ID number displays in the header on the Product
Maintenance screen.
For example, if APA Individual Member has a product ID number of 156,
Lifetime Membership has a product ID of 157, and Student Membership has
a product ID of 158, on the web the display order will be as follows:
APA Individual Member, Lifetime Membership, Student Membership, as shown
below.