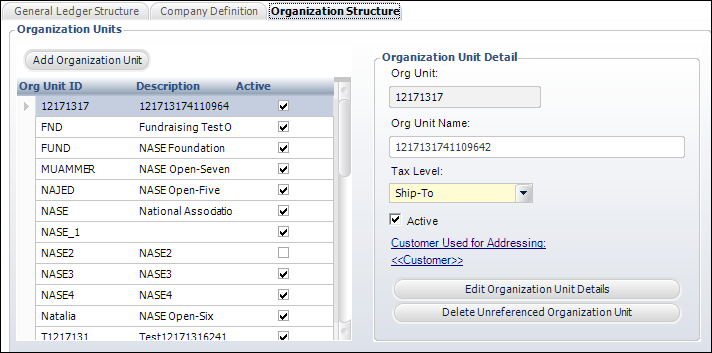
To define the organization structure:
1. From the
Organization
and GL Structure screen, access the Organization
Structure tab, as shown below.

2. Highlight an organization unit in the table, perform the following, if necessary:
a. If necessary, change the Org Unit Name.
b. Select the Tax Level from the drop-down.
· Active
· Customer Used for Addressing
3. You can add, edit, and delete the organization units to define the structure.
 See Organization
Unit Defaults Setup for more information.
4. Click Save.
Screen Element |
Description |
|---|---|
Organization Structure |
|
Add Organization Unit |
Button. When clicked, the Organizational Unit Maintenance screen displays. See Organization Unit Definition for more information. |
Org Unit |
Text box. The acronym of the organization unit. |
Org Unit Name |
Text box. The long name of the organization unit. |
Tax Level |
Drop-down. Select to whom the tax will be applied. For example, Ship-to or Bill-to. Values in the drop-down are populated based on the fixed codes defined for the APP "TAX_LEVEL" system type. |
Active |
Checkbox. When checked, indicates the account is active. Only active accounts display in the lookup and can be used for product setup or in transactions. |
Customer Used for Addressing |
Link. When clicked, the Customer Chooser screen displays. Select a customer to use for addressing.
|
Edit Organization Unit Details |
Button. When clicked, the Organizational Unit Maintenance screen displays. See Organization Unit Defaults Setup for more information. |
Delete Unreferenced Organization Unit |
Button. When clicked, the highlighted row from the table is deleted. |
See Also:
· Overview: Defining the Organization and GL Structure
· Setting Org and GL Structure Defaults