 The
Persona Wizard is recommended when you set up new personas since it automatically
links personas and security groups.
The
Persona Wizard is recommended when you set up new personas since it automatically
links personas and security groups.The Persona Wizard (PSM_PersonaWizard) screen combines the current Persona Maintenance (PSM004), Persona Menu Designer (PSM006), and Security Group Maintenance (PSM002) screens. The persona, menu structure, and privileges are displayed together as a single process rather than three separate processes.
The
Persona Wizard is recommended when you set up new personas since it automatically
links personas and security groups.
To define personas using the Persona Wizard:
1. From the Personify360 main toolbar, select Security > Persona Wizard.
2. Click
Create New Persona.
The Persona Wizard Step 1 of 6 - Persona Details screen displays, as shown
below.
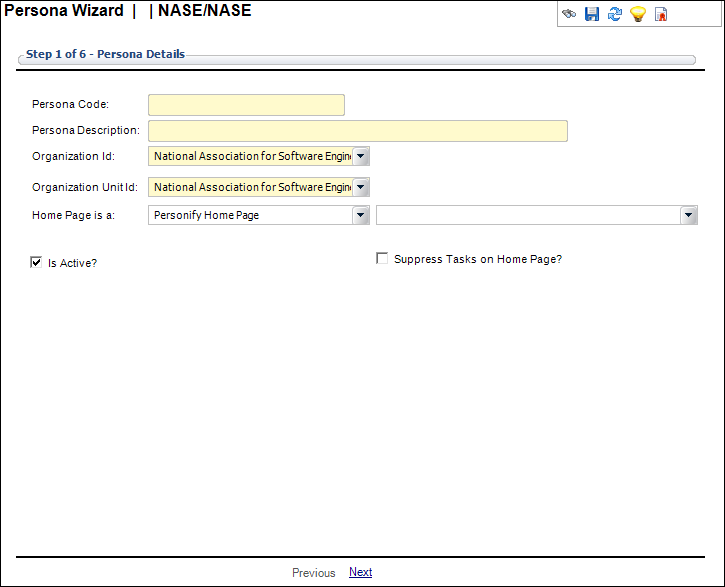
3. On the Persona Wizard Step 1 of 6 - Persona Details screen, perform the following:
a. Enter the Persona Code.
b. Enter the Persona Description.
c. Select the Organization ID and Organization Unit ID.
d. From the first drop-down next to “Home Page is a:”, select one of the following to determine the screen that displays when a user with this persona as default logs into the application:
i. Personify Home Page
If selected, the second drop-down provides you with a list of quick-start
Personify360 Home Pages
as set up by your administrator during System Setup.
Information on setting up and enabling the Personify Home Pages appears
in the Defining Home Pages.
ii. Dashboard
If selected, the second drop-down provides you with a list of available
BusinessObjects
dashboards the persona is associated with.
iii. Command or URL
If selected, the second entry field allows you to open the Command Builder
and build a command you want executing upon login OR type in a URL of
a webpage you want opened upon login.
e. Depending
on your selection in the first drop-down, select or enter an entry into
the second drop-down.
Options include a specific Home Page, Dashboard, Personify360 Command,
or URL.
f. Select whether or not to Suppress Tasks on Home page.
g. If necessary, uncheck the Is Active? checkbox.
4. Click
Next.
The Persona Wizard Step 2 of 6 - Define Menu Structure for the Persona
screen displays, as shown below.
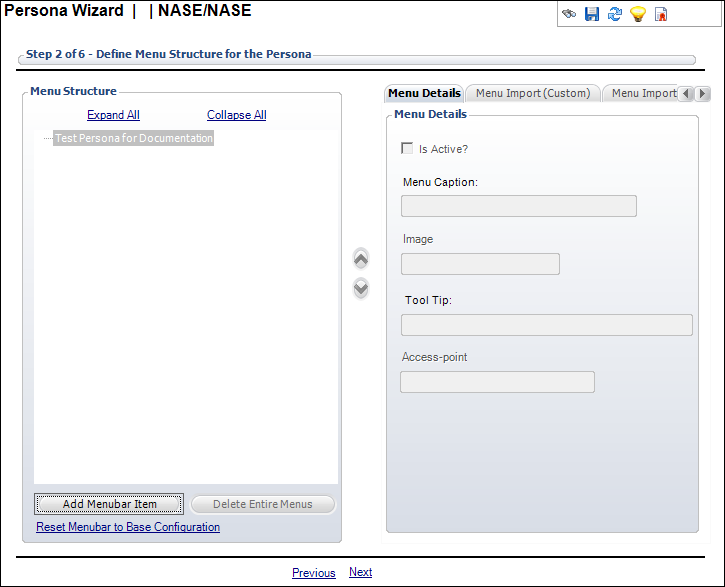
The Persona Wizard Step 2 of 6 - Define Menu Structure for the Persona
screen works exactly like the Persona Menu Designer screen. See Defining
Personify360 Menu Structures for more information on defining a menu
structure on this screen.
5. Click
Next.
The Persona Wizard Step 3 of 6 - Details of Related Security Group screen
displays, as shown below.
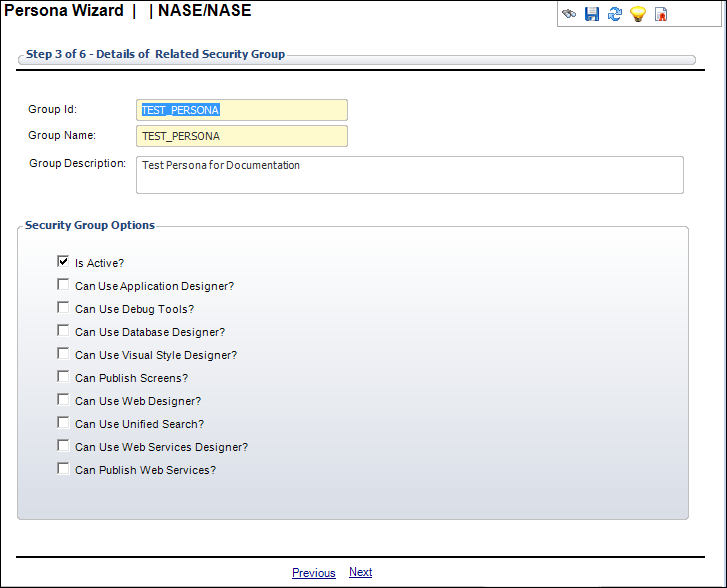
6. On the Persona Wizard Step 3 of 6 - Details of Related Security Group screen, perform the following:
a. Enter
a unique Group Id and Group
Name.
This defaults to the Persona Code entered in step 3a.
b. Enter
the Group Description.
This defaults to the Persona Description entered in step 3b.
c. In the Security Group Options section, check the appropriate checkboxes:
· Is Active?
· Can Use Application Designer?
· Can Use Debug Tools?
· Can Use Database Designer?
· Can Use Visual Style Designer?
· Can Publish Screens?
· Can Use Web Designer?
· Can Use Unified Search?
· Can Use Web Services Designer?
· Can Publish Web Services?
If a security
group already exists with the same name as the persona, then the existing
security group automatically populates in the Group ID and Group Name
fields. If a security group does not exist with the same name as the persona,
then the security name automatically populates as the same name as the
persona (uses the exact name with no underscores).
7. Click
Next.
The Persona Wizard Step 4 of 6 - Assign Application Permissions to the
Persona screen displays, as shown below.
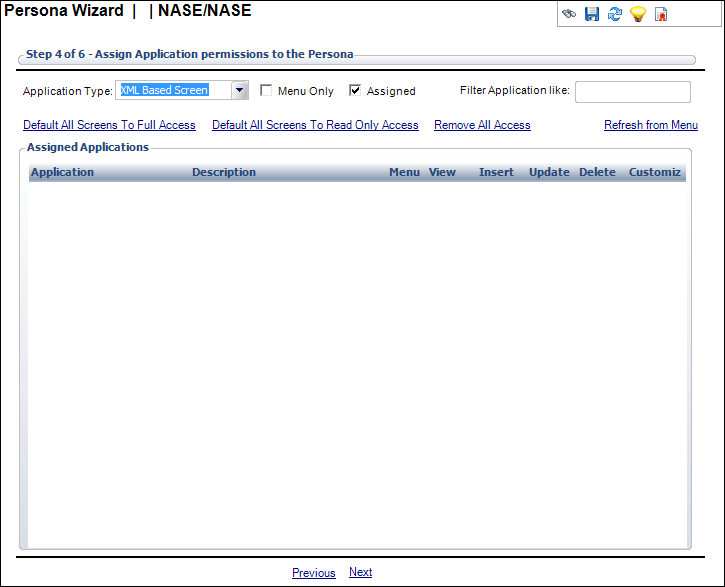
8. On the Persona Wizard Step 4 of 6 - Assign Application Permissions to the Persona screen, a list of batch processes, online reports, XML-based screens, and Web pages (options in the Application Type drop-down) display. Select the filters and the appropriate applications that the security group has permissions for. You can use the following links to make mass updates:
· Default All Screens to Full Access
· Default All Screens to Read-Only Access
· Remove All Access
· Refresh from Menu
The applications
automatically display based on the menu options you selected for the persona
on the Persona Wizard Step 2 of 6 - Define Menu Structure for the Persona
screen. For example, if you select the Accounting menu to display for
the persona, then the Accounting-related applications display on this
screen.
9. Click
Next.
The Persona Wizard Step 5 of 6 - Assign Access Point Permissions to the
Persona screen displays, as shown below.
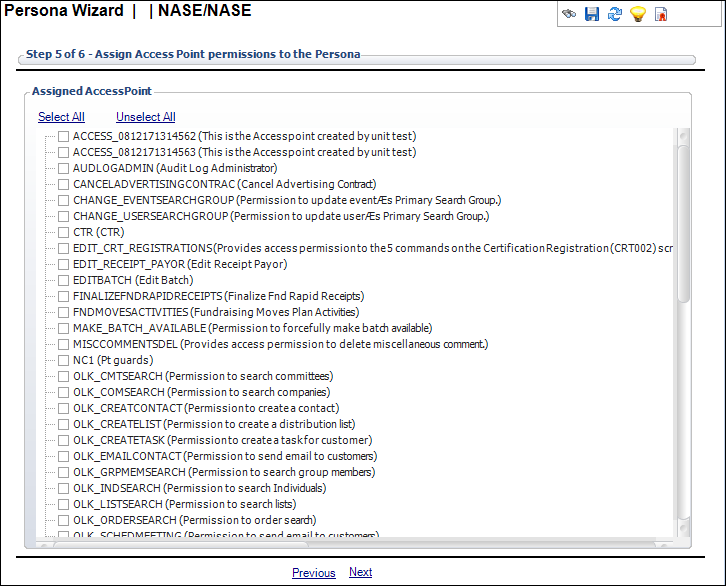
10. On the Persona Wizard Step 5 of 6 - Assign Access Point Permissions to the Persona screen, a list of access points defined for the organization unit displays. Select the appropriate access point checkboxes that the security group has permissions for.
The access
points with the “OLK” prefixes are associated with Outlook integration.
If assigned, the persona is permitted to perform certain actions in Outlook.
11. Click
Next.
The Persona Wizard Step 6 of 6 - Assign Users to Persona screen displays,
as shown below.
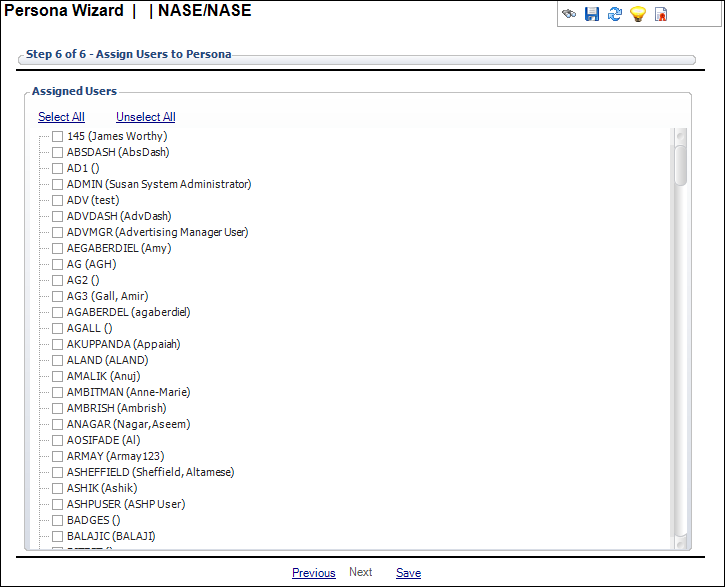
12. On the Persona Wizard Step 6 of 6 - Assign Users to Persona screen, select the appropriate user checkboxes that can use the persona.
13. Click Save.
Screen Element |
Description |
|---|---|
Step 1 of 6 - Persona Details |
|
Persona Code |
Text box. The name of the persona. For example, Call Center Manager or System Administrator. |
Persona Description |
Text box. The description of the persona. This description displays at the top-right corner of the Personify360 screen (or in the My Persona drop-down if you have multiple personas). |
Organization ID |
Drop-down. Identify the organization that owns the persona. |
Organization Unit ID |
Drop-down. Identify the organization unit that owns the persona. |
Home Page is a |
Drop-down. The screen that displays when a user with this persona as default logs into the application. Depending on your selection in the first drop-down, select or enter an entry into the second drop-down. Options include a specific Home Page, Dashboard, Personify360 Command, or URL. |
Is Active? |
Checkbox. When checked, indicates the persona is active. Only an active persona can be assigned. |
Suppress Tasks on Home |
Checkbox. When checked, the "What do you want to do?" tasks pane will not display on the home page selected from the "Home Page is a" drop-down. |
Step 2 of 6 - Define Menu Structure for the Persona See Defining Personify360 Menu Structures for more information on the screen elements. |
|
Step 3 of 6 - Details of Related Security Group |
|
Group ID |
Text box. A unique ID for the security group. |
Group Name |
Text box. The long name of the security group. |
Group Description |
Text box. The description of the security group. |
Is Active? |
Checkbox. When checked, indicates the security group is active. Only an active security group can be assigned. |
Can Publish Screens? |
Checkbox. When checked, indicates the security group can publish screens to the database. |
Can Use Debug Tools? |
Checkbox. When checked, indicates the security group can use the debug tools. The debug tools include the options available from the Debug menu on the menu bar. If you check this checkbox and modify the Toolbars.xml file in the Config folder, then the members of the security group have permission to turn on or off the command line (the blank line below the toolbar where you can enter a screen name and access it directly). |
Can Use Database Designer? |
Checkbox. When checked, indicates the security group can use the Database Designer. |
Can Use Visual Style Designer? |
Checkbox. When checked, indicates the security group can use the Visual Style Designer. |
Can Use Application Designer? |
Checkbox. When checked, indicates the security group can use the Application Designer. The Application Designer is used to customize and create Personify360 screens. |
Can Use Web Designer? |
Checkbox. When checked, indicates the security group can use the Web Form Designer. The Web Form Designer is used to create and publish forms for your Personify360 e-Business or external ASP.NET applications.
|
Can Use Unified Search? |
Checkbox. When checked, indicates the security group can use the Unified Search functionality first introduced in the 7.3.1 release. Unified Search is a search box that appears in the top-left corner of the application that allows users to enter a free-text search across all customer and order entry records within the user’s Organization Unit.
|
Step 4 of 6 - Assign Application Permissions to the Persona |
|
Application Type |
Drop-down. Select the type of application to filter by. Options include Batch Process, Online Report, XML-Based Screen, and Web Page. The results display automatically. |
Menu Only |
Checkbox. Check to search by menu items only (applications that have the “Menu” checkbox checked). The results display automatically. |
Assigned |
Checkbox. Check to search by assigned applications only. The results display automatically. |
Filter Application like |
Text box. Enter the name of the application. The results display automatically. |
Default All Screens to Full Access |
Link. Click to automatically give the security group full permissions to all the applications. |
Default All Screens to Read-Only Access |
Link. Click to automatically give the security group read-only (view) permissions to all the applications. |
Remove All Access |
Link. Click to automatically remove all permissions from all the applications for the security group. |
Refresh from Menu |
Link. Click to refresh the applications available based on the menu selected on the Step 2 of 6 - Define Menu Structure for the Persona screen. |
Step 5 of 6 - Assign Access Point Permissions to the Persona |
|
Select All |
Link. Click to select all access point permissions to the security group. |
Unselect All |
Link. Click to unselect all access point permissions from the security group. |
Step 6 of 6 - Assign Users to Persona |
|
Select All |
Link. Click to select all users to the persona. |
Unselect All |
Link. Click to unselect all users from the persona. |