Defining Menu Structures
Using this screen, you can assign a menu structure to a persona. The
menu structure is the toolbar that displays, which varies depending on
which persona is selected. The Base Persona and Menu template resolves
the issue of customized personas and menus being overwritten when upgrading
to a new release. Also, users can now reset and copy their personas from
base and customer personas.
 Two
new tables were added to resolve the issue of customized personas and
menus being overwritten: PSM_PERSON_BASE and PSM_PERSONA_MENU_BASE. These
tables store the metadata for Base Persona and Menu template. The product
development team will send SQL scripts to update the Base Persona and
Menu template. The metadata in the PSM_PERSONA and PSM_PERSONA_MENU tables
will not be updated in the future.
Two
new tables were added to resolve the issue of customized personas and
menus being overwritten: PSM_PERSON_BASE and PSM_PERSONA_MENU_BASE. These
tables store the metadata for Base Persona and Menu template. The product
development team will send SQL scripts to update the Base Persona and
Menu template. The metadata in the PSM_PERSONA and PSM_PERSONA_MENU tables
will not be updated in the future.
There are two ways to define the menu structure for a persona:
1. Manually
enter menu items.
2. Copy an
existing menu structure and modify it.
At any time, you can reset the menubar to the base structure by clicking
Reset Menubar to Base from the Menu Setup task
category.
The section below details how to create a menu structure using both
of these methods.
To define a menu structure for the persona:
1. From the
Security Central
screen, click Maintain Persona Menu Structure.
The Persona Menu Designer search screen displays, as shown below.
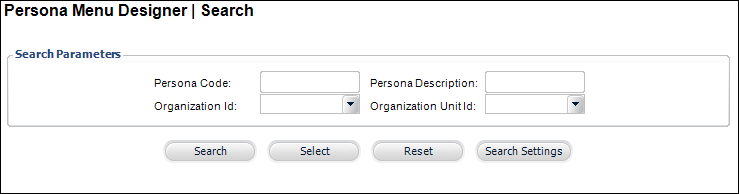
2. Search
for and select the Persona Code you
want to define.
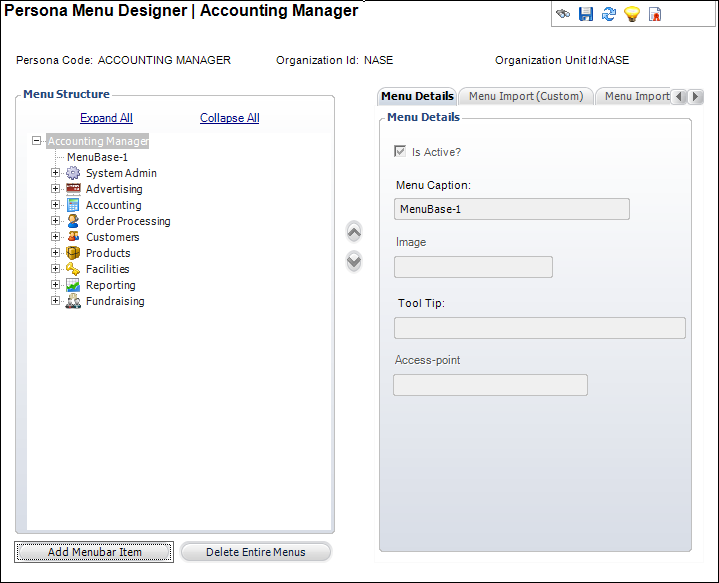
The Persona Menu Designer screen displays, as shown below.
3. To use
a custom menu already created, perform the following:
a. Access
the Menu Import (Custom) tab, as highlighted
below.
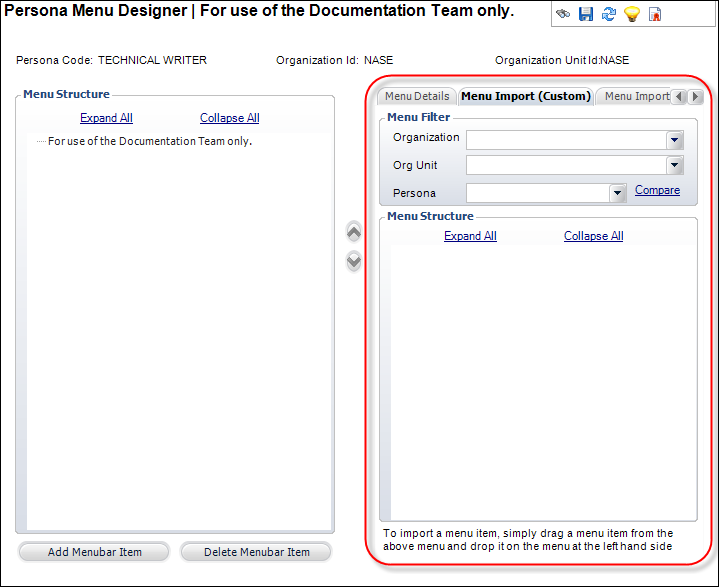
b. Select
the Organization and Organization
Unit from the drop-downs.
c. Select
the Persona from which you want to import the
menu structure.
The selected persona’s menu structure automatically displays below, as
highlighted below.
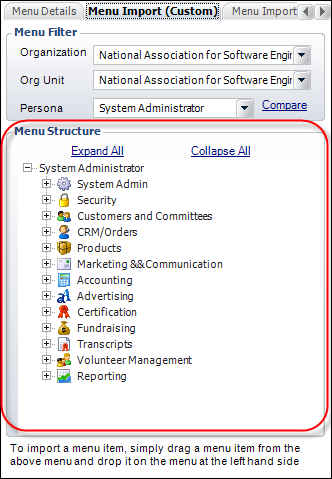
d. Drag-and-drop
a structure from the right menu to the left menu, as shown below.
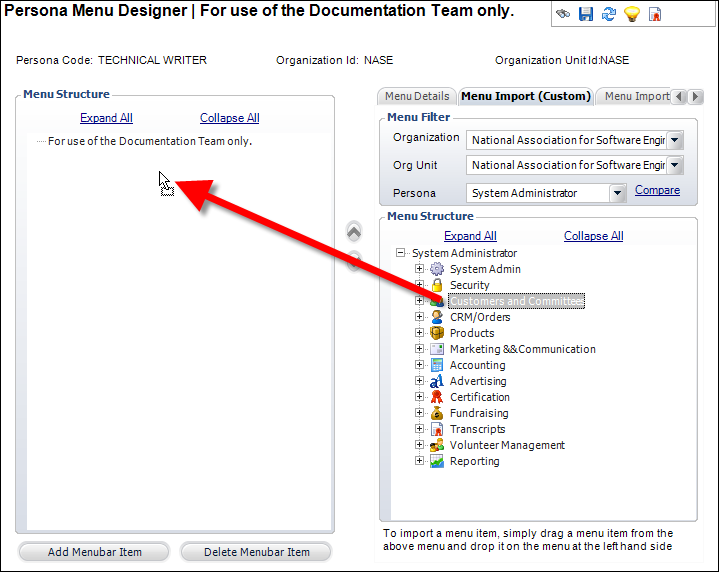
You can select
an entire menu button or just an application from within a menu button.
4. To use
a base menu, perform the following:
a. Access
the Menu Import (Base) tab, as highlighted below.

b. Select
the appropriate Persona from the drop-down.
The selected persona’s menu structure automatically displays below, as
highlighted below.
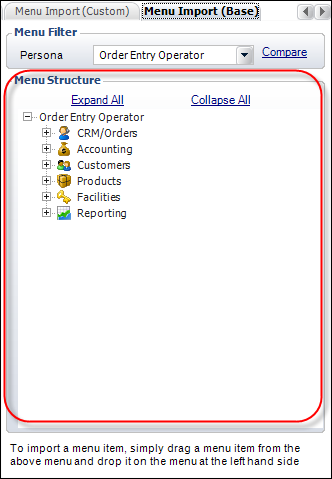
c. Drag-and-drop
a structure from the right menu to the left menu.
5. To create
a menu bar from scratch or add additional menu bar items to an imported
menu, perform the following:
a. Click
Add Menubar Item.
A new tool displays and the Menu Details tab enables, as shown below.
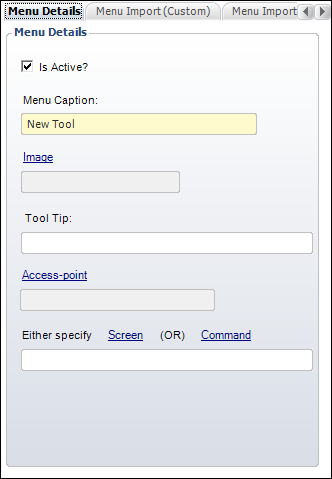
b. Select
whether or not the new menu bar item Is Active?
c. Enter
the Menu Caption for the new tool.
d. If necessary,
click the Image link to search for and select
an image to associate with the new menu bar item.
e. If necessary,
enter a Tool Tip.
The tool tip will display when a user points to a menu bar item.
f. If necessary,
click the Access-point link to select an access
point for the menu bar item.
6. Click
Save.
Screen Element |
Description |
Menu Structure |
Add Menubar Item |
Button. When clicked, a new menu is added
under the highlighted menu. |
Delete Menubar Item |
Button. When clicked, the highlighted
menu is deleted from the menu structure. |
Up/Down arrows |
Buttons. Moves the highlighted menu up/down
in the menu structure. |
Menu Details |
Is Active? |
Checkbox. When checked, indicates the
new menu is active. |
Menu Caption |
Text box. The caption of the menu that
the displays for the persona. |
Image |
Link. When clicked, a browser opens. Search
for the image associated with the menu. An image is typically
not used for internal menu items. |
Tool Tip |
Text box. This is text that displays if
you hover over the menu item. |
Access point |
Link. When clicked, the Generic Chooser
screen displays. Select an access point associated with the menu. |
Screen or Command |
Links. Specify which screen the menu item
opens. You can specify this by selecting either the screen or
the command. For top-level menu items, do not specify a screen
or a command. The submenu items typically call the applications.
For example, you can call the following screen or command:
· The
BusinessObjects server for a Membership Advantage Dashboard
· A
SharePoint webpage
· The
Committee Central screen for a specific customer
· The
Call Center screen to find a member quickly
· The
Send Email (APP014) screen to send an email quickly |
Menu Import (Custom) |
Organization |
Drop-down. The organization associated
with the persona for which you want to create a menu structure. |
Org Unit |
Drop-down. The organization unit associated
with the persona for which you want to create a menu structure. |
Persona |
Drop-down. A list of all personas from
which to copy to the menu structure. |
Compare |
Link. When clicked, opens the Compare
Persona (PSM006_Persona_Diff) screen, which compares the personas
side-by-side in XML. This screen is also color-coded to see specifically
what was added, removed, or changed. See Comparing
Personas for more information. |
Menu Import (Base) |
Persona |
Drop-down. A list of all personas from
which to copy to the menu structure. |
Compare |
Link. When clicked, opens the Compare
Persona (PSM006_Persona_Diff) screen, which compares the personas
side-by-side in XML. This screen is also color-coded to see specifically
what was added, removed, or changed. See Comparing
Personas for more information. |