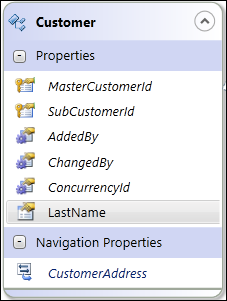
Read/Write entities adopt the “blue” theme with the “blue” entity icon and contain the following expandable/collapsible groups:
· Properties
· Navigation properties
New Read/Write Entities can be created in following different ways:
Dragging and dropping the “Entity (Read/Write)” from the Standard Tools on to the Design Canvas creates a new Read/Write Entity.
In this case, it creates a blank Read/Write Entity and the developer defines the map path and adds properties one at a time. Below is the suggested work flow for creating a new read/write entity from Standard Tools:
1. Drag and
drop “Entity (Read/Write)” from the Standard Tools on to the Design Canvas.
The Personify WSD automatically adds the system generated property “EntityGUID”.
2. On the Properties Pane, specify the appropriate Entity name and Entity Set name.
3. On the
Properties Pane, specify the map path.
Map paths point to the appropriate API Collection name. The developer may
either type in the auto-complete text box or click on the "..."
ellipsis to select the appropriate API Collection from the API Collection
Chooser.
4. Once the map path is specified, all the primary key and system properties will be automatically added.
5. Right-click
on the entity and select Add Property.
Add as many properties as needed.
6. Click on each property and on the Properties Pane, specify the appropriate Property name.
7. Click on the Entity Header area navigate to Mapping Pane.
8. Specify
the map path for all the properties.
Map paths point to the appropriate API Property name. The developer may
either type in the auto-complete text box or click on the "..."
ellipsis to select the appropriate API Collection from the API Collection
Chooser.
Dragging and dropping the “Entity (Read/Write)” from the Standard Tools on to the Design Canvas, followed by dragging and dropping the appropriate API object from the API explorer on to the new entity on the Design Canvas, creates a new Read/Write entity.
In this case, it creates a Read/Write entity, pre-populated with appropriate name, map path, and all the properties with proper mapping. Below is the suggested work flow for creating a new read/write entity from API Explorer:
1. Drag and
drop “Entity (Read/Write)” from the Standard Tools on to the Design Canvas.
The Personify WSD automatically adds the system generated property “EntityGUID”.
2. On the Properties Pane, specify the appropriate Entity name and Entity Set name.
3. Drag and drop the appropriate API Collection from API Explorer tree on to the newly created entity on the Design Canvas.
4. On the Properties Pane, rename the Entity name and Entity Set name, as desired.
5. Select one or more properties, right-click, and select Delete Property to delete the unwanted properties.
 The Personify
WSD allows you to drag and drop the API Properties from the API Explorer
on to the entity one at a time, provided that the property being dropped
is compatible with the entity's root mapping.
The Personify
WSD allows you to drag and drop the API Properties from the API Explorer
on to the entity one at a time, provided that the property being dropped
is compatible with the entity's root mapping.
Any existing entities can be cloned to produce a new entity of same type. Below is the suggested work flow for cloning a new read/write entity from existing entity:
1. Right-click the entity from the library that you want to clone.
2. Select
Clone this Item As and then click Read/Write
Entity.
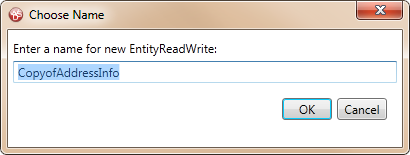
The designer prompts you to specify the name of the cloned entity, as shown
below.
The new entity will be added to the library.
3. Drag and drop the new entity on the Design Canvas.
4. Modify the Entity Name, Entity Set Name, Properties, etc., as needed.
Also in this section:
· File Uploading via Read/Write Entities
See also:
· Creating New Read-Only Entities
· Creating New Service Parameters
· Creating New Service Operations