 If the environments are load balanced, the Refresh Web Cache button on the Clear Cache screen will clear the cache for ALL instances of data services and web controls.
As of 7.5.0, the new Clear Cache screen allows you to clear cached data on the web. For example, if you add a new product in the back office to display on the web, you no longer have to wait to see the new product on the web. For a video demonstrating how to clear cached data on the web, refer to Video Demo: Clearing Cached Data on the Web.
 If the environments are load balanced, the Refresh Web Cache button on the Clear Cache screen will clear the cache for ALL instances of data services and web controls.
 Additional steps might have to be taken in order to see specific information updated on the web. For more information, please see Clearing Cached Data on the Web.
To refresh local cached data:
1. Ensure that the appropriate configuration settings have been defined and the Personify Data Services URL has been defined. For more information, please see Refreshing Cached Data.
2. Using the System Administrator persona, from the Personify360 main toolbar, select System Admin > System Setup > Clear Cache.
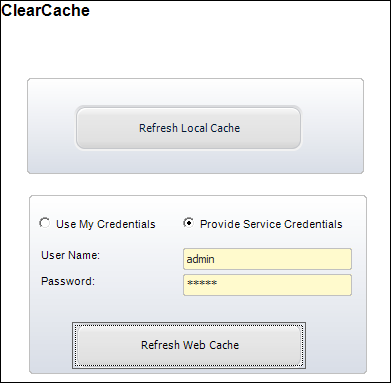
The Clear Cache screen displays, as shown below.

3. Select one of the following radio buttons:
· Use My Credentials: the system uses your login and password credentials from when you logged into Personify360.
· Provide Service Credentials: enter the valid user name and password credentials before selecting the Refresh Web Cache button.
 As of 7.5.2, if you are an active directory user, you can use the buttons on the ClearCache screen, as long as you enter the valid user name and password credentials for the data service. Personify Data Services does NOT support active directory integration. Only a defined Personify360 user can connect to Personify Data Services. See Defining Personify Users for more information.
4. Click Refresh Web Cache.
You MUST enter valid user name and password credentials, before selecting this button or you will receive an error message.
 Users must belong to a security group with access to the "CAN_CLEAR_WEB_CACHE" access point in order for the Refresh Web Cache button to display. For more information on assigning an access point to a security group, please see Defining Security Groups.