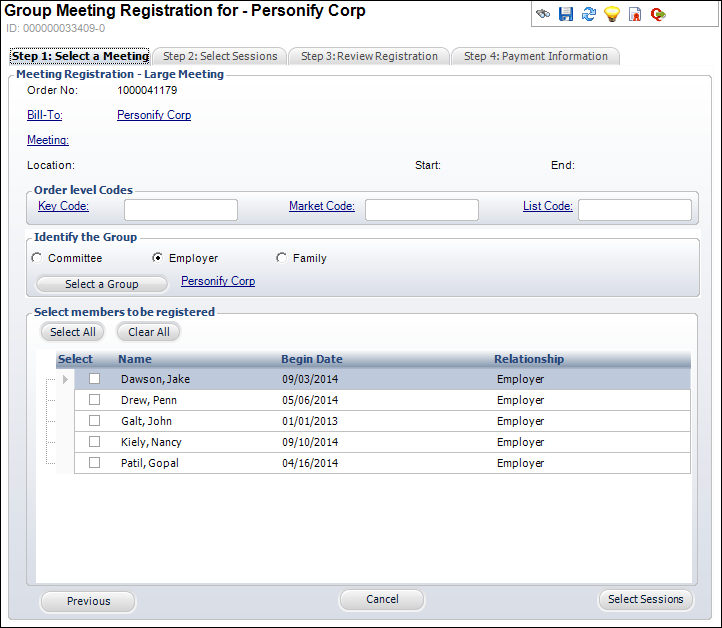
The Group Meeting Registration screen displays with the Order Number, Bill-To information, and all members within the group listed, as shown below.
Similar to the simplicity of the Simple Meeting Registration screen is the Group Meeting Registration screen. This screen allows you to create a single order for a meeting in which a group will attend. This way you can register all (or just some) members of a group for a specific meeting at once and pay for the order in one receipt with a single Bill-To person.
To process a group registration:
1. From Meeting Launch, click Process Group Registrations.
The Group Meeting Registration search screen displays.
2. Search for and select the appropriate customer.
The Group Meeting Registration screen displays with the Order Number, Bill-To information, and all members within the group listed, as shown below.
3. If necessary, modify the Bill-To information by clicking the respective link.
4. Click the Meeting link.
A Product Chooser search screen displays.
5. Search for and select the appropriate meeting.
The Location, Start date, and End date automatically populate based on the selected meeting.
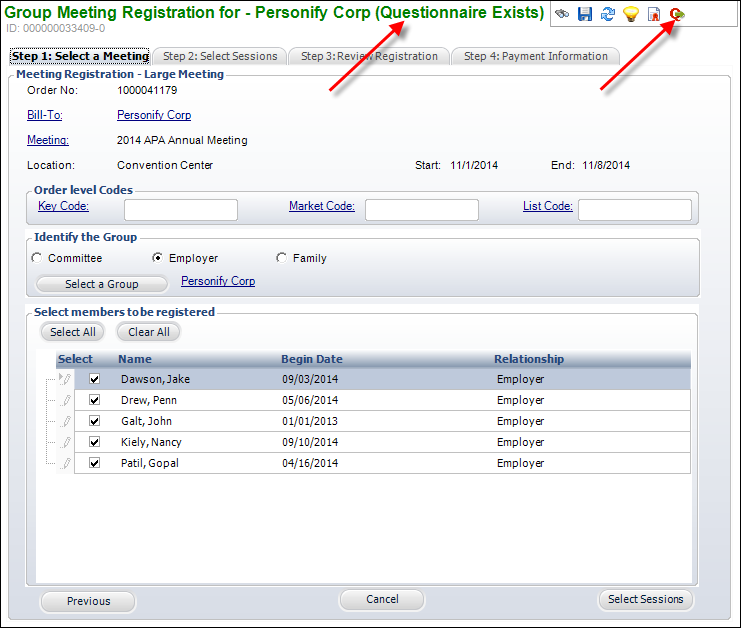
 If the selected meeting product has a product questionnaire defined, the header of the Group Meeting Registration screen will display in green text indicating that a questionnaire exists. In addition to the "Questionnaire Exists" text that displays in the header, the "Questionnaire Response" notification icon will display in the screen options, as shown below. Once the registration is saved, you can click this icon to open the questionnaire response screen where you can enter and change responses to a meeting questionnaire.
6. If necessary, click the Key Code, Market Code, and/or List Code to search and select the appropriate code.
7. From the Identify the Group section, select the appropriate radio button and click Select a Group.
8. Search for and select the appropriate Committee, Employer, or Family.
The members are displayed in the grid below.
9. Select the appropriate members to be registered or click Select All to register all members of the group for this meeting.
10. Select the Step 2: Select Sessions tab.
The Session Organizer displays, as shown below.
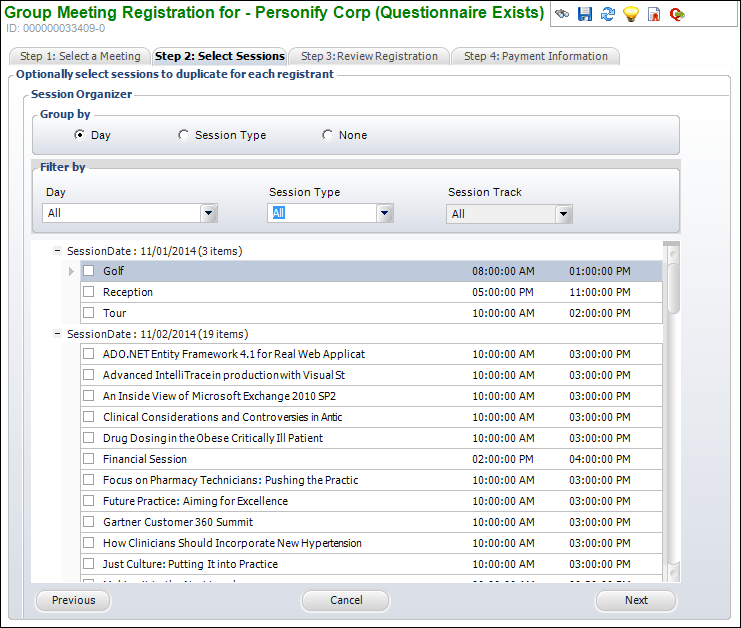
11. If necessary, use the Group by and Filter by sections to organize the available sessions.
12. Check the checkbox next to the sessions for which you want to register the group.
13. Click Next.
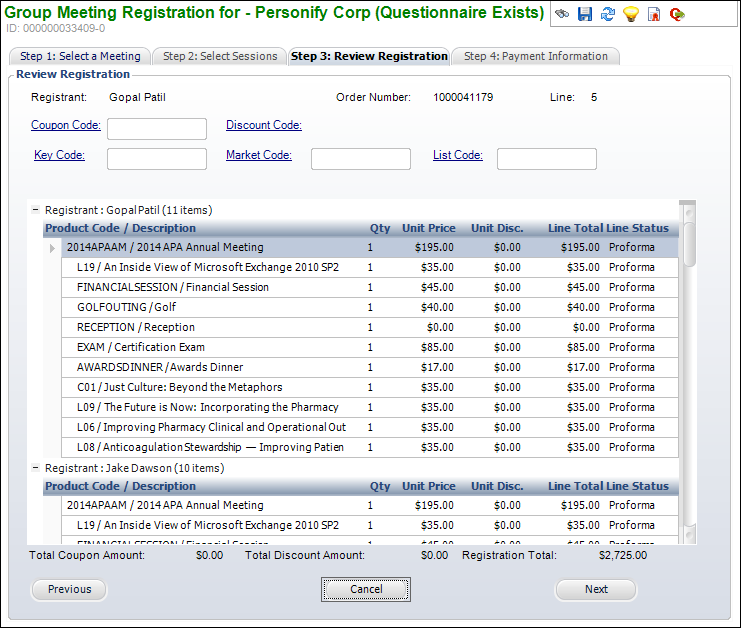
14. Select the Step 3: Review Registration tab.
A screen including a listing of all group members with each session he/she is registered for appears on the screen including order line information for each session/member.
 If a session conflict occurs and the Allow Session Conflict is not checked for the meeting product, the session that occurs appears first on the session list is added to the order and the other conflicted session(s) are not.
15. Optionally, click Coupon Code, Discount Code, Key Code, Market Code, and/or List Code to search and select a coupon, discount, key code, market code, and/or list code, respectively.
16. Click Next.
From this screen you can also choose to delete a specific session from a specific member by right-clicking the member’s session and selecting Delete.
17. Select the Step 4: Payment Information tab.
The Payment Information screen displays, as shown below.
If a batch is not already opened, you are prompted to open a batch for edit.
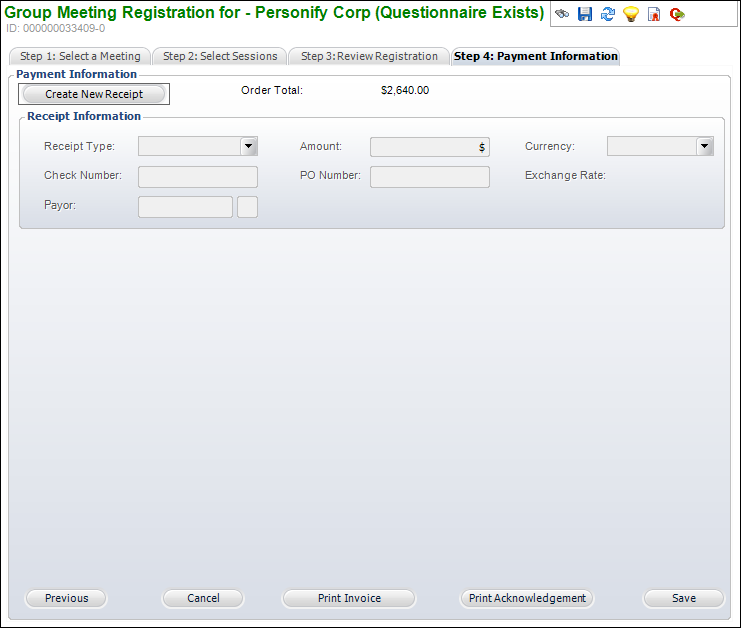
18. Click Create New Receipt.
19. Enter the appropriate payment information in the Receipt Information section.
20. Click Save.
By design, the Group Meeting Registration does not support multi-currency. If you would like it to, please contact your Account Specialist to request a customization for the multi-currency fields.
21. If applicable, enter responses to the meeting product questionnaire. For more information, please see Viewing and Entering Responses to a Meeting Questionnaire.
See Also:
· Back Office Meeting Registrations Overview
· Processing a Simple Meeting Registration
· Processing a Registration for a Large Meeting