 You
can search for meetings that have occurred in the past using the From: date field, as long as the
past meeting is still web enabled.
You
can search for meetings that have occurred in the past using the From: date field, as long as the
past meeting is still web enabled.The Events Calendar allows a web user to view all events that he/she can register for in one central location. Web users can also perform the following tasks from the Events Calendar page:
By default, when the calendar page is loaded first time, the system will search for meetings that have Meeting End Date greater than equal to the current date and where the current date is between the ecommerce_begin_date and ecommerce_end_date.
 You
can search for meetings that have occurred in the past using the From: date field, as long as the
past meeting is still web enabled.
If the web user clicks the hyperlinked name of a meeting from the preview window or from the list of meetings, he/she will be taken to the Meetings Detail page (as defined in the web settings).
 Alternatively,
if a URL is defined for a product in the Product
URL field on the eBusiness
Control screen in Product Maintenance in the back office, when the
web user clicks the hyperlinked name of a meeting from the preview window
or from the list of meetings, a new tab opens in the web user's browser
with the URL defined in the back office.
Web users can begin the meeting registration process directly from the events calendar by clicking Register Now. This will direct him/her to the Meeting Registration control (as defined in the web settings).
See also:
· To create meetings for the calendar see Configuring the Back Office Settings for the Events Calendar.
· To add the calendar to your website and define the settings see Configuring the Web Settings for the Events Calendar.
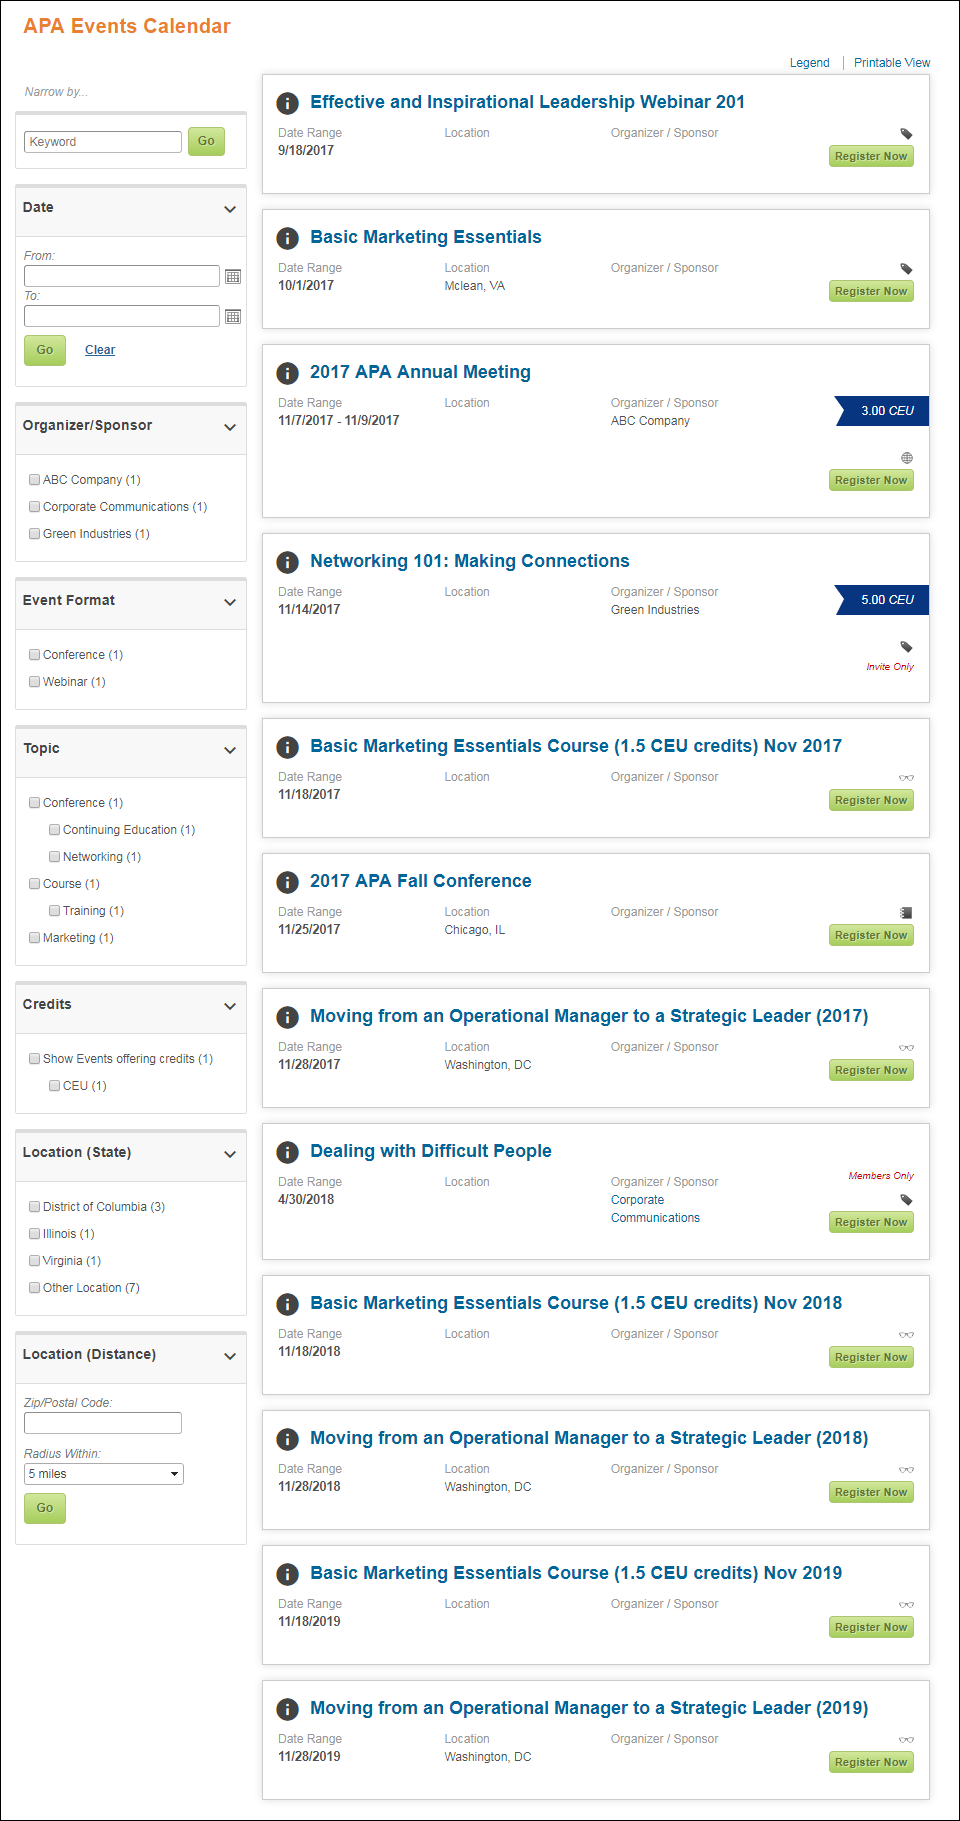
After setting up the Events Calendar control, the calendar will display similar to what is shown below.

 As
of 7.6.1, invite-only meetings will display in the Event Calendar ONLY
if the Exclude 'Invite Only' Meetings
web
setting is NOT checked. If this option is NOT enabled, "Invite
Only" will display.
Web users can select filtering options that display in the left navigation panel to search for an event on the calendar. As a web user selects filters, their selections will display at the top of the page, as highlighted below.
For more information on defining filter options for meeting products, see Configuring the Back Office Settings for the Events Calendar.
For more information on enabling, disabling, or renaming filters on the Events Calendar, see Configuring the Web Settings for the Events Calendar.
You can also pre-filter the calendar to display only events by one organizer/sponsor, format, or topic, and then remove the filtering options altogether. For more information, please see Configuring the Web Settings for a Calendar without the Left Navigation Panel.
A filter can be removed by clicking the X next to the name, or clicking Clear All to remove all selected filters.

In the meetings list, icons can be defined to display to the left of the meeting to identify different meeting categories, as displayed below. For more information on how to add or change the icons that display on the Events Calendar, please see Configuring Categorical Iconography.
![]()
 As
of 7.5.2, if an icon has NOT been defined for the Product Class of the
meeting product, the system will check to see if a default image has been
defined at the org unit level. If not, a blank, transparent box will display.
For more information on defining the default image at the org unit level,
please see Defining
Organization Unit Meeting Parameters.
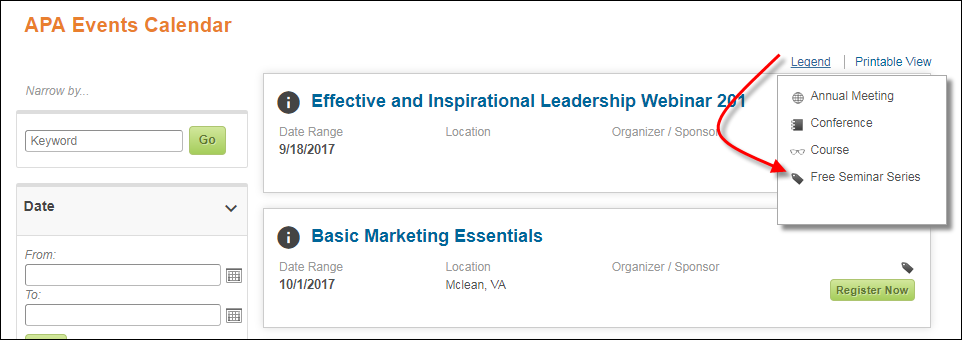
Web users can click the Legend link to display a dynamic list that only includes icons for the products displayed on the page, as shown below. Please note that if no icons have been defined for the events displaying in the calendar, the Legend link will not display.

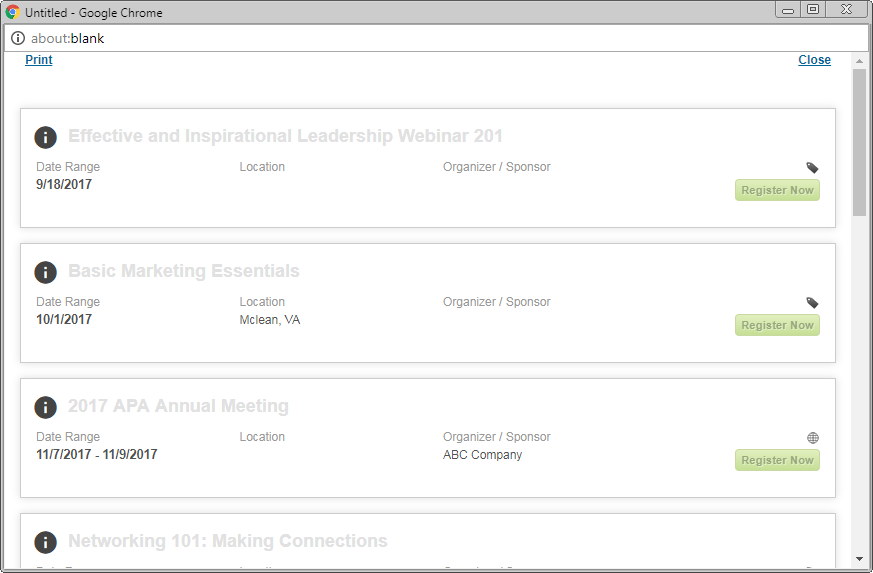
Web users can click the Printable View link to open a printer-friendly view of the event calendar for printing, as shown below.

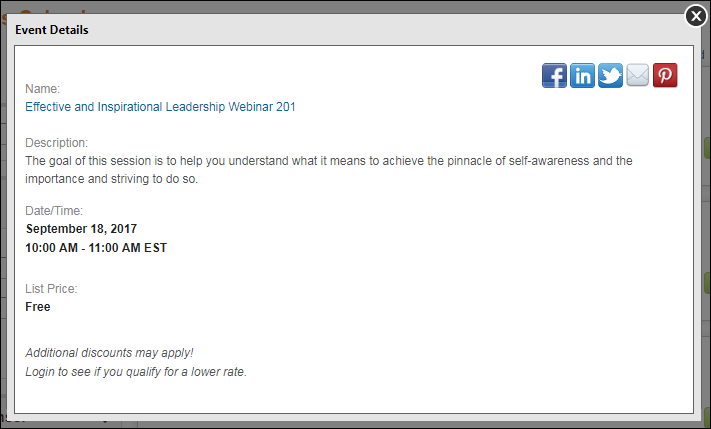
Web users can select the information icon ![]() to the
left of a meeting name to quickly view the short description, date/time,
and price of the meeting, as shown below.
to the
left of a meeting name to quickly view the short description, date/time,
and price of the meeting, as shown below.
