Additional Steps: Checkout Landing Page
The instructions below are intended for a web user with web admin/host
privileges.
If you decide to use the guest checkout workflow, as a best practice,
it is highly recommended that you create a Checkout landing page that
web users who are not logged into your site are redirected to before beginning
the checkout process. The alternative is to direct unauthenticated web
users to the standard login page on the site.
A special checkout landing page gives the web user additional options,
such as the opportunity to log into your website if he/she already has
an account, and if the web user does not have an account, he/she can proceed
to the first step in the checkout process as a guest. Even if you decide
not to use the guest checkout process, if you do not already have a standalone
page with the Login
control (e.g., the login that appears on your main page or in-line
on some other page), then your site should still use this landing page.
See Also:
· For a
broad summary of the Guest Email Lookup control, refer to Guest
Email Lookup Control Overview.
· To add
the Guest Email Lookup control to a page on the web, see Configuring
the Web Settings for the Guest Email Lookup Control.
· If you
want an overview of the guest checkout process, refer to Workflows
for the Guest Email Lookup Control.
To configure a Checkout Landing Page:
1. Create
a new page. Please refer to Adding
a Page on Your Site Using DNN for more information.
 You have
to set the right page permissions in order for your web users to be able
to view a page in your e-Business site. For example, if you want all users
(registered and non-registered) to be able to view a page, such as online
store, you check the All Users checkbox. If
you just want registered users to be able to view a page, check the Registered Users checkbox. In addition, all IMS
roles are also displayed in the Page Permissions tab and that is why you
see Personify Staff, Personify Member, etc. Please refer to Adding
a Page on Your Site Using DNN for more information.
You have
to set the right page permissions in order for your web users to be able
to view a page in your e-Business site. For example, if you want all users
(registered and non-registered) to be able to view a page, such as online
store, you check the All Users checkbox. If
you just want registered users to be able to view a page, check the Registered Users checkbox. In addition, all IMS
roles are also displayed in the Page Permissions tab and that is why you
see Personify Staff, Personify Member, etc. Please refer to Adding
a Page on Your Site Using DNN for more information.
a. From the
Advanced Settings tab, from the Page
Skin drop-down, select a two column skin.
As a best practice, it is recommended that setup your page to have two
columns. In the left column, you should drop the Login
control and in the right column, you should add the Proceed
as Guest button as well as text explaining the guest checkout process
to your web user.
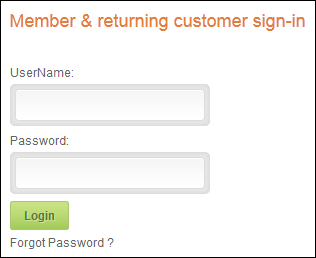
2. Drop the
Login Web Module
onto the left column of this page.
This module provides web users who are not logged into your site, but have
username and password credentials, the opportunity to login to your site,
as shown below.
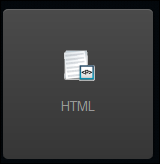
3. From
the Modules drop-down, select Add New Module > HTML,
as shown below.
4. Place the HTML module
in the right column on your page.
Once added to your page it displays as shown below.

5. Change the title of
this module, so the page does not say "Text/HTML", as pictured
above.
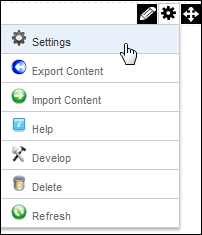
a. Select
the Settings option from the gear icon, as highlighted
below.
The Basic Settings screen displays, as shown below.
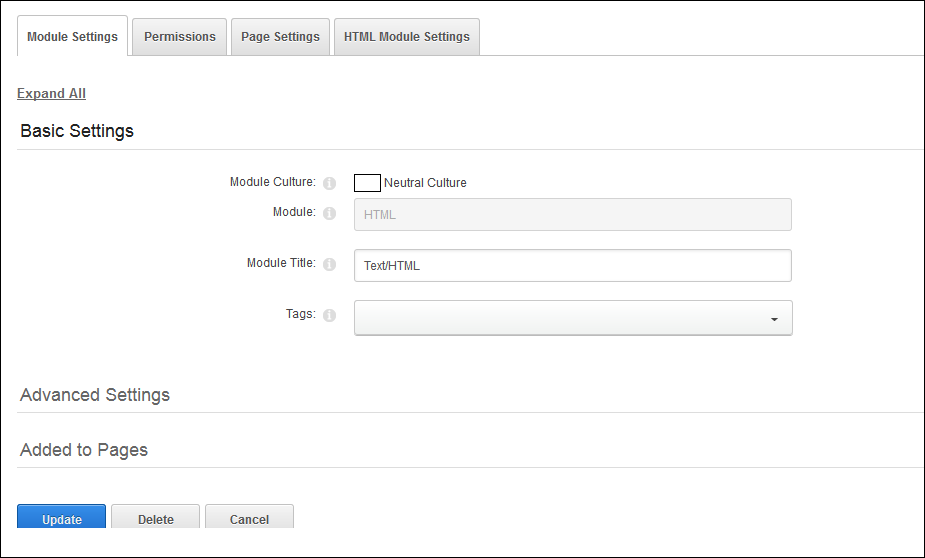
b. From the
Module Settings tab, rename the Text/HTML text in the Module
Title field.
This title should prompt the web user to begin the checkout process. As
a best practice, Personify recommends using the title "New to our
Checkout Process?".
c. Click
Update.
6. To add
instructions below the title of this module:
a. From the
Pencil icon, select Edit Content, as highlighted
below.
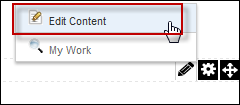
The Edit Content screen displays, as shown below.
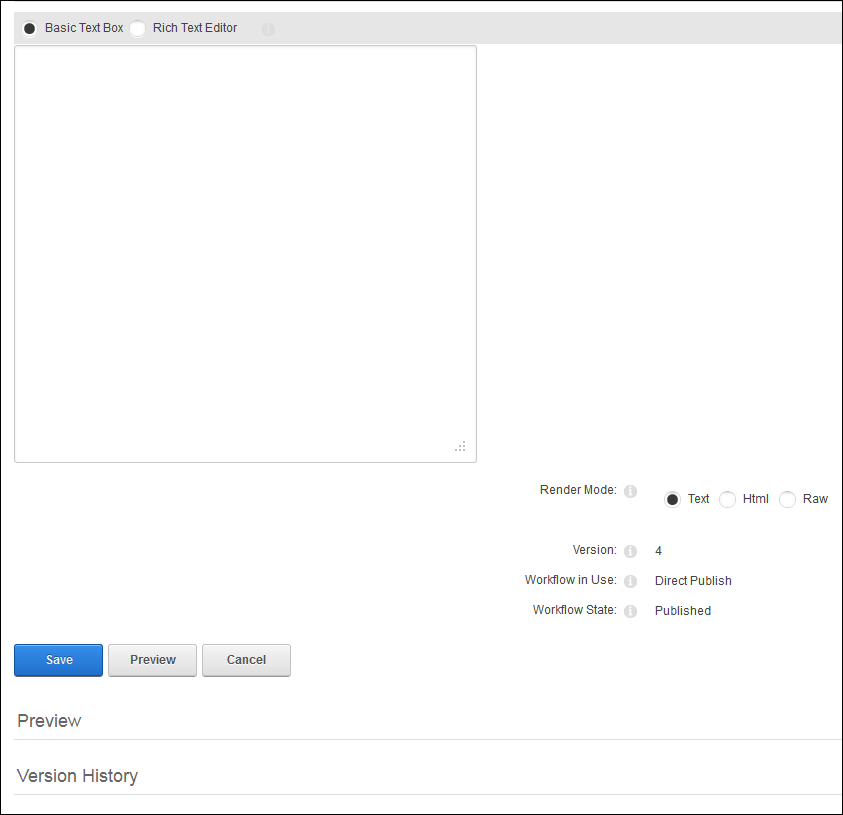
b. Select
"HTML" as Render Mode.
c. If you
would like to use the verbiage on the Personify base sample site, then
copy and paste the following HTML code into the text box, as highlighted
below.
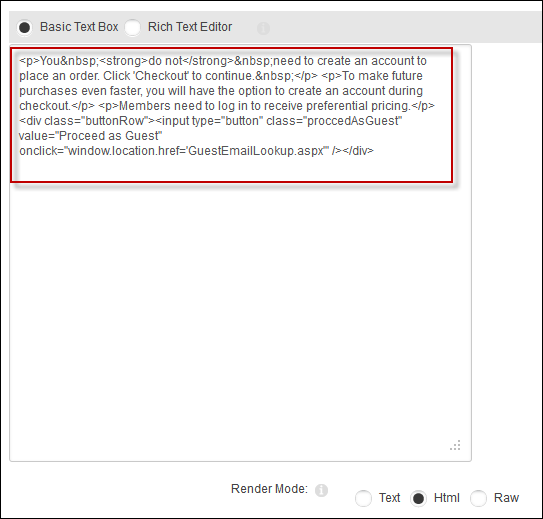
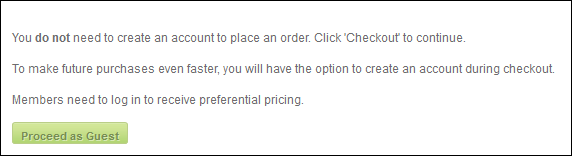
<p>You <strong>do not</strong> need
to create an account to place an order. Click 'Checkout' to continue. </p>
<p>To make future purchases even faster, you will have the option
to create an account during checkout.</p> <p>Members need
to log in to receive preferential pricing.</p>
<div class="buttonRow"><input
type="button" class="proccedAsGuest" value="Proceed
as Guest" onclick="window.location.href='GuestEmailLookup.aspx'"
/></div>
 You need
to understand how to edit HTML code in order to make edits to the text
above.
You need
to understand how to edit HTML code in order to make edits to the text
above.
d. Click
Save.
The text displays as shown below.
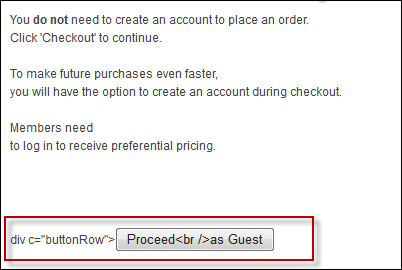
If any of
the HTML code is incorrectly formatted, you will see strange characters
similar to those pictured below. It is important to preview all setups
to catch errors like this.
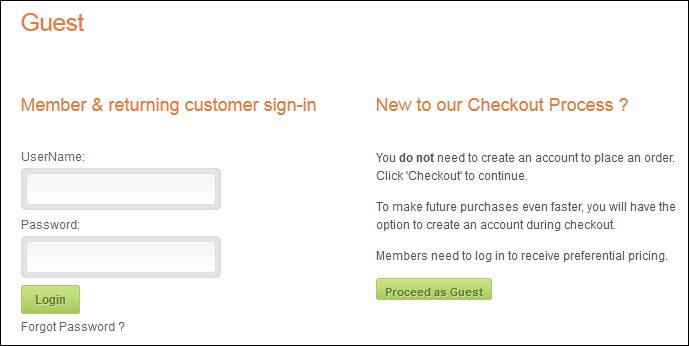
Customer Impact
After configuring the settings for you Checkout Landing page, it will
display similar to what is shown below to your web users.