The
message shown below is located in the control markup. In order to change
this message, you would have to change the text in the control itself.
The
message shown below is located in the control markup. In order to change
this message, you would have to change the text in the control itself.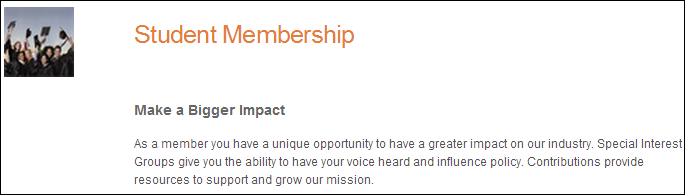
Below describes the necessary back office configurations in order to display the following information on this control:
The
message shown below is located in the control markup. In order to change
this message, you would have to change the text in the control itself.
 It
is expected that your organization will have at least one donation opportunity.
If it does not have either SIGs or donations, this page will NOT automatically
be suppressed. The controls would need to be customized to reflect a reduced
number of steps.
It
is expected that your organization will have at least one donation opportunity.
If it does not have either SIGs or donations, this page will NOT automatically
be suppressed. The controls would need to be customized to reflect a reduced
number of steps.
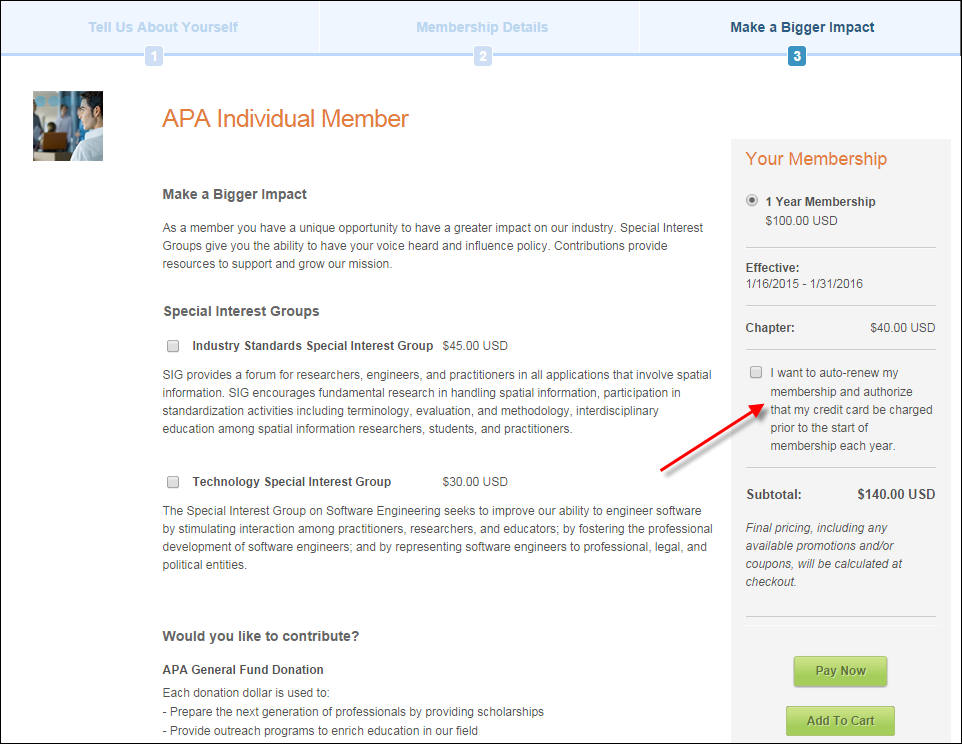
Special interest groups (SIGs) are usually organized around a topic
of interest to the to the membership community and if you have them set
up in the back office. The Special Interest Groups section of the Make
a Bigger Impact step displays SIGs that have been defined for the member
group and are sorted by the WEB_PRODUCT_INFO.SHORT_NAME in ascending alphabetical
order, as shown below.
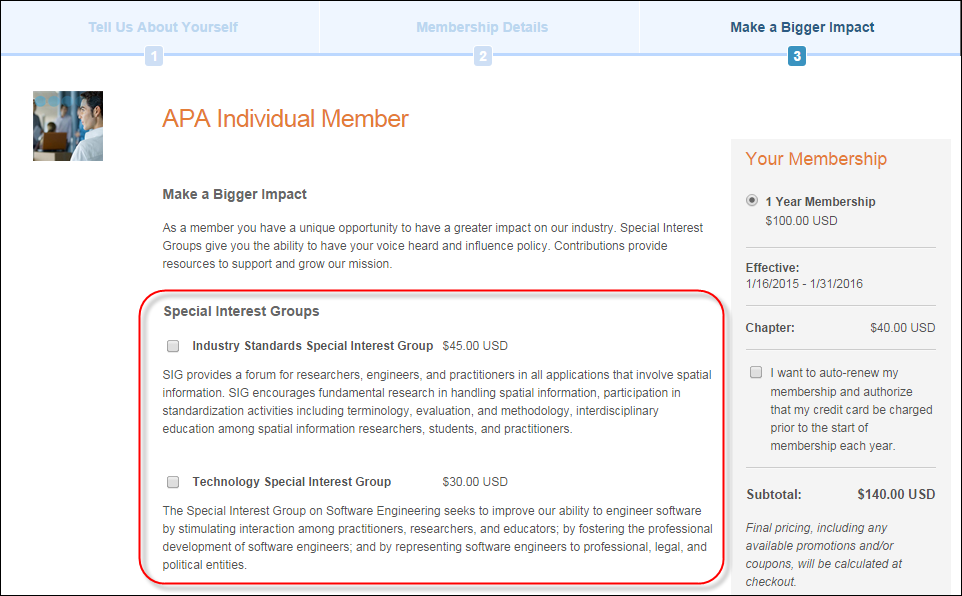
First, you must define a Level 1 membership structure for the member group with a Record Type of "SIG (Special Interest Group)" on the Membership Structure Maintenance screen. Then, you can create the SIG membership product for the member group with the "SIG" Level 1 option selected on the General Setup screen in Membership Product Maintenance.
In
order for the special interest group to display in this control, you must
defined the product to display on the web. For more information, please
see Defining
a Membership Product to Display on the Web.
If your organization does not have SIGs set up, then this section of the page will simply be suppressed.
As
a best practice, for special interest groups that are web-enabled, set
up rate codes that are consistent with the rates set up for membership.
For example, if you set up a membership listing for 2 years, 5 years,
and 10 years, the special interest groups' year listings should be 2 years,
5 years, and 10 years.
Associations often suggest donation opportunities during the join and
renew processes. Constituents who are interested in membership are usually
interested in the cause or industry that they wish to join, so this is
a logical time to solicit for the cause. The Contributions section of
the Make a Bigger Impact step displays donations that have been defined
for the member group and are sorted by the WEB_PRODUCT_INFO.SHORT_NAME
in ascending alphabetical order, as shown below.
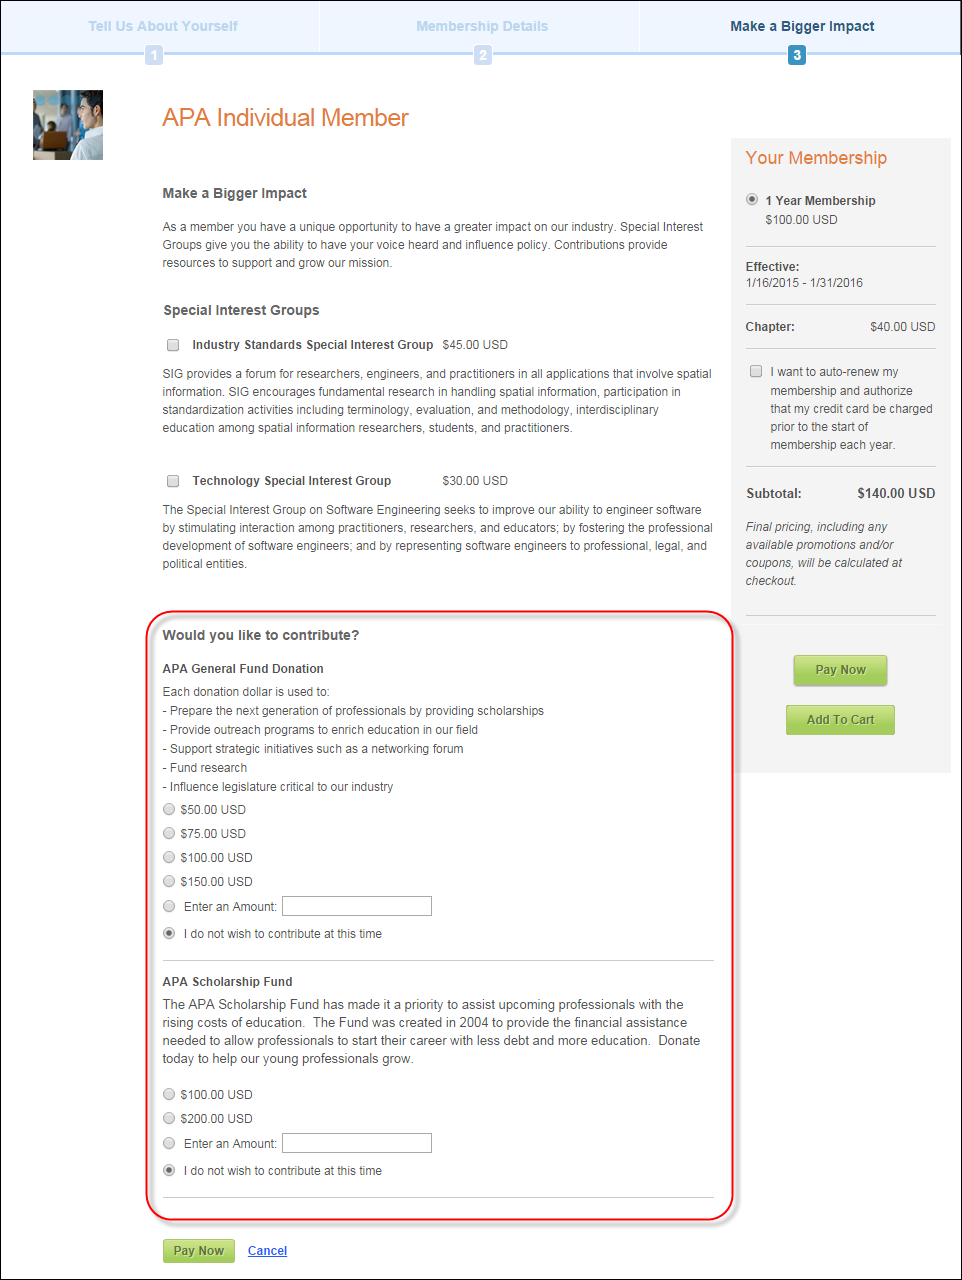
Two types of products can display in this section:
· Membership products with a Record Type
of "Donation"
First, you must define a Level 1 membership structure for the member group
with a Record Type of "Donation"
on the Membership
Structure Maintenance screen. Then, you can create the membership
product for the member group with the "Donation" Level
1 option selected on the General
Setup screen in Membership Product Maintenance.
In
order for the donation options to display in this control, the Master
Product checkbox must be checked on the General
Setup screen in Membership Product Maintenance and you must define
the product to display on the web from the eBusiness
Control screen in Membership Product Maintenance.
· Fundraising donation products linked to
the membership product
You can also include FND
donations in this section by adding the FND product as a related product
on the master membership product. Please note that the Relationship
Type must be "Related Fund Product for Membership Renewal".
For more information on adding related products, please see Adding
Membership Product Related Products.
When
defining web-enabled rates for donations linked to memberships, Personify
recommends that you limit the number of web-enabled rates to three to
ensure the optimum user experience.
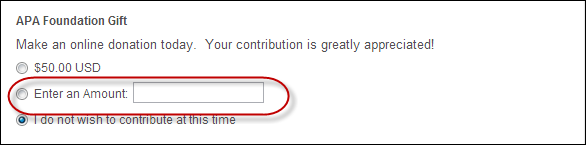
If
the donation price is $0 and the Allow
Price Update checkbox is checked on the General
Setup screen in Gift Code Maintenance, the "Enter an Amount"
option will display, as highlighted below.
If
your web site is set up to accept different currencies, as a best practice
for donation products, set up open-ended donation amounts rather than
suggested donation amounts. If not, the screen will display a suggested
amount such as $100, as 56.72 EUR because conversion will occur even if
the gift is set up with a rate for the non-base currency, such as from
the Euro to the Dollar.
 If
system type and code are not displaying on my web page even though they
are web-enabled it in the back office, you must check the data cache.
The data is cached in the Data Services, so changing the back office settings
will not change what is displayed on the control automatically. The Data
Services cache needs to be cleared in order to reflect the back office
configurations. The best way to clear the cache is do an Application Pool
reset on the Data Services, which will be located on the server. In order
to reflect the most recent back office configurations, the cache will
need to be cleared after each push. It is also possible to set a value
in the configuration file to clear the cache every [number] of minutes.
By default, the site cache will automatically clear when the site is idle
for thirty minutes and this typically occurs overnight. See Setting up Online Store and App Data Cache for
more information.
If
system type and code are not displaying on my web page even though they
are web-enabled it in the back office, you must check the data cache.
The data is cached in the Data Services, so changing the back office settings
will not change what is displayed on the control automatically. The Data
Services cache needs to be cleared in order to reflect the back office
configurations. The best way to clear the cache is do an Application Pool
reset on the Data Services, which will be located on the server. In order
to reflect the most recent back office configurations, the cache will
need to be cleared after each push. It is also possible to set a value
in the configuration file to clear the cache every [number] of minutes.
By default, the site cache will automatically clear when the site is idle
for thirty minutes and this typically occurs overnight. See Setting up Online Store and App Data Cache for
more information.
By default, the Auto-renew option is going to display on this control; there is NO configuration to suppress it. However, if the user already checked the Auto-renew checkbox, it will be suppressed.
When
a member indicates that they want to automatically renew his/her membership,
the assumption is that he/she want to auto-renew the ENTIRE membership,
so all sublines (e.g., chapters, SIGS, etc.) to the master line will also
auto-renew.
On the web, it displays as shown below, and it gives users the option
to renew their Membership. By default, users will have to check this check
box and when checked, in the back office, the credit card is saved on
the order, Order_Detail. RENEW_TO_CC_FLAG is set to "Y", and
the payment will be processed next time the order is picked up by ORD650.
Please note that in order for the membership product to be renewed, you
must run ORD650, which is an application that looks for current products
that expire between specific dates and have not yet been renewed. This
process then creates a new order for those products for a new year. Please
refer to ORD650-
Renewal Processing for more information. In addition, when the user
checks this checkbox, the credit card is saved on the order and displays
on the web as a saved credit card on the Saved
Credit Card control, as well as on step
3 of the Checkout control.
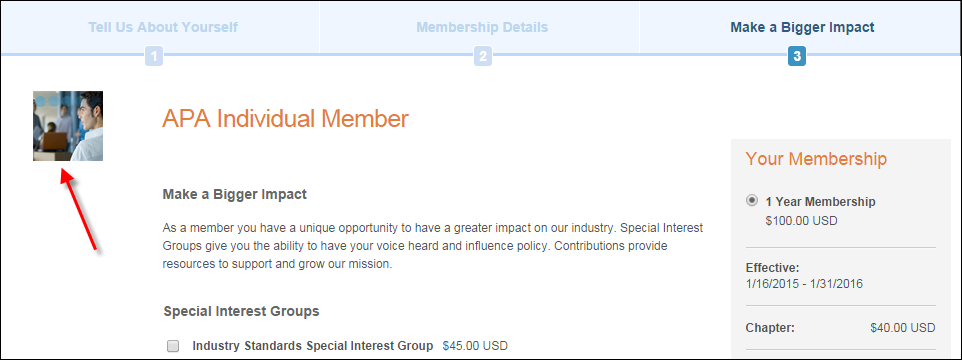
If a default image is defined for the membership product on the Product Images screen in Membership Product Maintenance, that image will display on the Make a Bigger Impact step.