Making a Page Responsive Using a CMS other than DNN
For non-DNN
users, the responsive .NET controls
need to be placed and setup in a similar layout as the DNN layout to obtain
the same results. In order for the whole user experience to be responsive,
the website layout must be responsive. The header and footer are not part
of the web controls; rather, they belong to the website layout. Please
see Responsive Skins for a list of
the skin layouts (e.g., one column, two column, etc.) and what controls
should be dropped on the page in order for it to be responsive.
To configure the responsive CSS if you are NOT using
the CMS DNN:
1. Delete
the Mediaqueries folder and its
contents from the website.
2. For non
DNN users, please delete any references to the mediaqueries.css files
from your page header if you are upgrading from an earlier version.
3. In order for the page
to be responsive when users are viewing it on a mobile device, the appropriate
skin should be applied to it. Please see the Responsive
Skins topic that lists what skin and controls should be dropped on
the page in order for it to be responsive.
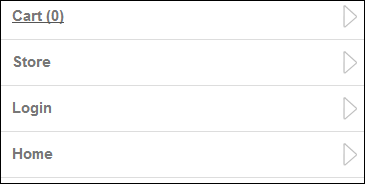
4. The HTML markup tags
that you will add to your responsive page will be determined based on
whether or not you are using the Personify’s APA skin package. If you
are using the Personify’s APA skin package, the bottom navigation, as
shown below, is included and you only need to update the URLs for your
Login and Online Store Landing
pages.
If you are NOT using the APA skin package or you want to create new skin
pages, you need to add specific HTML markup tags to your page in order
for the bottom navigation to display. To add specific HTML markup tags
to your page if you are NOT using the APA skin package or you want to
create new skin pages:
a. Open the
respective file.
b. Add the
following code BEFORE the footer line:
<div class="bottom-navigation mobile-way desktop-hide">
<ul>
<a
href="#" class="shopping-cart-url"><li>Cart
(0)</li></a>
<a
href="#" (UPDATE THIS URL WITH
YOUR STORE PAGE'S URL)"><li>Store</li></a>
<a
href=" (UPDATE THIS URL WITH
YOUR LOGIN PAGE'S URL)" class="login-url"><li>Login</li></a>
<a
href="<%="http://" & PortalSettings.PortalAlias.HTTPAlias%>/default.aspx"><li>Home</li></a>
</ul>
</div>
 Make sure
to replace the bold and highlighted text above with your login page's
URL. Since the Search control redirects users to your Store page's URL,
this link does not have to be added to the markup.
Make sure
to replace the bold and highlighted text above with your login page's
URL. Since the Search control redirects users to your Store page's URL,
this link does not have to be added to the markup.
c. Click
Save.
See Also:
· Making
a Page Responsive Overview
· Responsive
Skins
· Making
a Page Responsive Using the CMS DNN