 As
of 7.6.0, the new online member
directory .NET controls allow organizations to create searchable,
member directories through which logged in members can search. Therefore,
this DNN web module is de-supported as of 7.6.0.
As
of 7.6.0, the new online member
directory .NET controls allow organizations to create searchable,
member directories through which logged in members can search. Therefore,
this DNN web module is de-supported as of 7.6.0.As
of 7.6.0, the new online member
directory .NET controls allow organizations to create searchable,
member directories through which logged in members can search. Therefore,
this DNN web module is de-supported as of 7.6.0.
The Dynamic Search web module can be set up to search based on any data available in the API. This web module works using the same functionality available in the Application Designer search control for building forms. As a result, this module can also work with user defined columns and tables in the same manner as the Application Designer search control does. When working with user-defined columns and tables, be sure to add the Personify.API.User.Generated.dll file to the bin folder for your e-Business website and to update the configuration file to use this file.
 Information
on creating a search control can be found in the Studio
Tools section.
Information
on creating a search control can be found in the Studio
Tools section.
 Personify's
.NET controls do NOT need any of the DNN system controls to work; this
control is specific to DNN. See Using
DNN as Your CMS Platform for more information.
Personify's
.NET controls do NOT need any of the DNN system controls to work; this
control is specific to DNN. See Using
DNN as Your CMS Platform for more information.
To configure the Dynamic Search web module:
1. Log into your site as Host.
2. Navigate to the appropriate page on your site where you want to add the Dynamic Search web module.
3. Add the
Personify –
Dynamic Search module to where you want it to be located on your
page.
See Adding a
Web Module to the Webpage for more information.
4. From the
pencil icon, select Edit, as highlighted below.
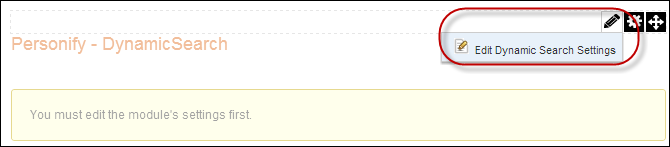
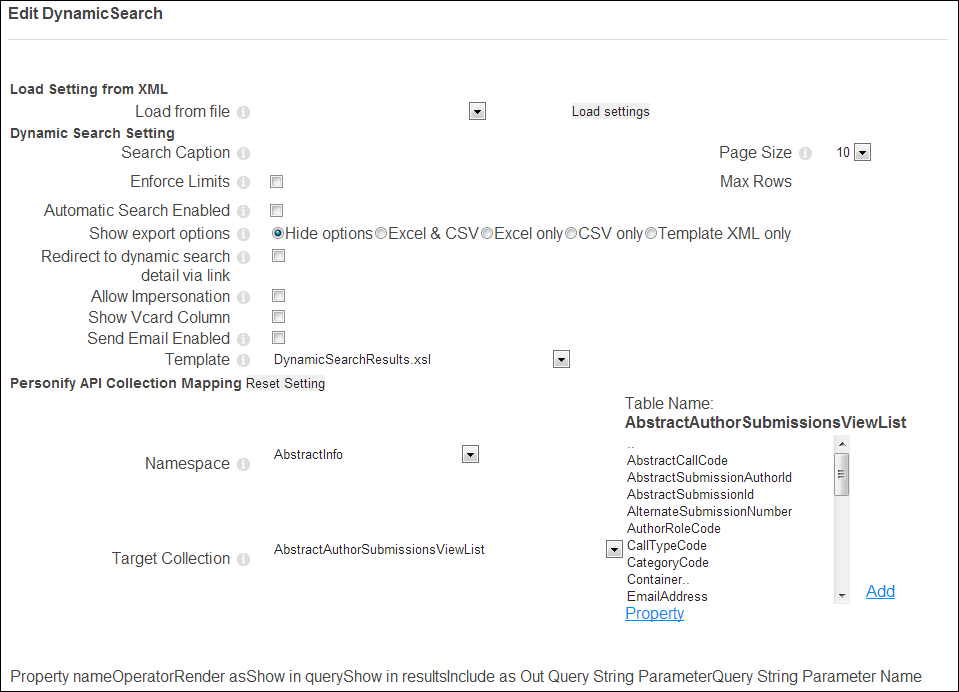
The Edit Dynamic Search page displays, as shown below.
5. Configure the appropriate module settings as described below:
a. In the Load Setting from XML section:
· Load from file - If any previously created search
settings have been saved, you can select one from the Load from file drop-down
and click Load settings.
The settings from that XML file are set for this instance of the Dynamic
Search module.
· Load Settings - Button. When clicked, the settings from the selected file are enacted.
b. In the Dynamic Search Setting section:
· Search Caption - Text field. When these Dynamic Search settings are saved as an XML file, this is the name that will be associated with those settings.
· Page Size - Drop-down. Click the drop-down to select the number of items that will display on the page.
· Enforce Limits - Checkbox. This option lets you decide whether or not to enforce the limits set in the Page Size and Max Rows parameters.
· Max Rows - Text field. Enter the maximum number of rows you want to display on a page.
· Automatic Search Enabled - Checkbox. This option lets you decide whether or not to enable the automatic search feature. If this is enabled, search results will display upon entering this page, with only the default filters applied.
· Show export options - Radio buttons. Select the radio button of the export options you would like to provide for a web user.
You also
have the ability to give users access to the XML. This was designed to
allow you to develop the XML yourself and should NOT be used on your live
site.
· Redirect to dynamic search detail via link - Checkbox. Select this checkbox to redirect a user to a detail page once they select a record. Once clicked, radio buttons will appear, allowing you to redirect users to an outside link, or a page on your site.
· Allow Impersonation - Checkbox. Select this checkbox to allow a staff member to impersonate a web user. Once clicked, radio buttons will appear, allowing you to redirect users to an outside link, or a page on your site. If you select a page on your site, click the drop-down to choose one. You can use this option to allow a staff user to modify a user's demographic data or to place orders on behalf of the user. The three output query string parameters should be labelname, mcid, and scid. This only works if the logged-in user has a “Staff” role and the search results have both a Master and Sub Customer ID.
To use the
impersonation feature you must set the Namespace to “Customer” and the
Target Collection to “Customers”. The “Staff ID” is entered as the ADDOPER
for any activities entered while a user is being impersonated.
There are three mandatory properties that must be selected for this feature
to work:
1. LabelName – The Query String Parameter Name must be “labelname”. The
Include as Out Query String Parameter must be set to “True”.
2. MasterCustomerID – The Query String Parameter Name must be “MCID”. The
Include as Out Query String Parameter must be set to “True”.
3. SubCustomerID – The Query String Parameter Name must be “SCID”. The
Include as Out Query String Parameter must be set to “True”.
The Alternate Customer web module must also be installed on all web pages.
· Show Vcard Column - Checkbox. Select this checkbox to display a Vcard column along with the search results. The Vcard is then available for view or download, depending on your Vcard settings.
· Send Email Enabled - Checkbox. Select this checkbox to enable web users to send an email from the Dynamic Search wen module. Once clicked, radio buttons will appear, allowing you to redirect users to an outside link, or a page on your site. If you select a page on your site, click the drop-down to choose the page where your Email web module is located.
· Template - Drop-down. Select a template option from the drop-down to define the look and feel of your dynamic search.
c. In the Personify API Collection Mapping section:
· Reset Setting - Button. Click this button to remove the properties listed on the bottom of the page in the settings table.
· Namespace - Drop-down. Select an option from the drop-down to filter the list of available table names. This is the subsystem from which you want to create a search control.
· Table Name - List. Select an item from the list and click the Add Property link to display the name list item in the Property Table section displayed below. The list items are dependant on your selection from the Namespace drop-down.
· Target Collection - Drop-down. Select an option from the drop-down to filter the list of available table names. The options in this drop-down are dependant on the Namespace drop-down.
d. In the
Property Table section, as shown below.

· Property name - Table column - Displays the name of the property as selected from the Table Name list.
· Operator - Table Column. Displays the operation the list item performs.
· Render as - Table Column. Displays the field type the property renders as.
· Show in query - Table Column. Indicates whether this field appears for a user to filter their search.
· Show in results - Table Column. Indicates whether a list type displays in the search results.
· Include as Out Query String Parameter - Table Column. If the results of this search can be used to prompt another search, and you want the search to begin using the data in this search, this field will display a check.
· Query String Parameter Name - Table Column. Displays the user-created query string parameter name.
· Remove - Link button. Click to remove the list item.
· Edit - Link button. Click to display the Edit
Search Parameters screen, as shown below.
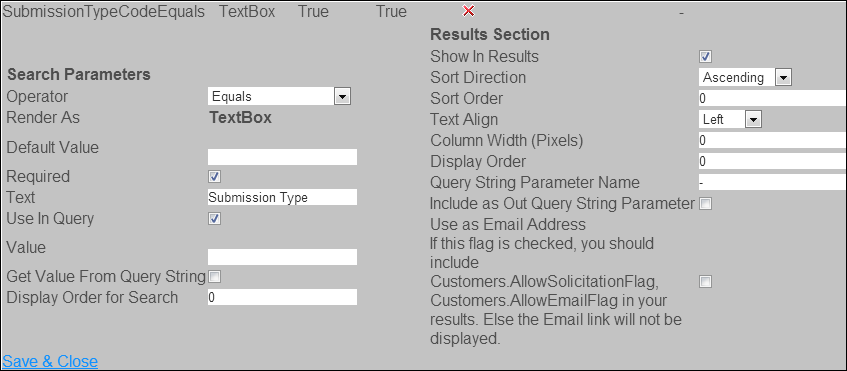
Configure the following settings after clicking the Edit button.
o Operator - Drop-down. Select an operation for the list item to perform. For example, if your search operator is "Equals," the information a user enters must be exactly the same as the information in the database.
o Render As - Read-only field. Displays the way the option as been configured to appear, whether a checkbox, text field, date picker, etc.
o Default Value - Text field. Enter the information you want to
o Use System Date - Check box. Appears if the Render As option is DataPicker. Select this option to use the system's pre-defined date.
o Required - Checkbox. Select this checkbox if you want to require web users to enter information in this field.
o Text - Text field. Enter the description of the search field.
o Use In Query - Checkbox. Select this checkbox if you want this search item do be used in queries.
o Value - Text field. Enter the desired value of this search field, or select Use System Date checkbox if available.
o Use System Date - Checkbox. This checkbox appears when the Render As option is DatePicker. Select to use a pre-defined system date.
o Get Value From Query String - Checkbox. If you
want this search field to be populated by the contents of a previous search,
select this checkbox.
Example: If you want users to be able to perform a search for a committee,
and then use those results to display members of that committee, select
this option.
o Display Order for Search - Text field. Type the order you want this search field to display in.
o Show In Results - Checkbox. Check if you want this search option to display in the results list.
o Sort Direction - Drop-down. Click the drop-down to select how each field will display in the dynamic search.
o Sort Order - Text field. Enter the order you want this search option to appear in a list.
o Text Align - Drop-down. Click the drop-down to select the alignment of the text in the fields.
o Column Width (Pixels) - Text field. Enter the width of this column in pixels.
o Display Order - Text field. Enter the display order.
o Query String Parameter Name - Text field. Type a unique name to identify the name of the query string parameter if you creating a dynamic search chain.
o Include as Out Query String Parameter - Checkbox. Select this checkbox if you want to use the query string parameter to perform a subsequent search.
o Use as Email Address - Checkbox. If you want to be able to send an email to a customer displayed in the search, click the this checkbox and include the AllowEmailFlag and AllowSolicitationFlag properties in your search parameters.
6. Click Save and Close.
7. Click Update.
You may want to save your Dynamic Search settings for use on other pages on your website. To facilitate this need, e-Business provides you with the ability to save your Dynamic Search settings for later use.
After setting up your Dynamic Search, click Publish setting to XML at the bottom of the screen. The next time you set up a Dynamic Search control, your settings will appear in the Load from file drop-down with its title being in the form of (Search Caption).xml.
To save your dynamic search settings for later use:
1. After
setting up the Dynamic Search with your desired settings, click Update.
You are returned to the Dynamic Search view.
2. Click
Edit Dynamic Search Settings.
The Edit Dynamic Search screen reappears.
3. Scroll
down to the bottom of the page and click Publish setting
to XML.
The Dynamic Search settings will now appear in the Load from file drop-down
tagged with the Search Caption name you entered.
If you want
to use the “Publish setting to XML” functionality, after creating your
dynamic search control you must first click Update and then Publish setting
to XML. If you do not follow this order, the system will crash. This is
a known issue that will be resolved in a future release.
You can also
save the Dynamic Search settings of any previously created search controls
by following these steps.
After setting up your Dynamic Search module, it may appear, as below, to your customers.
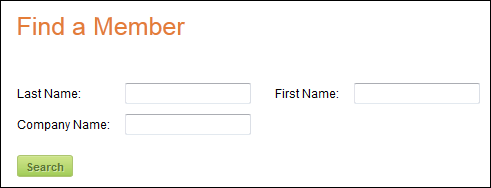
Once the customer has entered their search criteria and clicked Search, the results display as shown below.
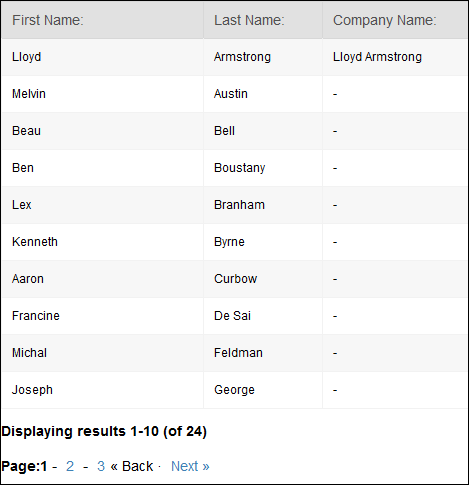
The way in which the search results display vary depending on the Template selected and the parameters set for the various API properties. The example shown above is the default Dynamic Search Template.