The Large Meeting Registration screen displays with the Order Number, Bill-To information, and Registrant information automatically populated based on the selected customer.
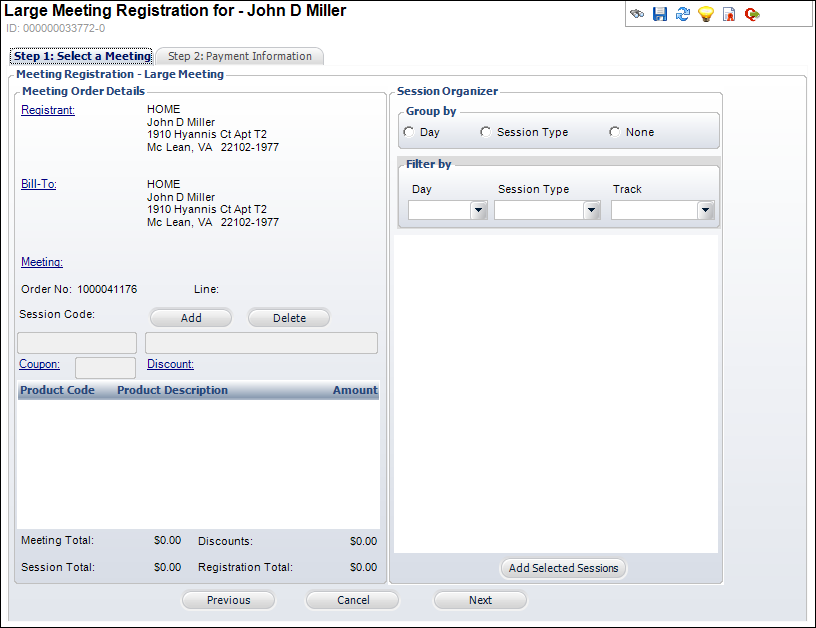
The Large Meeting Registration Screen provides you with functionality that allows you to filter through the break-out sessions in a variety of ways making a complex registration much more manageable.
To process a registration for large meetings:
1. From Meeting Launch, click Process Registrations for Large Meetings.
The Large Meeting Registration search screen displays.
2. Search for and select the appropriate customer.
The Large Meeting Registration screen displays with the Order Number, Bill-To information, and Registrant information automatically populated based on the selected customer.
3. If necessary, modify the Registrant or Bill-To information by clicking the respective link.
4. Click the Meeting link.
A Product Chooser search screen displays.
5. Search for and select the appropriate meeting.
The Session Organizer section automatically populates with the meeting sessions.
 If the selected meeting product has a product questionnaire defined, the header of the Large Meeting Registration screen will display in green text indicating that a questionnaire exists. In addition to the "Questionnaire Exists" text that displays in the header, the "Questionnaire Response" notification icon will display in the screen options, as shown below. Once the registration is saved, you can click this icon to open the questionnaire response screen where you can enter and change responses to a meeting questionnaire.
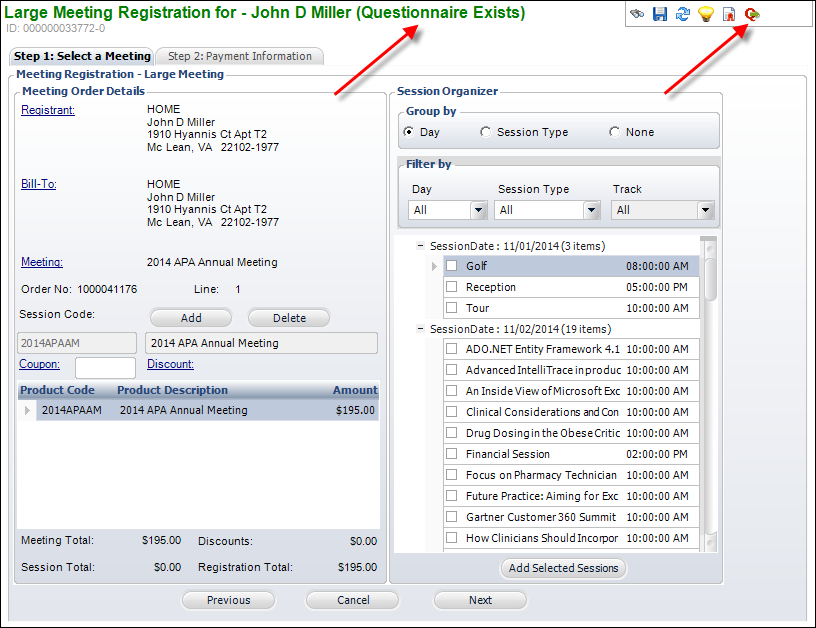
6. Filter through the sessions by using the Group by and Filter options to locate the sessions you want to add to the order.
7. Select the appropriate sessions and click Add Selected Sessions.
The sessions appear in a list on the left side of the screen as shown on the second screen on the right.
 You can also add a session by entering the Session Code and clicking Add or delete a selected session from the order by selecting it and clicking Delete.
8. If necessary, click Coupon and/or Discount to search and select a coupon and/or discount, respectively.
9. Select the Step 2: Make Payment tab.
The Payment Information tab displays, as shown below.
If a batch is not already opened, you are prompted to open a batch for edit.
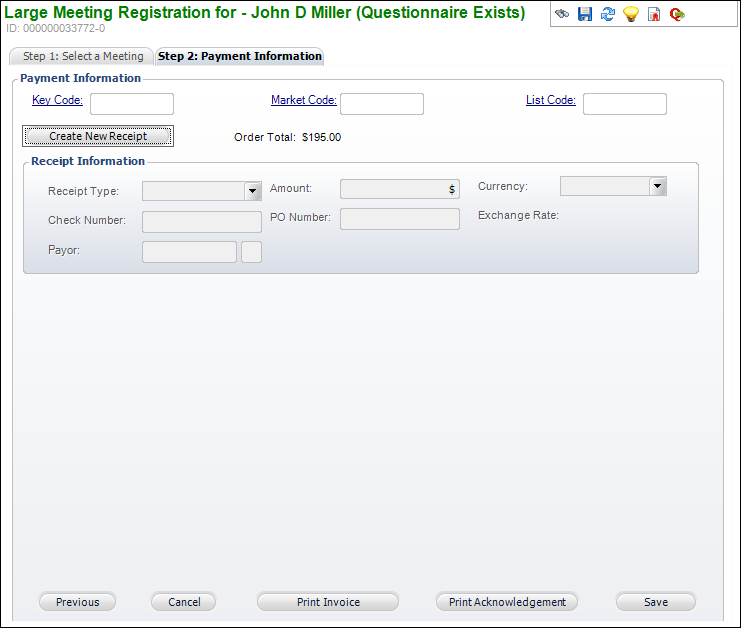
10. If necessary, click Key Code, Market Code, and/or List Code to search and select a Key Code, Market Code, and/or List Code, respectively.
11. Click Create New Receipt.
12. Enter the appropriate payment information in the Receipt Information section
13. Click Save.
By design, the Large Meeting Registration does not support multi-currency. If you would like it to, please contact your Account Specialist to request a customization for the multi-currency fields.
14. If applicable, enter responses to the meeting product questionnaire. For more information, please see Viewing and Entering Responses to a Meeting Questionnaire.
See Also:
· Back Office Meeting Registrations Overview
· Processing a Simple Meeting Registration
· Processing a Group Meeting Registration