 Inventoried product orders can only be cancelled after the product is added to the order and payment is received and BEFORE a packing slip has been generated. If a packing slip has been generated, you must return the inventoried product.
 Inventoried product orders can only be cancelled after the product is added to the order and payment is received and BEFORE a packing slip has been generated. If a packing slip has been generated, you must return the inventoried product.
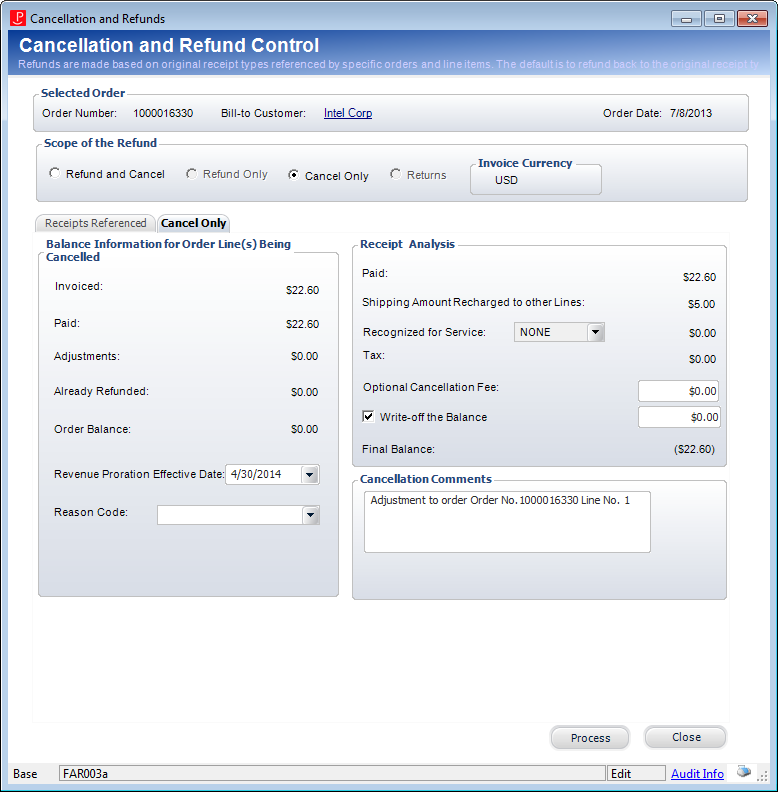
Cancelling an order, without also refunding the order, results in a credit balance on the order. That credit balance can then be transferred to another order, if necessary. The credit balance is displayed in parentheses as the Final Balance in the Receipt Analysis section of the Cancellation and Refunds screen.
To cancel an inventoried product order:
1. On the Order Entry screen, click Cancel an Item from the Work with Line Items task category or Cancel an Order from the Work with Orders task category.
The Cancellation and Refunds screen displays, as shown below.

2. From the Scope of the Refund section, select the Cancel Only radio button.
3. On the Receipts Referenced tab, highlight the appropriate receipt.
4. On the Cancel Only tab, select the Revenue Proration Effective Date.
5. Select the Reason Code from the drop-down.
Values in the drop-down are populated based on the non-fixed codes defined for the ORD "LINE_STATUS_REASON" system type. The option selected is stored in the LINE_STATUS_REASON_CODE column in the Order_Detail table.
6. Enter Cancellation Comments.
7. If a cancellation fee was defined for the product, it will display in the Optional Cancellation Fee field. Update this amount, if necessary.
The default cancellation fee will be based on the current date unless you are in an adjustment batch. If you are in an adjustment batch, the cancellation fee will default based on the batch date.
 If the order has NOT shipped, the system will NOT automatically add a cancellation fee, because cancellation fees on inventoried product orders are considered "restocking fees".
 The process of entering cancellation fees is dependent on whether you are adding a cancellation fee for the master order line and/or sub order line. For more information on the options, please see the Cancellation Fees section.
8. If you check the Write-off the Balance checkbox, then enter the amount of the write-off in the text box.
9. Click Process.
The inventory counts are adjusted accordingly.