 For
a video demonstrating how to narrow down search results, refer to Video Demo: Narrowing
Search Results.
For
a video demonstrating how to narrow down search results, refer to Video Demo: Narrowing
Search Results.The Personify360 Outlook Plug-In uses full text search, which makes it easier to narrow down your results and find the person(s) you wish to email, send a meeting request, or assign a task. In order for customers to display in the search results, the Option 2 field on the Types and Codes Maintenance screen for the customer's CUSTOMER_STATUS code must be set to "Active". In addition, you can also decide to include constituents with a status code of "DECEASED". For more information, please see Customers System Types and Codes.
 For
a video demonstrating how to narrow down search results, refer to Video Demo: Narrowing
Search Results.
To search for Personify360 contacts:
1. Open a new email, meeting invite, or task.
2. From the
Personify Actions section of the ribbon bar, begin typing your search
into the Search
Personify field, as highlighted below. Search terms must be
three or more characters in length.
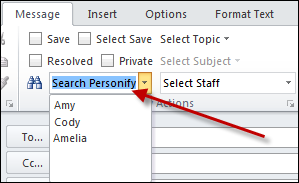
 Alternatively,
select the Search Personify drop-down
to display a list of previous searches.
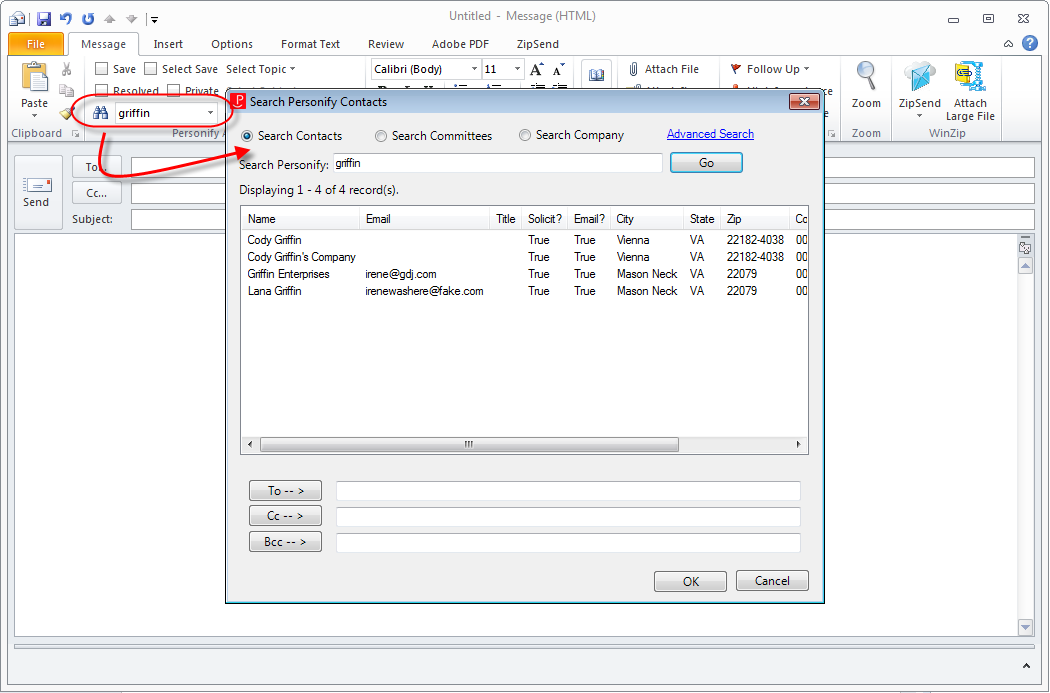
3. After
typing your search, hit Enter or click the binoculars
icon to the left.
The Search Personify Contacts window displays, as shown below.
4. In order
to narrow your search results, in the Search
Personify text box, enter additional search criteria in a string
with NO commas (e.g., name city).
The full text search spans multiple fields using "and" logic.
The following are the fields that full text search uses:
· Name
· Company Name
· City
· State
· Zip
For example, you search for "smith" and the results returned are the following:
· Names= Smith, Smithson, Blacksmith, Papersmith, and Smithy.
· Cities = Smithfield, Smith City, and Ladysmith.
· Employer = J. J. Smith & Sons, Smithsonian, and Applesmith Corporation.
In order to narrow down your search results, you need to add additional search criteria. For example, you would enter an employer name, city, or other details in one string (e.g., smith personify vienna). The results returned are dramatically smaller.
 In order
for customers to display in the search results, the Option
2 field on the Types and Codes Maintenance screen for the customer's
CUSTOMER_STATUS code must be set to "Active". For
more information, please see Customers System Types
and Codes.
5. By default,
the Search Contacts radio button is selected.
If necessary, select the Search Committees or
Search Company radio button.
The search results display the same fields as when searching by contacts,
with the addition of the Committee field with searching for committees.
 When searching
committees, if an individual serves on more than one committee that is
search on, that individual will be displayed more than once in the search
results.
6. If necessary, enter a different name into the Search Personify field and click Go.
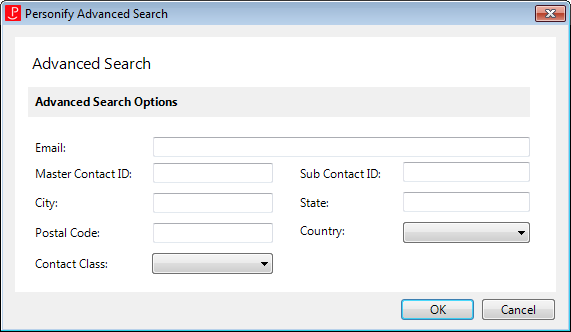
 Click the
Advanced Search link to display the Personify
Advanced Search screen and narrow the search results further. See Using
the Advanced Search for more information.
7. From the
search results grid, select the appropriate contact(s) and click the To, CC, or BCC buttons.
Please note that if you are sending a meeting request, the Required
and Optional buttons
will display instead. Similarly, if you are creating a task regarding
a contact, the Regarding
button displays instead.
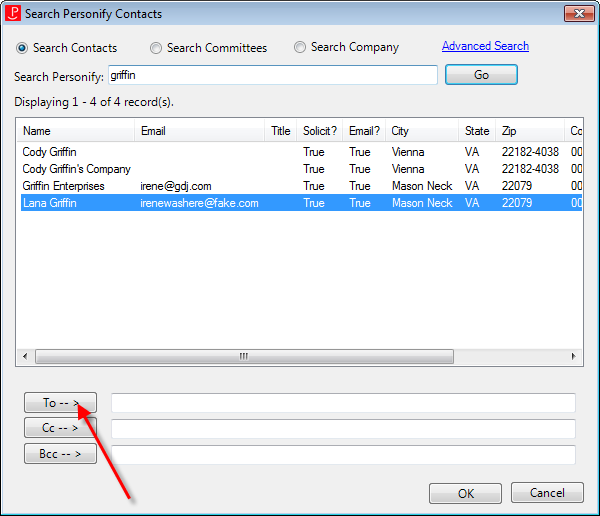
 If you want
to send an email to customers on a specific committee, click the Committee
column header to sort the customer by committee. You can select multiple
customers to add to the email by using the Ctrl key on your keyboard.
The email address is added to the field to
the right.
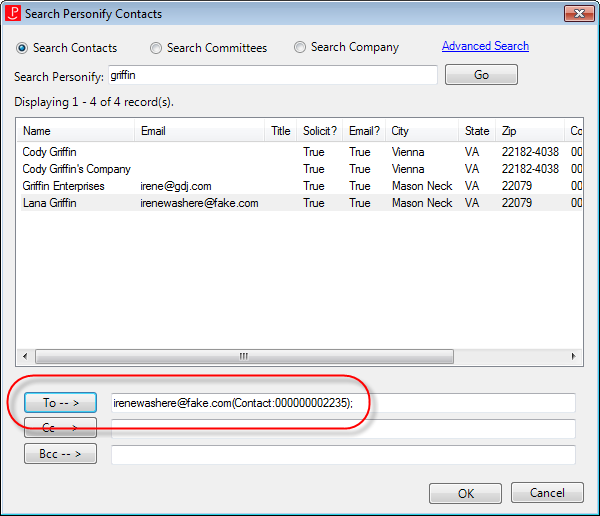
8. To add a carbon-copy (Cc) or blind carbon-copy (Bcc), select the appropriate contact from the search results grid and click the appropriate button.
9. To add additional contacts, repeat the above steps.
10. Click
OK.
The Search Personify Customers screen closes and the email,
meeting, or tasks
displays with the selected contact(s) email address(es) in the To, Cc,
or Bcc field.
See also: Using the Advanced Search