The Meeting Parameters screen displays, as shown below.
To define organization unit meeting parameters:
1. Select System Admin > Organization Structure > Organization Unit Definition from the toolbar.
2. Search for an organization unit and double-click it or highlight it and click Select Org Unit.
The Organizational Unit Maintenance General Parameters screen displays.
3. From the Subsystem Parameters task category, click Meeting Parameters.
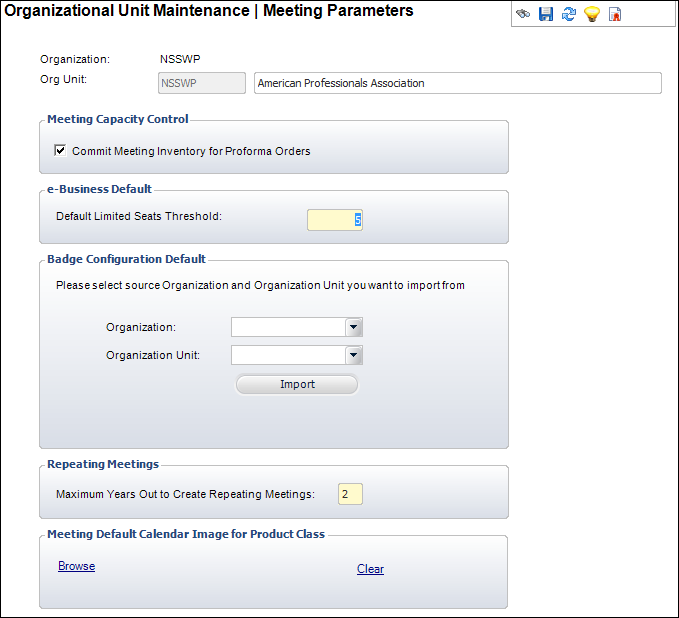
The Meeting Parameters screen displays, as shown below.
4. If necessary, select the Commit Meeting Inventory for Proforma Orders checkbox.
When checked, indicates that proforma meeting registrations will be included when calculating available spaces.
5. If necessary, enter a Default Limited Seats Threshold.
When a number is entered in this field, the system will display a product alert for a meeting once the limited seats threshold has been reached. For more information, see Configuring Product Alerts.
6. Select the Organization and Organization Unit to import the badge configuration from, if necessary.
a. Click Import.
The default badge configuration will be applied to all meeting products.
7. As of 7.5.2, enter the Maximum Years Out to Create Repeating Meetings. You can enter any whole value between 1 and 5. These are the only valid values that you can enter for this field. You can only create recurring meetings up to 5 years out, and in base, this field automatically defaults to 2 years out. For more information, please see Creating a Repeating Meeting.
8. As of 7.5.2, from the Meeting Default Calendar Image for Product Class section, click the Browse link to search for and select the default image to be used on the Events Calendar for meeting Product Class codes in which an image has NOT been defined.
 If a default image is not defined here AND an image has not been defined for the appropriate meeting Product Class, a default image (blank/transparent box) will display in the Events Calendar.
9. Click Save.
10. From the Subsystem Parameters task category, click Line Status Defaults.
The Line Status Defaults for New Order screen displays, as shown below.
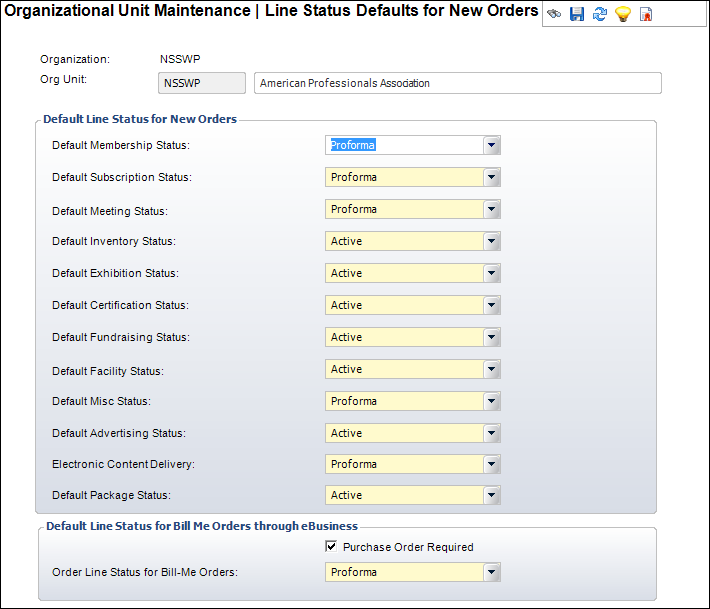
11. From the Default Meeting Status drop-down, select "Active" or "Proforma".
Personify recommends that you select "Proforma" so that meeting capacity will not be captured until the meeting registration order is Active. However, please note that if you select "Proforma" AND check the Commit Meeting Inventory for Proforma Orders checkbox (discussed above), the system will include proforma meeting registrations when calculating available spaces.
12. Click Save.
See Also:
· Defining Meetings Application Parameters
· Setting Up Facilities for Meetings
· Defining Default Badge Configuration