 Before you can add a relationship to a product, IMS roles need to be set up. See Creating a New IMS Role for more information.
 Before you can add a relationship to a product, IMS roles need to be set up. See Creating a New IMS Role for more information.
This process suggests products to constituents based on related roles defined to a product. You can configure the system to suggest products based on a plethora of variables such as, past purchases, membership involvement, past meeting attendance, etc. For example, on the e-Business website, if a constituent bought a book and the sequel was released, the sequel would be suggested to the constituent. This process only works after a role is setup. A role defines a product relationship with one another.
This setup is only applicable to the e-Business website. You must set up Related Roles to be related to products using the back office or the e-Business website.
To add related roles to a product from the back office:
1. Using the Fundraising Manager persona, from the Personify360 main toolbar, select Fundraising Setup > Gift Setup.
The Gift Code Maintenance search screen displays.
2. Click Search to find a gift or click Create New Gift Code.
3. From the eBusiness Links task category, click Related Roles.
The Related Roles screen displays, as shown below.
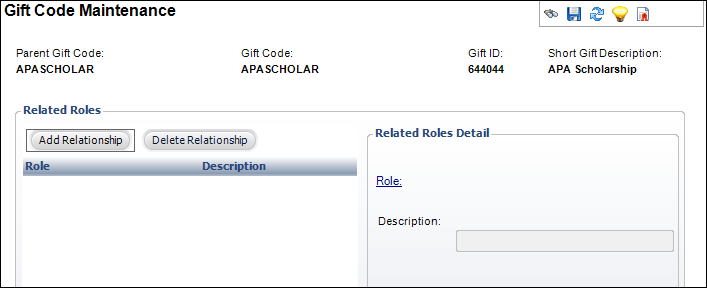
4. Click Add Relationship.
5. In the Related Roles Detail section, click the Roles link, as highlighted below.
The IMS Role Chooser Screen displays.
6. Select the IMS Role you want related to the product.
The role is created in the e-Business website (refer to Creating a New IMS Role for more information).
If your IMS Role Chooser is blank, your IMS Role Configuration is incorrect. To correct, select Configuring and Verifying Interfaces, click SSO interface.
7. Click Select.
To delete a relationship, select the role and click Delete Relationship.
8. Click Save.
To display your gifts on your e-Business website:
You must be logged in as host on the e-Business website in order to display your gifts.
1. From the top toolbar, select SSO.
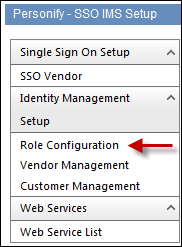
The Personify-SSO IMS setup web module displays.
2. From the Identity Management Setup task category, select Role Configuration, as highlighted below.
3. In Role Search, click the arrow button to search for existing IMS roles or click New to create a New IMS Role.
Once the IMS Role is set up, the Windows service running does all the work assigning customers to the roles they qualify for.
4. Make sure the Start Time is “Current” and Web Enable is “True” to display your product.
5. To edit Start Time and Web enable, click the pencil icon, as shown below.

6. In the Role Start Time, click the calendar icon to select the date.
7. In the Role Start Time, click clock icon to select a time.
8. Check the Web Only checkbox.
This checkbox must be checked in order for your product to display.
9. Click Save.