
The following page displays:
The Shopping Cart web module is a holding area where you can place items that you wish to buy from the online store. The Shopping Cart web module lets you store product information, such as name, quantity, etc. However, it does not handle actual order processing. This is done using the Order Payment web module.
To configure the Shopping Cart web module:
1. Log into your site as Host.
2. Navigate to the appropriate page on your site where you want to add the Shopping Cart web module.
3. Add the Personify – Shopping Cart module to where you want it to be located on your page. See Adding a Web Module to the Webpage for more information.
4. From the pencil icon, select Edit, as highlighted below.
The following page displays:
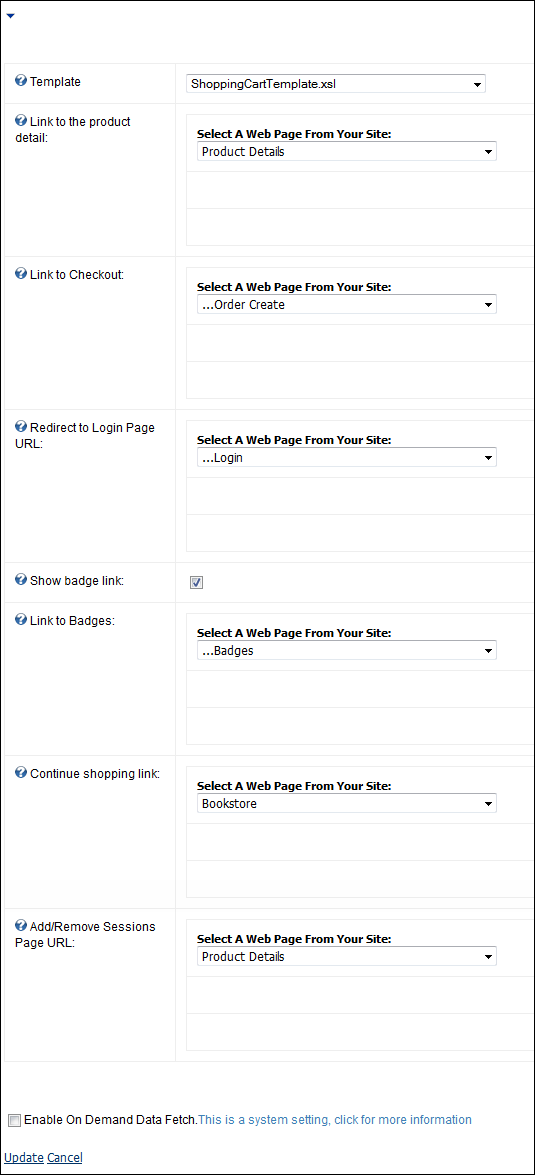
5. Configure the appropriate module settings as described below:
· Template - Drop-down. This setting allows you to choose the way in which you want the module to display.
· Link to the product detail - Drop-down. This setting allows you to determine which page to display if the customer clicks on the product name of the item in the shopping cart
· Link to Checkout - Drop-down. This setting allows you to determine which page to display if the customer clicks the Checkout button.
· Redirect to Login Page URL - Drop-down. This setting allows you to redirect the customer to the login page if the customer is not logged in when trying to checkout from the shopping cart.
· Show badge link - Checkbox. When checked, the Show Badge link displays to the customer.
· Link to Badges - Drop-down. This setting allows you to determine which page to display if any badges are available for a particular product.
· Continue shopping link - Drop-down. This setting allows you to determine the page to which the customer is directed to upon clicking Continue Shopping.
· Add/Remove Sessions Page URL - Drop-down. This setting allows you to determine which page the customer is directed to upon clicking Add/Remove Sessions. This is primarily used for Meeting products where a customer may want to add or change different breakout sessions of the meeting.
6. Click Update.
Once you set the desired settings, customers will see the following windows when viewing the Shopping Cart module:
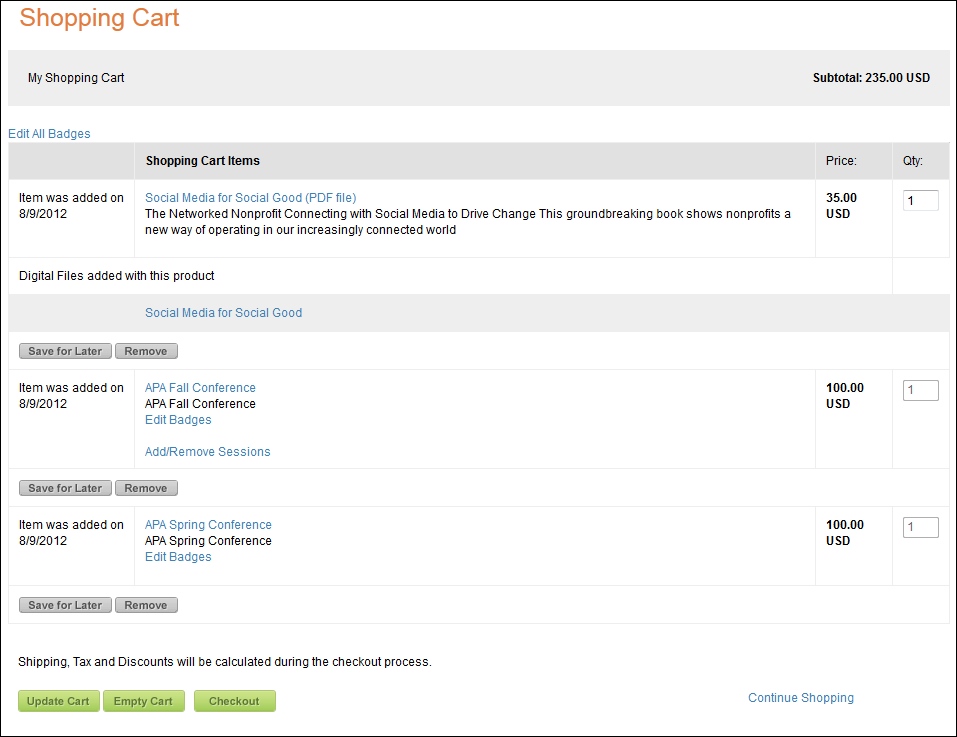
In this example the customer has purchased two meeting products.
The Add/Remove Sessions links allow the customer to add breakout session products to the associated meeting product. The customer can purchase additional breakout sessions at anytime after purchasing the initial meeting product.
If the customer has already purchased one session, but he/she is allowed to purchase more than one of the same session, he/she can do so from this screen by editing the number in the entry field next to the associated session before clicking Update the Cart.
The customer can also view any components that are automatically given to the customer upon purchase of a product. By clicking the “+” sign next to the “The following items are included as a part of the product.” label, the customer can see any component products. Clicking on any of the component products takes the customer to that product’s Product Detail page.
 If a product that has components is added to the Wish List, that product’s components can also be viewed in the same manner.
Your portal alias table needs to hold all the combinations of aliases for your site. For more information, please see Working with Portals.