
The following page displays:
The Product Management web module allows you to set the look and feel of your products on your webpage. Using this web module you can set a picture and add the long and sort text for the product. The information you include in this web module is only visible if you are logged in as a host.
To configure the Product Management web module:
1. Log into your site as Host.
2. Navigate to the appropriate page on your site where you want to add the Product Management web module.
3. Add the Personify – Product Management module to where you want it to be located on your page. See Adding a Web Module to the Webpage for more information.
4. From the
pencil icon, select Edit, as highlighted below.
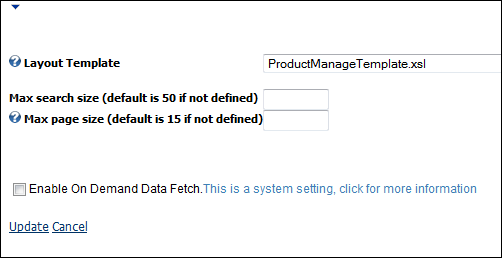
The following page displays:
5. Configure the appropriate module settings as described below:
· Layout Template - Drop-down. Select the temple you want to apply to the layout.
· Max search size (default is 50 if not defined) - Free text field. This is the maximum amount of records to be returned before the system creates an error.
· Max page size (default is 15 if not defined) - Free text field. This is the maximum amount of products that will display on the screen after a query.
6. Click
Update.
The Product Management module displays with query fields as shown below.
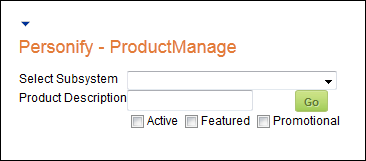
7. Click the drop-down to select a subsystem.
8. Click
Go.
The applicable products display as shown below.
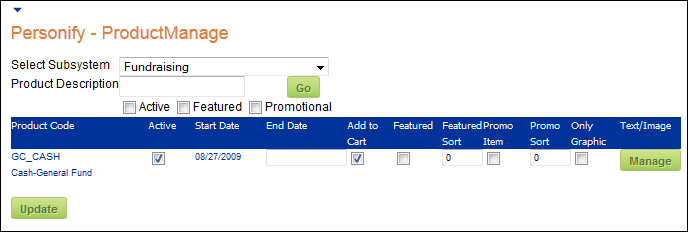
9. From the table view you can modify the following fields if necessary:
· Active – Checkbox. Displays whether or not this is an active product.
· End Date – Text field. Displays the date this product will no longer be for sale.
· Add to Cart – Checkbox. Displays whether this product can be purchased
· Featured – Checkbox. Displays whether this is a “featured” product.
· Featured Sort – Text field. When multiple featured products occur, displays the order in which this product will display.
· Promo Item – Checkbox. Displays whether this is a promotional item.
· Promo Sort – Text field. When multiple promotional items occur, displays the order in which this product will display.
· Only Graphic – Checkbox. Displays whether only the graphic of this product will display.
10. To manage
the text and graphics that related to a product, click Manage.
The following screen appears:
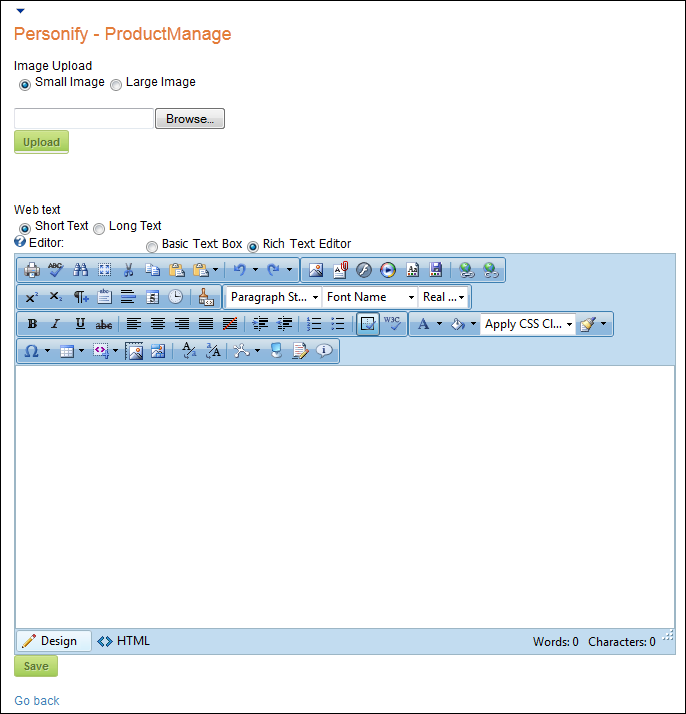
11. Edit the applicable settings as described below:
· Small Image - Radio button. Select this option, then click the Browse button to search for a small image to associate with the product.
· Large Image - Radio button. Select this option, then click the Browse button to search for a large image to associate with the product.
· Short Text - Radio button. Select this option, then write a short description in the text box.
· Long Text - Radio button. Select this option, then write a long description in the text box.
· Basic Text Box - Radio button. Select this option to change from the rich text box option to a simple text box.
· Rich Text Box - Radio button. Select this option to change from the basic text box to a text box that allows you to format and change the font of your description.
12. Click Save.