
The following page displays:

The My Meeting web module displays a list of meetings that the logged in user has purchased. It also displays links that allow you to view the agenda and order summary for the meeting(s). This web module can be used on a profile’s page to display a meeting.
To configure the My Meetings web module:
1. Log into your site as Host.
2. Navigate to the appropriate page on your site where you want to add the My Meetings web module.
3. Add the Personify – My Meetings module to where you want it to be located on your page. See Adding a Web Module to the Webpage for more information.
4. From the
pencil icon, select Edit, as highlighted below.
The following page displays:
5. Configure the appropriate module settings as described below:
· Select template to use - Drop-down. This setting lets you determine which template is applied to your web module. The default selection is MyMeetingsTemplate.xsl.
· Display All Meetings - Checkbox. When checked, all meetings for which the user is registered display.
· View Order Page - Drop-down. This setting lets you determine which page to display for the View Order Page link. Select Order Summary under Shopping Cart.
· View Agenda Page - Drop-down. This setting lets you determine which page to display for the View Agenda Page link. Select My Meeting Agenda under My Personify.
· View All Page - Drop-down. This setting lets you determine which page to display for the View All Page link. Select Meeting under Online Store.
· Meeting Detail Page - Drop-down. This setting lets you determine which page to display for the Meeting Detail Page link. Select Product Detail.
6. Click Update.
After setting up the My Meetings module, it may appear, as below, to
your customer.
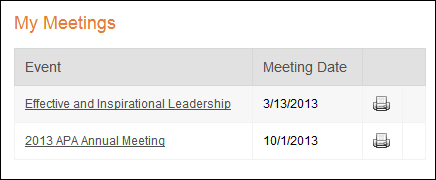
The customer’s purchased meeting products display. The customer has a number of options:
· Clicking
on the meeting product name opens the Product Detail page for the meeting
product.
From the Product Detail page, the customer can then either add/delete the
desired sessions for the meeting or add another registration (for a guest,
for example) and update his/her Shopping Cart.
· Clicking the magnifying glass icon (not shown) opens the Order Summary page for the meeting product.
· Clicking the calendar icon (not shown) opens the My Meeting Agenda page for the meeting product.
· Clicking the printer icon prints a summary of the meeting.
· Clicking the “+” icon opens the Product Detail page allowing the customer to add breakout sessions to the meeting product.
 The
“+” icon will NOT be displayed if there are no sessions defined for the
meeting product.
The
“+” icon will NOT be displayed if there are no sessions defined for the
meeting product.
As mentioned earlier, from the Product Detail page, the customer can then either add/delete the desired sessions for the meeting or add another registration (for a guest, for example) and update his/her Shopping Cart.