 The
Calendar Web Module uses Telerik controls.
The
Calendar Web Module uses Telerik controls.The calendar web module works with the Meetings subsystem and allows your customers the ability to visualize your organization's meeting schedules via the web. Meeting products set up with the Web Display begin date less than today and the Web Display end date greater than today or blank in the back office display in the drop-down above the calendar. Your customers can then click the meeting product to be taken to the product detail page where the customer can then purchase that meeting or session product. For more information on setting up your meeting products to display on the calendar web module, please see Defining Meeting Product e-Business Control.
The
Calendar Web Module uses Telerik controls.
Once you have installed and set up your web module so that it is displayed in your site, you must configure it to work with your website.
To configure the Calendar web module:
1. Log into your site as Host.
2. Navigate to the blank page you created.
3. Add the Personify – Calendar module to where you want it to be located on your page. See Adding a Web Module to the Webpage for more information.
4. From the
pencil icon, select Edit, as highlighted below.

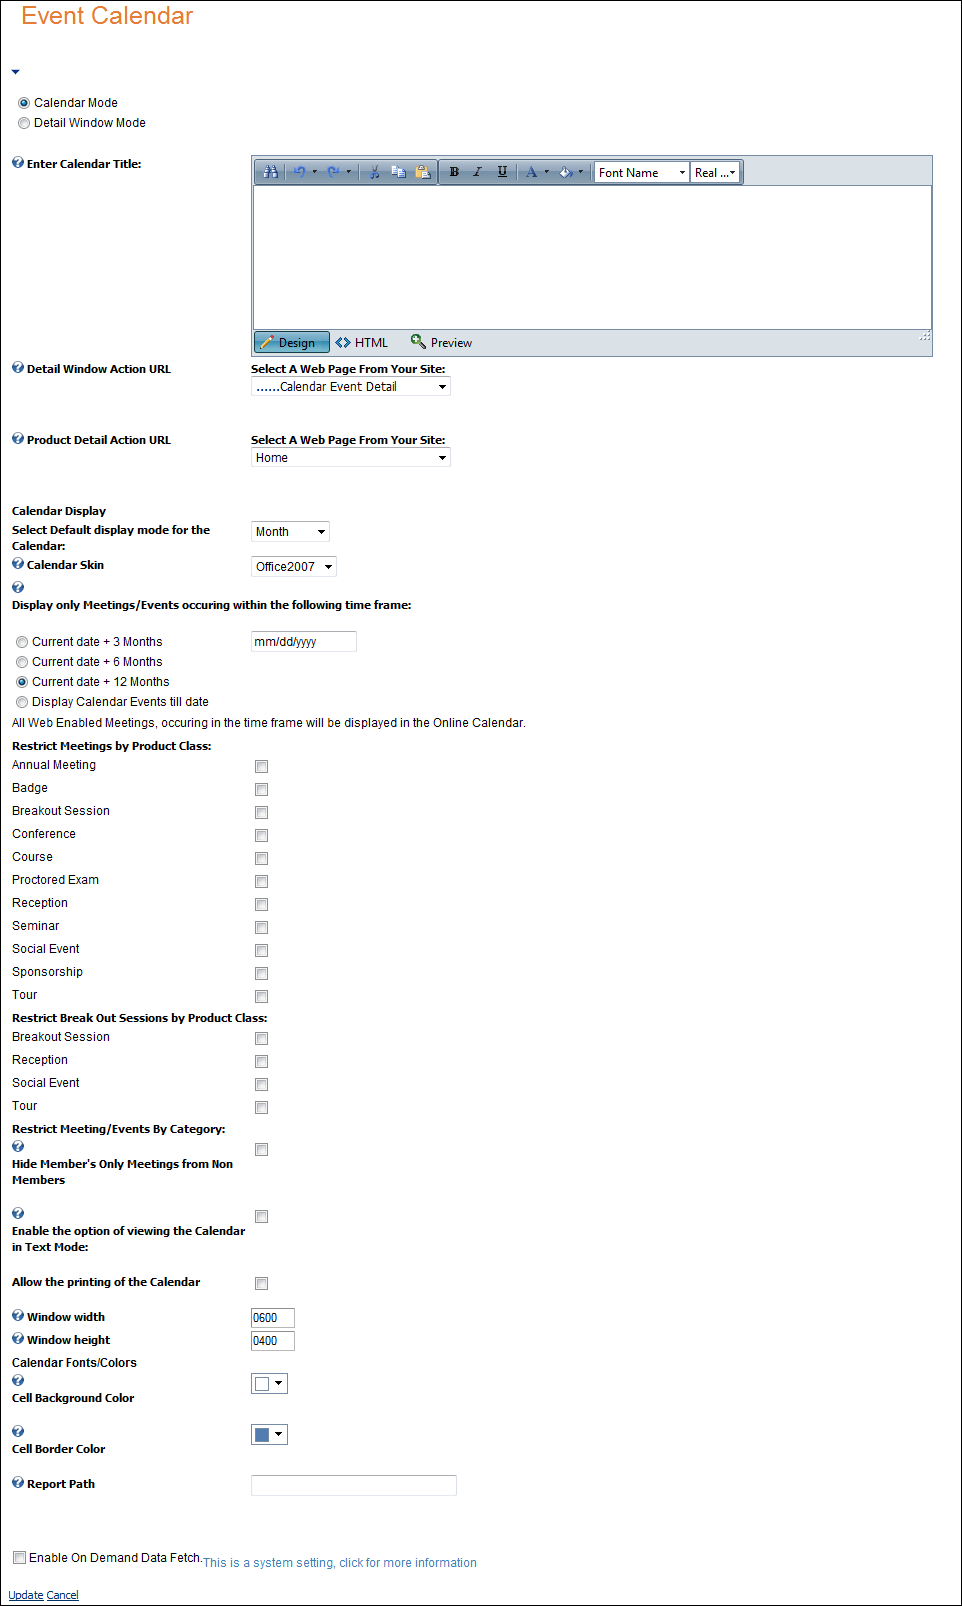
The following page displays:
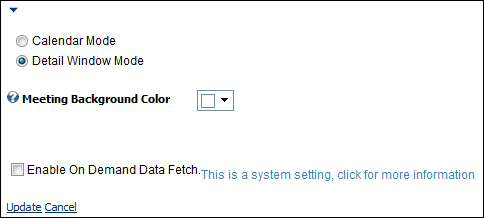
5. Select
the Detail Window Mode radio button, as highlighted
below.
6. Set the background color in which you want to display the meeting’s detailed information.
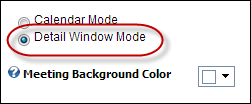
7. Select
the Calendar Mode radio button, as shown below.
Select the
page you set up in steps 1-3 as the Detail Window Action URL.
8. Configure
the appropriate module settings as described below:
Parameter
· Calendar Mode - Radio button. When selected, allows your customers to view your meeting product on the calendar.
· Detail Window Mode - Radio button. When setting up your calendar you must put one calendar on a page in “Calendar Mode” and create another blank page to add the calendar in “Detail Window Mode”. When a meeting is clicked upon by the customer, the customer is then taken to the detail calendar which provides more information about the meeting product.
· Enter Calendar Title - HTML input box. Allows you to enter a title for the calendar that is unique to your organization.
· Detail Window Action URL - Drop-down. This setting determines which page the customer is sent to upon clicking the meeting product within the calendar. When the customer double-clicks the meeting product, a modal window opens to the page determined here. Set this to the "Calendar Detail" page. This opens the modal window, giving the customer a brief description of the product and the times the meeting occurs. There are also options for adding the meeting to your cart or wish list.
· Product Detail Action URL - Drop-down. From the modal screen, this is where the customer is sent upon clicking on the meeting product name.
Calendar Display
· Select Default Display Mode for the Calendar - Drop-down. This option allows you to select how the calendar will display to your customers when it loads onto the page. Available options are Day, Week, Month, TimeLine. Customers have the ability to override the default mode.
· Calendar Skin - Drop-down. Allows you to change the look and feel of the calendar.
· Displays only Meetings/Events occurring with in the following time frame - Radio buttons. Allows you to select a time frame within which valid meetings and/or events will display to the customer. Selecting a limited time period can help with performance issues.
· Restrict Meetings by Product Class - Checkboxes. Allows you to check whether you want to restrict Meeting Products or Annual Meeting products from displays on the calendar.
· Hide Members Only Meetings from Non Members - Checkbox. Allows you to hide from non-members meetings that only member customers can purchase/attend.
· Enable the option of viewing the Calendar in Text Mode - Checkbox. This allows your customers to view a text only version of the calendar.
· Allows the Printing of the Calendar - Checkbox. Allows your customers to print a copy of the calendar.
· Window Width - Text box. Sets the pixel width of the modal window that opens when a customer clicks upon a meeting product within the calendar. The page to which the modal window opens is set in the Detail Window Action URL drop-down.
· Window Height - Text box. Sets the pixel height of the modal window that opens when a customer clicks upon a meeting product within the calendar. The page to which the modal window opens is set in the Detail Window Action URL drop-down.
Calendar Fonts/Colors
· Cell Background Color - Drop-down. This allows you to set the background color that displays for meetings occupying space in the calendar.
· Cell Border Color - Drop-down. This allows you to set the color of the cell borders for the entire calendar.
9. Click Update.
After setting up the Calendar web module, your customers will see the
module as displayed below.
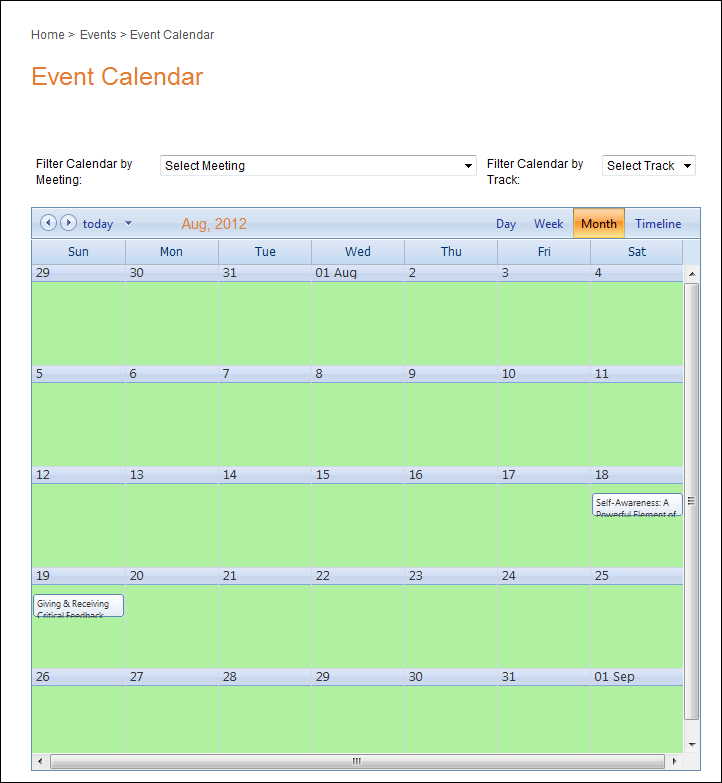
When the customer double-clicks on an event, the following window displays
the event detail, as defined via the "Detail Window Action URL"
parameter:
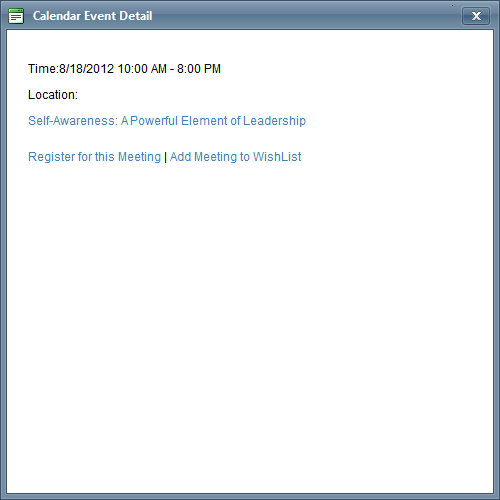
The
Calendar Event Detail pop-up window will not display in Internet Explorer
9.
If the customer clicks the hyperlinked meeting product, they will be taken to the page defined via the "Product Detail Action URL" parameter. If the customer clicks Register for this Meeting, the meeting product will be added to their cart. If the customer clicks Add Meeting to WishList, the meeting product will be added to their cart under "Saved for Later".