
The following page displays:
The Advanced Shipping web module allows e-Business customers to manage advanced shipping needs for their accounts. For example, if you wish to add a different shipping address to an order.
The Advanced Shipping Web Module has three options available that allow you to dictate how the web module behaves and appears.
To configure the Advanced Shipping web module:
1. Log into your site as Host.
2. Navigate to the appropriate page on your site where you want to add the Advanced Shipping web module.
3. Add the Personify – Advanced Shipping module to where you want it to be located on your page. See Adding a Web Module to the Webpage for more information.
4. From the pencil icon,
select Edit, as highlighted below.
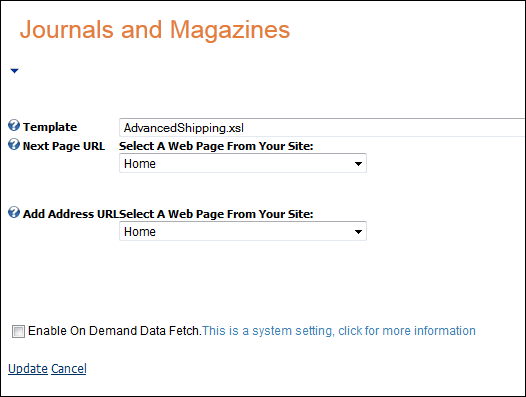
The following page displays:
5. Configure the appropriate module settings as described below:
· Template – Drop-down. Drop-down. This setting allows you to apply the default, or any customized template to the Advanced Shipping web module’s appearance. The default template is AdvancedShipping.xsl.
· Next Page URL – Drop-down. This setting determines where the customer is redirected when the Next Page button is clicked.
· Add Address URL – Drop-down. This setting determines where the customer is redirected when the Add Address button is clicked.
6. Click Update.
Depending on the parameters you selected when setting up the Advanced
Shipping module, your customers will see the module similar to the one
displayed below.
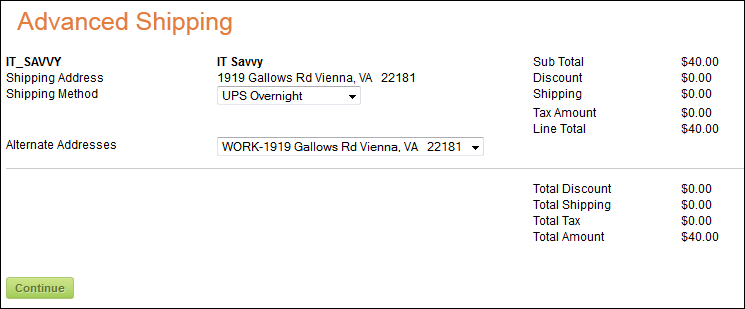
In the example above, the customer has the option of choosing by which shipping method they would like their purchased product shipped. The customer can also choose which address, if they have multiple, they would like the product shipped to.
Clicking Continue takes the customer to the Order Payment web module.