
The following page displays:
Beginning with the 7.0.6 release, the Customer Demographic Information section, formerly found in the Customer Demographic web module, is now found in the Customer Preferences web module. The Customer Preferences web module gives you the ability to either show or hide certain pieces of a customer’s information. Additionally, you can choose whether or not the customer has permission to edit those pieces of information.
To configure the Customer Preferences web module:
1. Log into your site as Host.
2. Navigate to the appropriate page on your site where you want to add the Customer Preferences web module.
3. Add the Personify-Customer Preferences module to where you want it to be located on your page. See Adding a Web Module to the Webpage for more information.
4. From the
pencil icon, select Edit, as highlighted below.
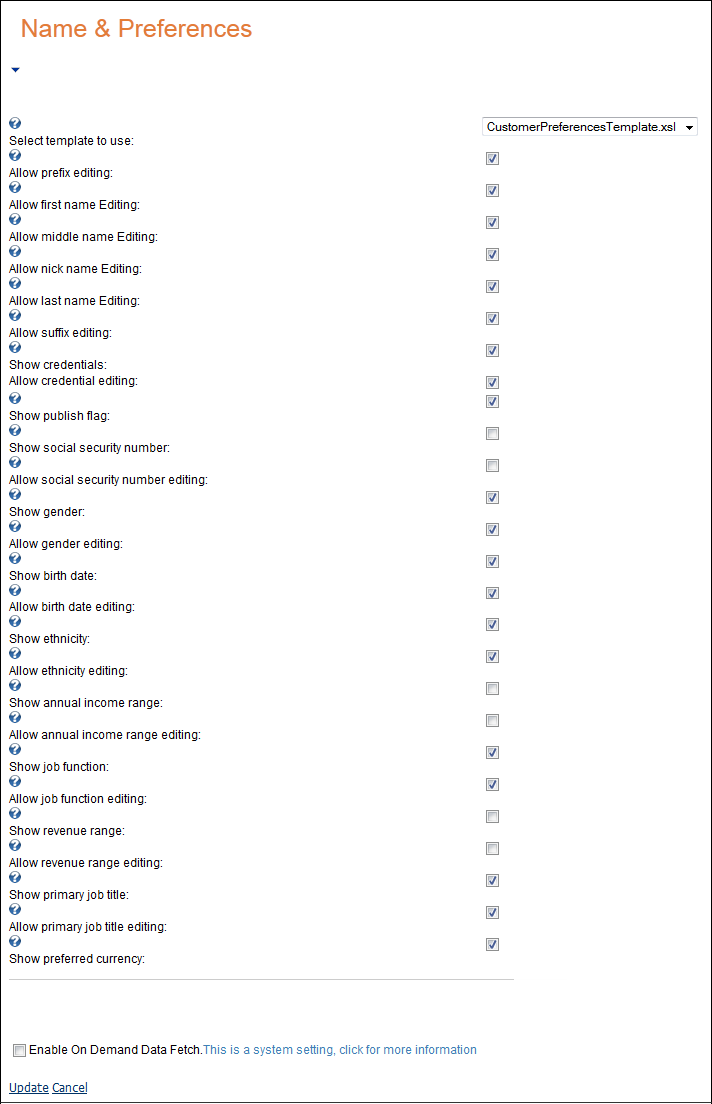
The following page displays:
5. Click the drop-down to select a template to use.
6. Review all the options noted with a checkbox and select the options you want to allow customers to view and/or edit.
7. Click Update.
Depending on the options you checked when setting up the module and your site settings, the module may look like this to your customers:
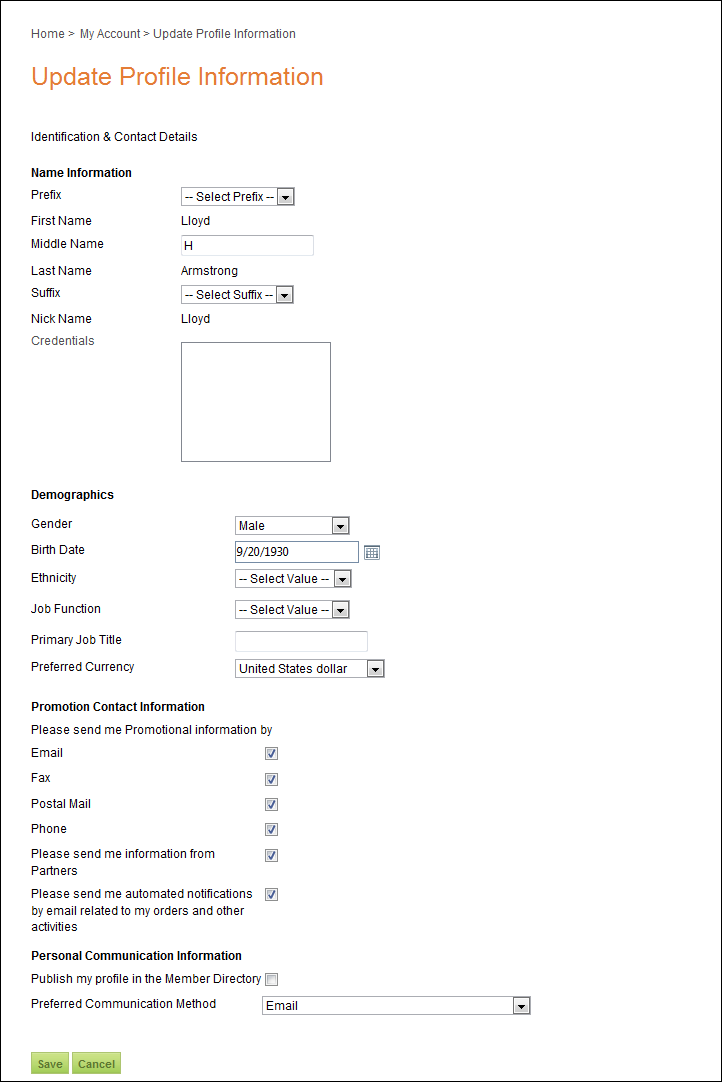
 As
of 7.4.1SP1, if a web user updates his/her Primary Job Title from this
page, the system will ask if the user wants to update the job title on
all work addresses.
As
of 7.4.1SP1, if a web user updates his/her Primary Job Title from this
page, the system will ask if the user wants to update the job title on
all work addresses.