 The Clear Cache screen was delivered in 7.5.0 as part of the System Admin > System Setup menu for the System Administrator persona. However, you must manually add this screen to the desired personas. For more information, see step 3 below.
As of 7.5.0, changes have been made in Personify360 to improve performance and better manage caching in both web and data services. This implementation provides a refresh of cached items internally when data behind the cached objects change, as well as make sure that the cached objects for web controls (items added to the ASP.NET Runtime’s Cache object) and data services are always in sync. You can configure how often you want the cache to be refreshed via the data service config.xml file. Additional configuration entries have been added for the web and data services for this purpose. Additionally, you can monitor specific cached object collections (e.g., Application Code, Countries, etc.).
The new Clear Cache screen allows you to clear both local and web cached data. Before you begin, please perform the following setup.
The Clear Cache screen was delivered in 7.5.0 as part of the System Admin > System Setup menu for the System Administrator persona. However, you must manually add this screen to the desired personas. For more information, see step 3 below.
 Clearing cache on the web for a large site may slow down the performance of your website. Therefore, consider clearing the web cache during non-peak business hours.
To setup the Clear Cache screen:
1. Define the appropriate configuration settings:
a. In the data services Config.xml, add the following new section:
<Section Name="Caching">
<Item Name="FileMonitoringEnabled" Value="[FILE_MONITORING_ENABLED]"/>
<Item Name="MonitoredBaseFolder" Value="[CACHING_MONITORED_BASE_FOLDER]"/>
<Item Name="MonitoredKeys" Value="[CACHING_MONITORED_KEYS]"/>
</Section>
b. Define the following values, highlighted above in yellow:
· FileMonitoringEnabled: The cache's file based dependency will be turned on if the value is set to "True"; other valid value is "False".
· MonitoredBaseFolder: Ensure that the path ends in a path separator. If a UNC path has been used, the path separator is "\", else the path separator is "/".
Example: <Item Name="MonitoredBaseFolder" Value="\\PDAPP\ServerFiles\DSCache\"/>-->
· MonitoredKeys: The cache items that will be invalidated and monitored are controlled by the value of the "MonitoredKeys". The value can be a comma-separated list of table names corresponding to which cache items reside in the Data Services cache. Product Price cache items are controlled by the key PRODUCT_PRICING. "ALL" will control all the items in the cache irrespective of what namespace they belong to. Another example is "APP_CODE", as it is the master table where all app_codes are stored.
Example: <Item Name="MonitoredKeys" Value="ALL,PRODUCT_PRICING"/>-->
2. Define the appropriate Data Services URL:
a. Using the System Administrator persona, from the System Admin toolbar, select Configure and Verify Interfaces.
The Configure and Verify Interfaces screen displays, as shown below.
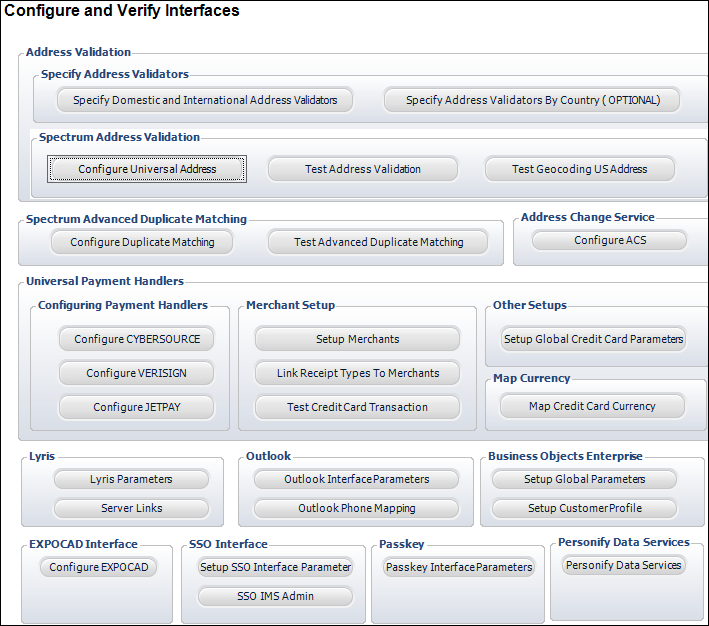
b. Click Personify Data Services.
The following details screen displays:
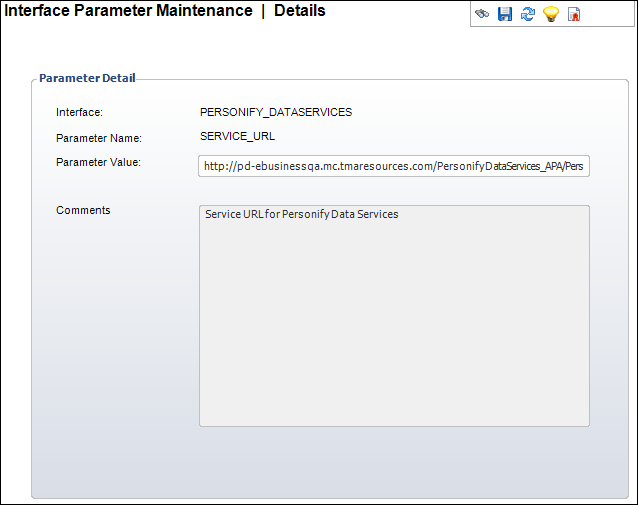
c. In the Parameter Value text box, enter the appropriate data services URL.
d. Click Save.
3. Add the Clear Cache screen to your desired persona menu:
a. Access the Security Central screen.
b. From the Security Central screen, click Maintain Persona Menu Structure.
The Persona Menu Designer search screen displays.
c. Search for and select the persona to which you want to add the Clear Cache screen to the toolbar menu.
The Persona Menu Designer screen displays.
d. Select the Menu Import (Base) tab, as shown below.
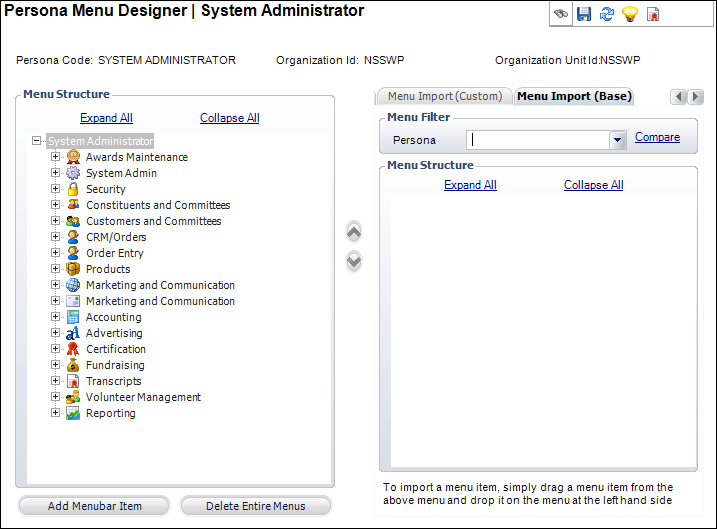
e. From the Persona drop-down, select "System Administrator".
f. From the Menu Structure section, navigate to System Administrator > System Admin > System Setup.
g. Select the "Clear Cache" menu item, as highlighted below.
![]()
h. Drag and drop the Clear Cache menu item to the appropriate location in the Menu Structure on the left where you want this menu item to display in the persona menu structure. Since this menu item is delivered in the base System Admin > System Setup menu for the System Administrator persona, it is recommended that you place the Clear Cache menu in the same location.
i. Click Save.