 You must save the exhibition product in order to enable the Location
link and add locations.
You must save the exhibition product in order to enable the Location
link and add locations.
You must save the exhibition product in order to enable the Location
link and add locations.
To an exhibition locations:
1. From the
Personify360 main toolbar, select Products > Product
Central.
The Product Maintenance search screen displays.
2. Click Search to find a product or click Create New Product.
3. In the
Exhibition Products section on the General
Product Setup screen, click the Location
link.
The Exhibition Locations window displays, as shown below.
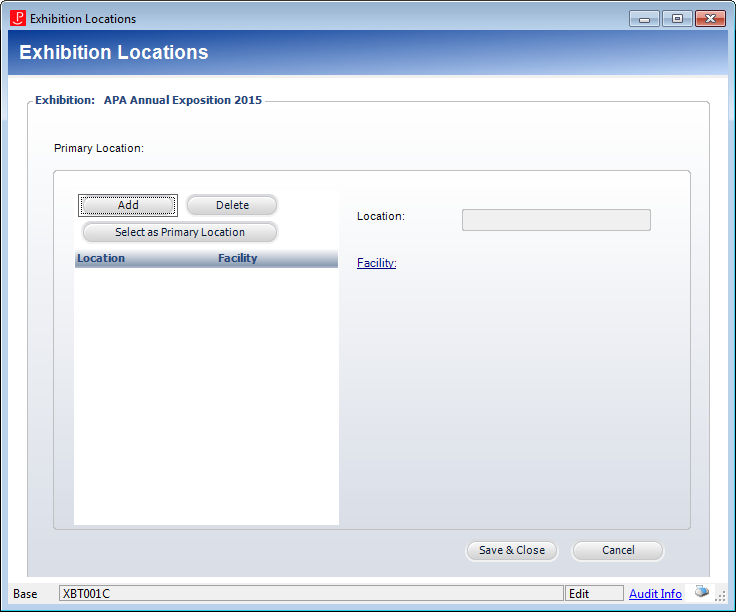
4. Click Add.
5. Click
the Facility link.
The Facility Chooser displays.
6. Search for and select the facility hosting your exhibition.
7. Enter the Location within the facility.
8. After setting up your locations, highlight the primary location within your facility and click Select as Primary Location.
9. Click
Save & Close.
The location you selected as your primary location and its corresponding
facility display in the Exhibition Products section.
Screen Element |
Description |
|---|---|
Add |
Button. When clicked a new row is added to the grid and the Location text box becomes active. |
Delete |
Button. When clicked, the highlighted row from the table and the information entered in the corresponding fields are deleted. |
Select as Primary Location |
Button. When clicked, the highlighted row from the table is designated as the primary location. |
Location |
Text box. The location within the facility. |
Facility |
Link. When clicked, displays the Facility Chooser to search for and select the appropriate facility. |