The Work with Submission Type screen displays.
To accept or decline submissions submitted to a submission type:
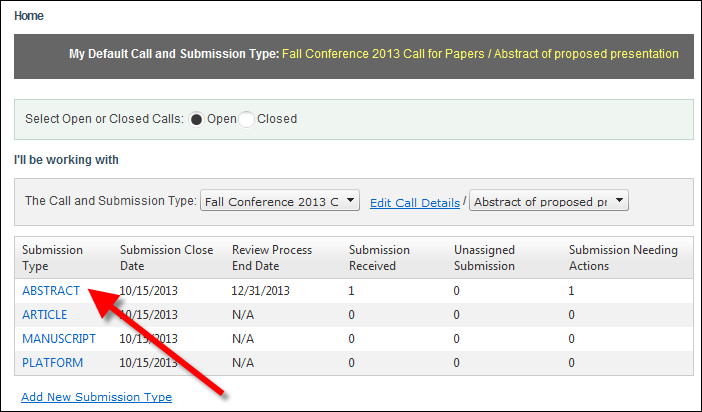
1. From the ABS Home Page, select the appropriate Call and Submission Type from the drop-downs.
2. From the grid, click the Submission Type to which you want to assign reviewers, as shown below.
The Work with Submission Type screen displays.
3. Access the View Submissions tab, as shown below.
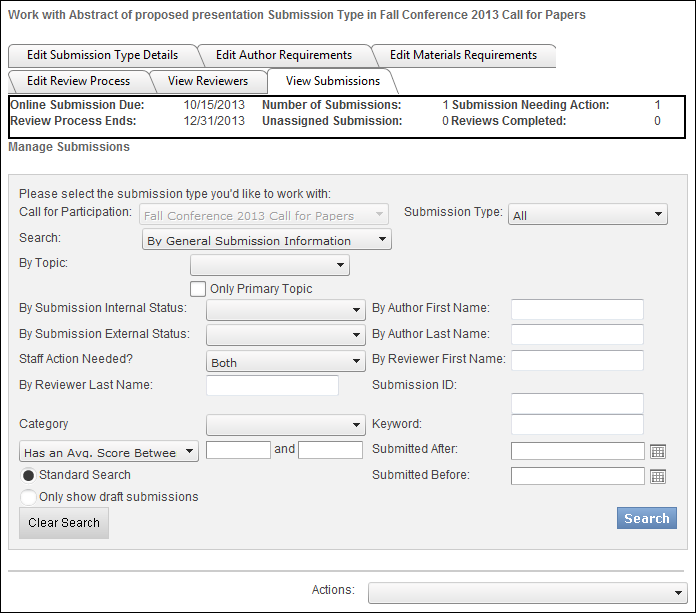
4. Enter the appropriate search criteria and click Search.
See the table below for more information on the available search parameters.
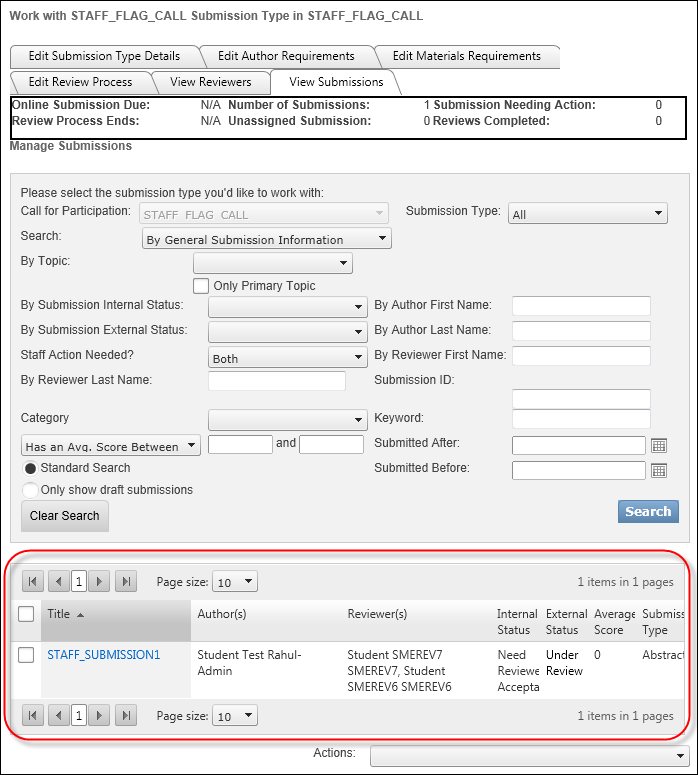
The appropriate search results display below, as highlighted below. See the table below for more information on the search results.
5. Click the Title of the submission to open the Submission Details screen, as shown below.
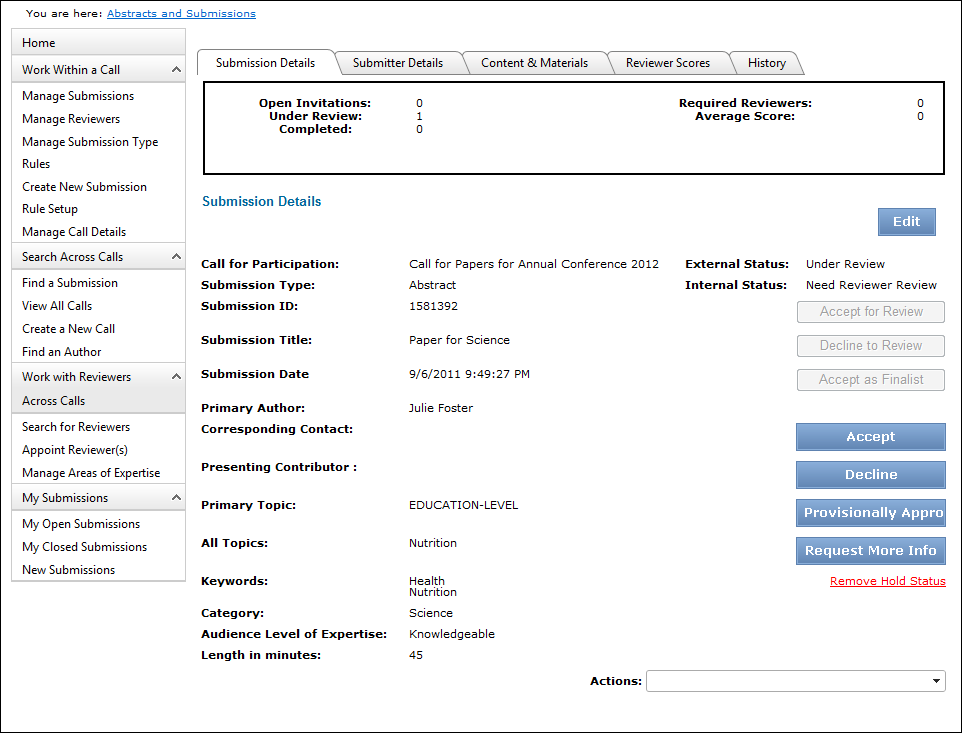
6. From this screen, an administrator can click any of the following buttons, when appropriate:
· Edit: opens the submission for editing. An administrator would only use this for minor changes the submission. If significant changes need to be made to the submission, the submitter should be notified by selecting the "Send Email to Corresponding Contact for Submission" action (see below).
· Accept for Review: if the organization is using a staff review stage, the system updates the submission external status to "Under Review" and the internal status to "Need Reviewer Invite" or "Need Decision".
· Decline for Review: if the organization is using a staff review stage, the system updates the submission external status to "Declined" and the internal status to "Final Decision".
· Accept as Finalist: if the organization is using a finalist stage, the system updates the submission external status to "Finalist" and the internal status to "Need Decision".
· Accept: the system updates the submission external status to "Accepted" and the internal status to "Final Decision".
· Decline: the system updates the submission external status to "Declined" and the internal status to "Final Decision".
· Provisionally Approve: the system updates the submission external status to "Provisionally Approved" and the internal status to "Need Author Revision".
· Request More Info
· Remove Hold Status: this option is available for abstracts that have been returned to authors for additional information. An abstract is considered on hold if it has an external status code of "Needs Revision" or "Provisionally Approved".
7. Additionally, an administrator can use the following Actions:
· Send Email to Reviewer: opens the send email screen with the reviewer assigned to the submission's email address in the To field. If a reviewer has not been assigned to this submission, the system will not do anything and the administrator could select "Assign to Reviewer(s)" (see below).
· Send Email to Corresponding Contact for Submission: opens the send email screen with the corresponding contact for the submission's email address in the To field, which is defined on the Author Details page when the submitter creates the submission.
 The email address that populates in the From field is stored in ABS_Submission_Author.EMAIL_ADDRESS.
· Assign to Reviewer(s): opens the Potential Reviewer List page, as shown below.
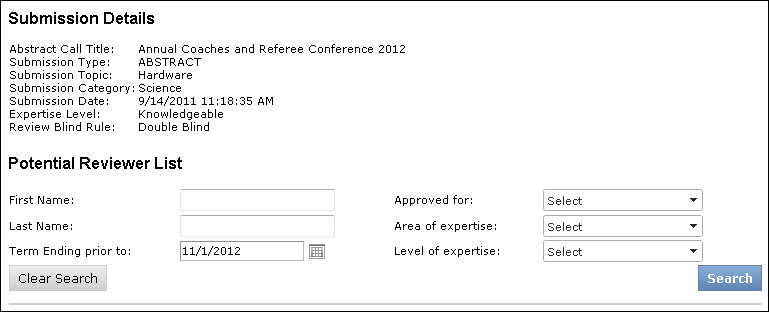
Enter the appropriate search criteria and click Search. The search results display, as shown below.
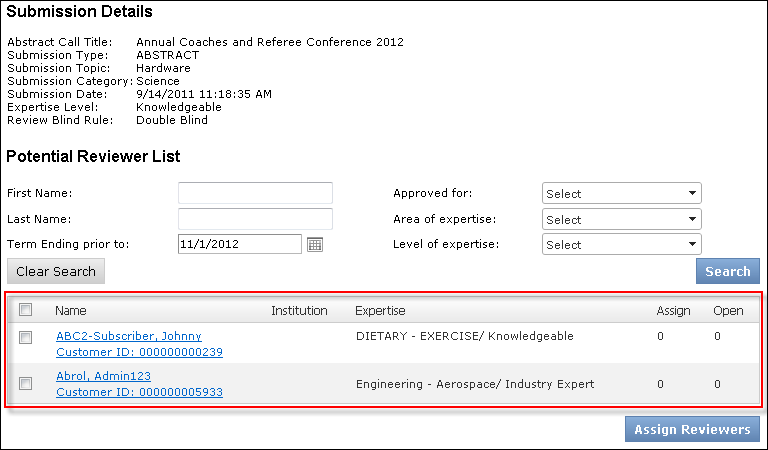
Select the checkbox next to the appropriate reviewer(s) and click Assign Reviewers.
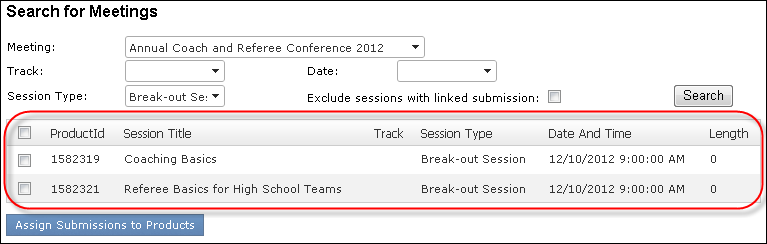
· Assign to Sessions: the submission must be accepted before it can be assigned to a session. When selected, this opens the Search for Meetings page, as shown below.

Enter the appropriate search criteria and click Search. The search results display, as shown below.
 If the call for participation/papers was setup to be linked to a meeting product, that meeting will be selected by default in the Meeting drop-down and cannot be changed. However, if a meeting product was not linked to the call for participation/papers, the administrator can select any available meeting product from the drop-down. Only meeting products that are valid and that have a Product Type code that has been Web Enabled in system types and codes can be selected from this drop-down. Ensure that the "M" and "S" product type codes are web enabled.
8. Select the checkbox next to the appropriate session and click Assign Submissions to Products.
See Also:
· Overview: Working with Submissions
· Viewing Submissions Submitted to a Submission Type
· Viewing Submission Statistics Summary
· Working with Reviewers Assigned to a Call Submission Type