 The product images defined for the package product, not the images defined for the individual products within the package, will display on the product detail and product listing pages in e-Business.
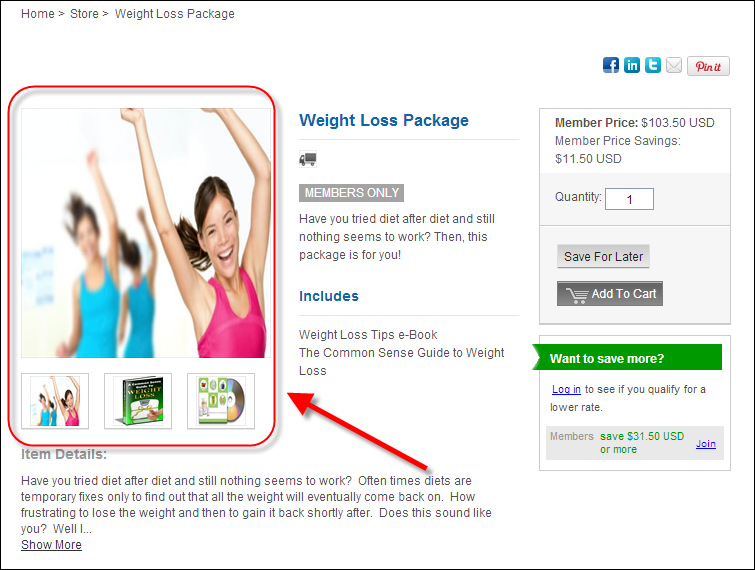
Personify360 supports the upload of multiple images for products for display on your e-Business site. You may want to have multiple images of your product, allowing customers to click on each image to view it in a larger size. This includes a default image and two additional thumbnails, clickable to show alternate images, as shown below.
The product images defined for the package product, not the images defined for the individual products within the package, will display on the product detail and product listing pages in e-Business.
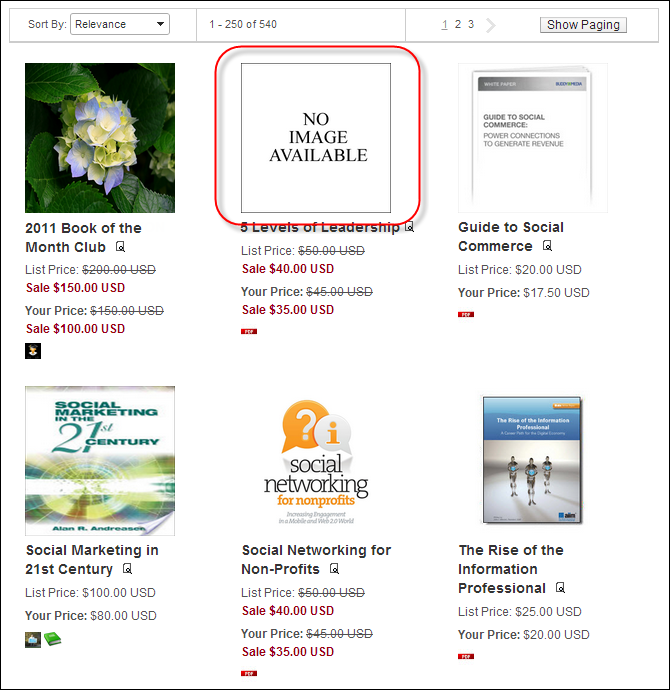
If no image is set up, a “No Image Available” image will display on your site, as shown below.
Images have a big impact on a consumers' decision to learn more and, ultimately, purchase a product. The time spent taking photos of products and loading them into the system will affect how well your organization's ability to sell products and services is. Additionally, you should provide your photos in the highest resolution possible and the system will resize them. By default, the system resizes the large image to 250 x 250 pixels and the thumbnail image to 150 x 150. However, this default can be changed by editing the width and height of the "LARGE" and "SMALL" codes defined for the PROD_IMAGE_SIZE system type. For more information, please see Defining System Types and Codes.
To add product images:
1. From the Personify360 main toolbar, select Products > Product Central.
The Product Maintenance search screen displays.
2. Click Search to find a product or click Create New Product.
3. From the eBusiness Links task category, click Online Store Listing Images.
Please note that this task will not appear until you have set up eBusiness Control for whatever product you are working on. For more information, pleases see Defining a Package to Display on the Web.
The Product Images screen displays, as shown below.
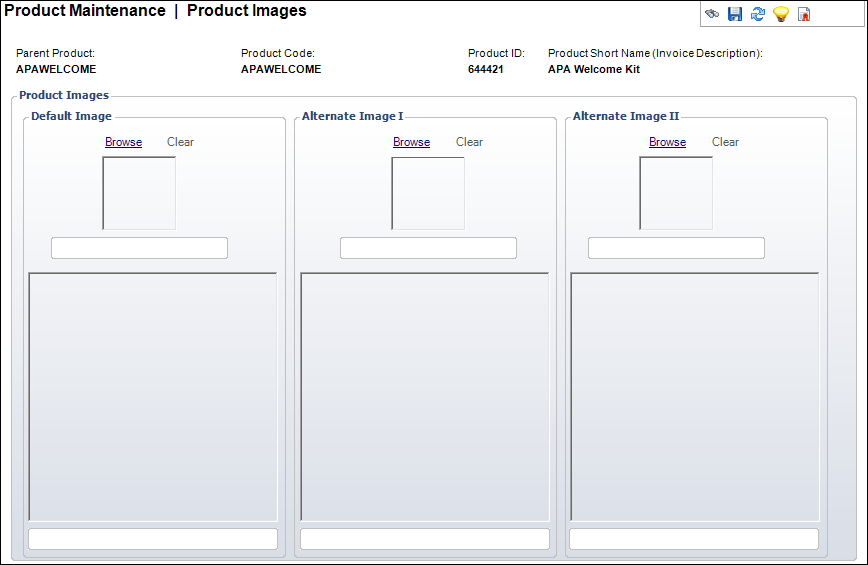
4. From the Default Image section, click Browse to upload an image.
This is the first image a customer will see in the product listing in the online store.
The system supports all image files types, but will convert the image to .png when uploaded.
5. From the Alternate Image I and Alternate Image II section, click Browse to upload the alternate images that will display as two smaller thumbnails that you can click to display as a large image like the default.
The new images will display in the boxes. If you would like to delete an image, click Clear.
6. Once you have finished uploading your images, click Save.
Images will be renamed in this format once they are uploaded: [productID].Def.[image size].png. This is so that the system can logically place the images where they are desired within the system. "Def" might also be "Alt1" or "Alt2" depending on which image you are uploading.
Also in this section:
· Defining a Package to Display on the Web
· Adding a Package Brief Web Description
· Adding a Package Long Web Description
· Defining Package Related Roles
See also:
· Creating an Order for a Package